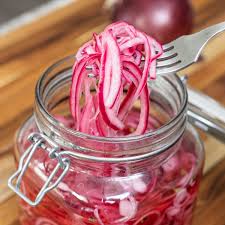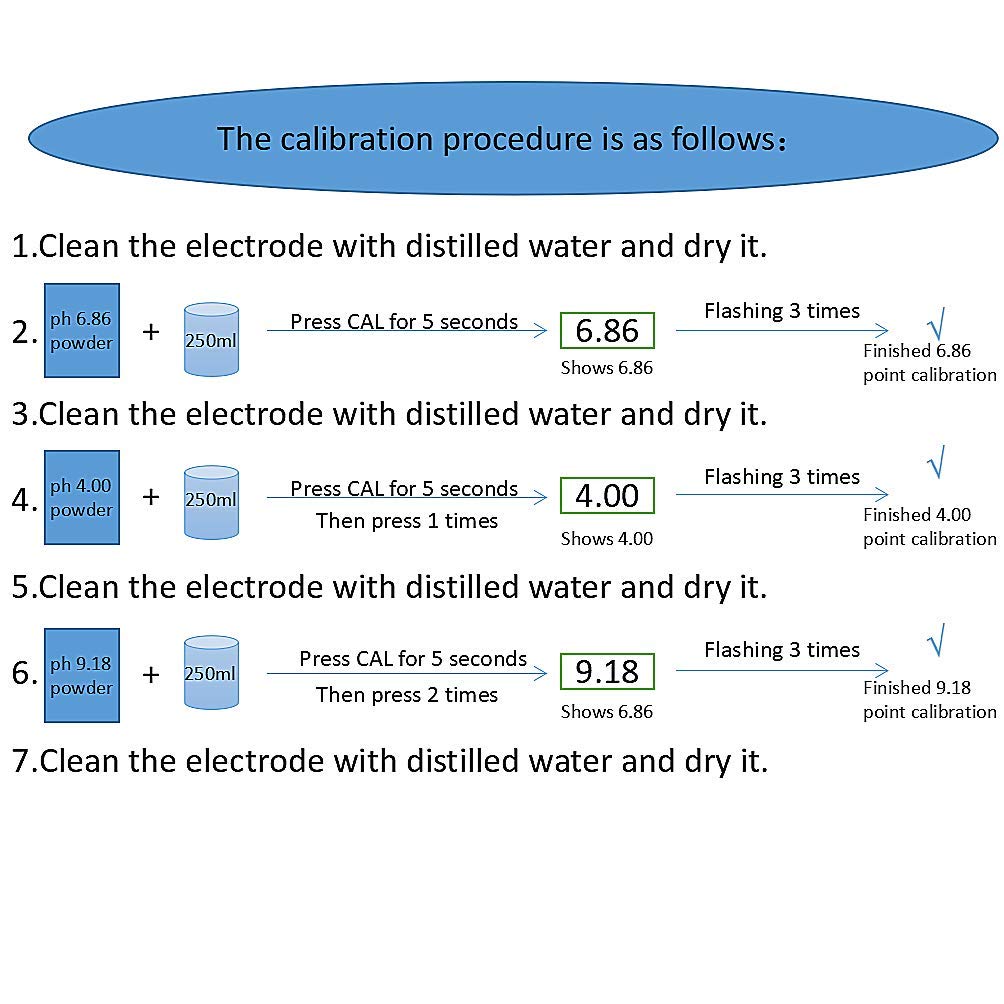
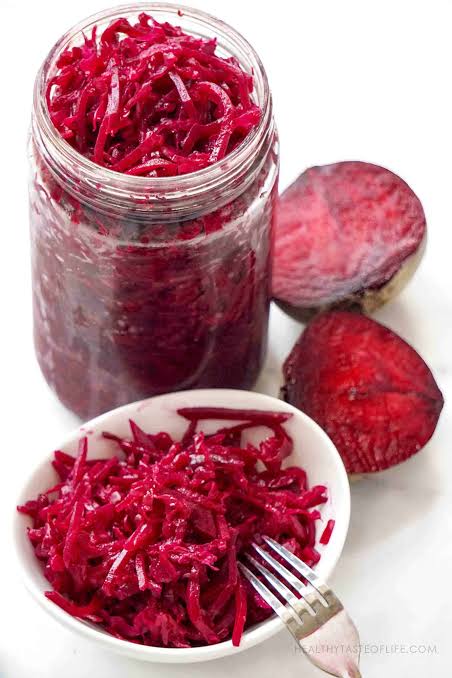
Beet Kraut/sweet and sour
AI easy recipe
Ingredients
- 1 small to medium head of cabbage (about 1.5 lbs, red or green)
- 1-2 medium beets (peeled and grated)
- 1 tbsp fine sea salt or mineral salt (avoid iodized salt, as it can hinder fermentation)
- Optional additions: 1 clove of minced garlic, 1 tsp grated fresh ginger, or 1/2 tsp caraway seeds
Instructions
- Prep the vegetables: Remove the outer leaves of the cabbage and set 1-2 large leaves aside. Finely slice or shred the rest of the cabbage. Grate your peeled beets using a box grater or food processor.
- Combine and salt: Place the shredded cabbage, grated beets, and any optional add-ins into a large mixing bowl. Sprinkle the salt evenly over the mixture.
- Massage the mix: Using clean hands, vigorously massage and squeeze the vegetables for 5 to 10 minutes until they begin to wilt and release their natural juices. The liquid combined with the salt will create the brine.
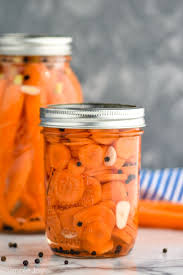
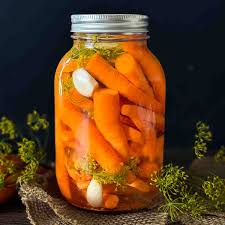
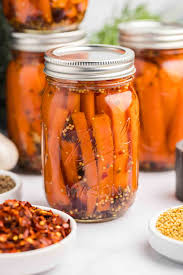
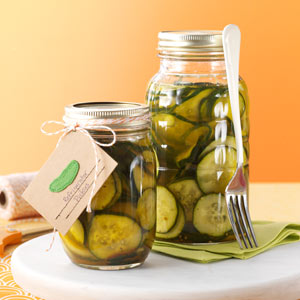
- Pack the jar: Transfer the mixture into a clean 1-quart glass mason jar. Tamp it down tightly with your fist, a muddler, or a wooden spoon as you go to remove air pockets. Pour any remaining brine from the bowl into the jar. [
- Submerge the kraut: The vegetables must stay completely submerged in the brine to prevent mold. Fold one of the reserved whole cabbage leaves and place it on top of the kraut as a barrier. Top this with a glass fermentation weight (or a small, food-safe weight) to keep everything pushed down under the liquid.
- Ferment: Leave at least 2 inches of space at the top of the jar. Cover the jar loosely with a cloth and a rubber band, or use a specialized airlock lid. Store the jar in a cool, dark place (between 65°F and 72°F) away from direct sunlight.
- Wait and taste: Let it ferment for 3 to 7 days, tasting a little bit each day after the 3rd day until it reaches your preferred tanginess.
- Refrigerate: Once it is fermented to your liking, remove the airlock, cap the jar tightly, and store it in the refrigerator to slow down fermentation. It will stay fresh and crunchy for several months.
Ingredients
Units USM
- 3 cups (720 ml) cabbage, finely sliced
- 1 cup (240 ml) grated beet (or substitute with an extra cup of cabbage or grated carrot)
- 1/8-1/4 cup (30-60 ml) sliced onion (optional)
- 1 tsp kosher salt
- 1 tsp caraway seeds (optional)
- 1 clove minced garlic (optional)
Instructions
- Finely slice the cabbage and grate the beets. You need about 4 cups total of vegetables.
- If using, add the sliced onion and minced garlic to the bowl.
- Place the vegetables in a large bowl and sprinkle with 1 tsp of kosher salt.
- Massage the salt into the vegetables for about 5-10 minutes until they start to release their juices.
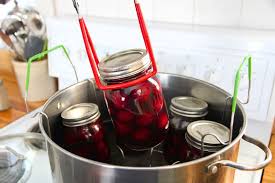
- Pack the mixture tightly into a clean mason jar or fermentation crock, pressing down firmly to ensure the vegetables are submerged in their own juices.
- Cover the jar with a lid or cloth and let it sit at room temperature for 3-7 days, depending on your taste preference. Taste it every few days until it reaches your desired level of tanginess.
- Once fermented to your liking, store the sauerkraut in the refrigerator where it will continue to ferment slowly and develop more flavor.
Mother Earth News Beet Kraut
Ingredients
- 1 medium head (about 2/3 pounds) cabbage, shredded
- 2 medium beets (about 1-1/2 pounds), grated
- 1–1-1/2 tablespoons salt
Directions
Finely slice your cabbage into shreds and place in a bowl. Grate your beets and place them in the same bowl.
Massage in one tablespoon of salt. Taste – it should be like a salty chip, you should taste salt but it shouldn’t be at all briny.
By now your brine will be developing. Continue to massage the veggies. (As if you are kneading bread.) When the veggies are glossy and there is a liquid at the bottom of your bowl you will begin to press them in your jar or crock. Start by putting a little of your kraut in the bottom of your vessel, press until compacted and continue until all of the kraut is pressed in the jar—air bubbles are out and brine is on top.
There are many ways to add pressure to ensure that your kraut stays under the brine once the fermentation starts bubbling. The simplest fermentation method for a small jar batch is to use a zip-style plastic bag. Open the bag and place in the jar on top of the vegetables, wedging it along the top edges. Fill the bag with salt-water brine until all the air spaces are filled. Seal the top of the bag.
The first day or so you will see your beet kraut get a layer of pink foam—think cotton candy. If you are using a plastic bag for the weight, it will ooze up the sides of the bag. This is our friends the LAB, eating the sugars and exhaling the CO2. A few days later, this foam can have a nasty brown muddy color with the remaining bubbles looking almost metallic. It can be alarming. Keep breathing; it is still okay—lift out your bag and rinse the bag with clean water, set aside. If you have plenty of brine, gently ladle this scum off using a clean utensil. If you are a little low on brine your best bet is to use a clean cloth to clean the sides of the jar and then return the bag to the top of the kraut.