
https://www.youtube.com/watch?v=jJVQuec2fTs
Very Good: https://cleanfoodliving.net/how-to-make-apple-cider-vinegar/
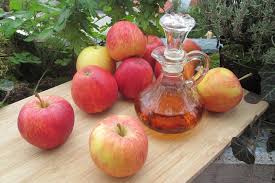
Making your own apple cider vinegar (ACV) at home is a simple, two-stage fermentation process using apple scraps, sugar, and water. The entire process takes approximately 5 to 8 weeks.
Ingredients & Supplies
- Apple scraps: Cores and peels from approximately 6 large, fresh, pesticide-free apples (enough to fill a 1-quart jar about 3/4 full). Avoid using moldy or rotten pieces.
- Water: 2-3 cups of non-chlorinated water (chlorine can interfere with fermentation).
- Sugar: 2-4 tablespoons of granulated cane sugar or honey (this feeds the bacteria and yeast).Per quart.
- Jar: A clean glass jar (quart size is standard).
- Cover: A breathable cover such as a coffee filter, paper towel, or tight-weave cloth, secured with a rubber band or a jar ring (this allows air in while keeping pests out).
- Optional: A splash of raw, unfiltered store-bought ACV with “mother” to help kick-start the process.
Instructions
First Fermentation (Alcoholic)
- Combine apple scraps, dissolved sugar in non-chlorinated water, and optional ACV “mother” in a jar, leaving headspace.
- Cover the jar with a breathable cloth and secure it.
- Store in a dark room-temperature place (65-80°F) for 2-3 weeks, stirring every few days. You should observe bubbling and a slightly alcoholic smell.
Second Fermentation (Acetic Acid)
- Strain the liquid into a clean jar after the initial fermentation, discarding the apple solids.
- Cover the jar with the breathable cloth again. Oxygen is needed for the bacteria to convert alcohol to acetic acid.
- Continue fermenting in a dark place for another 3-6 weeks or longer. A “mother of vinegar” may form.
- Taste periodically with a clean straw. When it has a sharp, tangy taste, it’s ready. (See PH test below)
Storage
Once the desired acidity is reached, remove any “mother,” transfer the ACV to an airtight bottle, and store in a cool, dark place. Refrigeration with a sealed lid can halt the fermentation.
he pH of homemade apple cider vinegar typically ranges from 2 to 3, but can be higher (up to 4.5) depending on the fermentation success. An ideal pH is between 3.0 and 3.5. If the pH is above 4.5, it’s considered unsafe due to a failed fermentation process.
Ideal pH for homemade ACV
- pH 2.0–3.0: This is the ideal range for most homemade apple cider vinegar, indicating a strong fermentation and safe acidity.
- pH 3.0–3.5: This is a very good and safe range, indicating a successful and acidic product.
- pH 4.0–4.5: While some sources say a pH of 4.2 is considered safe, a reading above 4.5 indicates the fermentation may not be complete, and it should not be consumed.
How to measure the pH
- Use a pH test kit: Use pH strips or a digital pH meter for the most accurate reading.
- Test the pH: Take a reading to ensure the vinegar is acidic enough for preservation and is safe to consume.
- Avoid tasting or smelling: Relying on taste or smell is not a precise way to determine the acidity of vinegar.
What to do if pH is too high
- If the pH is above 4.5: The fermentation was not successful and the mixture is not safe to consume. You can try again, making sure to use appropriate starter materials and maintaining the right conditions for fermentation.
- If the pH is in the 3.0 to 4.0 range: You can either consume it cautiously or let it continue to ferment to reach a lower pH level. Adding a little more sugar and letting it continue to ferment may help it reach the desired lower pH.