Pork Chile Stew

Ingredients:

1 ½ pounds pork tenderloin, cut into 2 inch strips
1 small onion, coarsely chopped
1 small red bell pepper, coarsely chopped
1-3 (15 ounce) cans black beans
1 (16 ounce) jar salsa
½-1 cup chicken broth
1 teaspoon dried oregano
1 teaspoon ground cumin
2 teaspoons chili powder

Directions

Combine pork tenderloin, onion, red pepper, black beans, salsa, chicken broth, oregano, cumin, and chili powder in a slow cooker. Set to Low and cook for 8 to 10 hours.

Break up pieces of cooked pork to thicken the chili before serving.

Tomato Hornworm in Hydroponics

Tomato hornworm caterpillars can be a problem in hydroponic systems, especially in greenhouses. These caterpillars can quickly defoliate tomato plants and eat flowers and fruit. Here are some ways to control tomato hornworms:

Hand-pick: Pick off caterpillars by hand and drop them into soapy water. Wear gloves if you don’t want to touch them. 

  • Use pesticides: Apply a low-risk pesticide like: Bacillus thuringiensis (Bt): A naturally occurring bacterium that’s effective on young caterpillars. 

    Spinosad: A soil-dwelling microorganism that affects the nervous system of caterpillars. 

    Insecticidal soap: Most effective on small caterpillars, but it doesn’t last long and needs to be repeated. 

  • Grow companion plants: Some plants can help deter hornworms.
    Marigolds: Their strong scent can repel hornworms and other pests. For maximum protection, intersperse marigolds among your tomatoes.
  • Basil: :The scent of basil repels tomato hornworms and asparagus beetles. To make it more effective, you can gently touch the leaves to release their oils.
  • Borage: Repels tomato hornworms and imported cabbageworm. Borage also attracts pollinators and beneficial insects, such as bumblebees.
  • Nasturtiums: Repel tomato hornworms, Japanese beetles, and whiteflies. They also help with weed suppression and retaining soil moisture.
  • Garlic: Deters many insect pests, including tomato hornworms, cabbage moths, flea beetles, carrot rust fly, aphids, and ants.
  •  

    Chives : Repel many common garden pests, including cabbage worms, aphids, carrot flies, and apple scab.

Tomato hornworms are the larvae of moths. The tomato hornworm moth is called the five-spotted hawkmoth. These moths lay eggs and die after a week or two. 
Published
Categorized as Garden

Tower 2

pH Range: 5.0-5.5 is best
Lights: 14 – 16 hrs. a day
Water setting to 15 minutes on and 45 minutes off.

Plants that like this PH

Basil
Chamomile
Collard Greens
Daisy
Dandelion
Dill
Kale
Lemon Balm
Marigold
Mint
Parsley
Rosemary
Strawberries
Sunflower
Thyme
Tomato
Zucchini

Published
Categorized as Garden

pH Levels for Hydroponic Plants

Full Chart:
https://igworks.com/blogs/growing-guides/nutrient-and-ph-chart-for-growing-hydroponic-fruits-and-vegetables?srsltid=AfmBOor_RXT-WKGGj7P25jQGXOZ-PKGrpEQ60MWKu2VKHq5IT_LTPNzG

Measurement Definitions & Full Chart
There are 5 “measurement terms” that you’ll likely encounter when researching how to grow your plants — pH, TDS, EC, cF, and PPM. Here’s what each one means:

Hydroponic Charts for Fruits and Vegetables: pH, TDS, EC, cF, PPM

Nutrient solutions used for soilless culture should have a pH between 5 to 6 (usually 5.5), so the pH in the root environment is maintained between 6 to 6.5. This is the pH range at which nutrients are most readily available to plants.

In general, the ideal pH range for hydroponic crops is 5.5–6.0. However, different plants have different pH preferences, so it’s important to research the preferred pH range for the plants you’re growing.

pH measures how acidic or basic a solution is, with 7 being neutral. The pH of the nutrient solution affects how available nutrients are to the plants. If the pH is too low, it can prevent plants from accessing vital minerals. If the pH is too high, it can also prevent plants from accessing nutrients and can clog the hydroponic system.

To ensure your plants are getting the nutrients they need, it’s important to measure the pH regularly and maintain it within the optimal range. You can also use separate nutrient reservoirs for plants with similar pH ranges.

Published
Categorized as Garden

How to Grow Strawberries

Tower Growing

Day-Neutral Strawberry Plants for The Longest Strawberry Season! This is important for getting your strawberries to flower and produce fruit. If you stick them in the same system as lettuce, the lettuce may become bitter.

Pinch off blooms if you don’t have at least 6 true leaves so strawberries grow large.

Remove runners. So all nutrients go to fruit not new propagation. You can propagate these in water for new plants.

Ready to eat in about 80 days if starting with bare roots.

Strawberries:

Sunlight: Strawberries need at least 8 hours of direct sunlight per day. If using grow lights, you may need to keep them on for at least 14 – 16 hours.

pH: Keep the pH of your Tower Garden between 5.5 and 6.5.

Ventilation: Keep your Tower Garden in a well-ventilated area to avoid fungus. You can use an HVAC system or fans to circulate air.

Watering: Set an automatic timer for the pump to run for 15 minutes on and 45 minutes off. Strawberry roots don’t like to be too wet.

Planting: Soak the roots of bare-root strawberry plants for an hour before planting. Trim away any dead roots, but be careful because they might just be dormant. You can also protect the plant with a rock wool cube wrapped around the crown or just below it. Cut a hole in the bottom of the net pot so the roots can come through easily.

Strawberries from Bare Root

How to Grow Strawberries from Seeds

Strawberry seed is tiny. The small seed requires special care at planting time. Get a good start and build a productive berry patch by following these 5 steps for growing strawberries from seed.

  1. Start Seeds Indoors

Alpine strawberries will produce fruit the first summer after planting if the seeds are started indoors about 8 weeks before the last frost. Sow the tiny seeds in a seed-starting flat or shallow container filled with fine seed starting mix. Sprinkle the seeds on top of the starting mix. Barely cover the seeds with soil; they need light to germinate. Mist the soil daily to keep it moist but not wet. Be careful not to water too intensely; too much water will disturb the seeds, pushing them down into the soil where they will not be able to germinate.

Provide a strong light source above the seeded flat. A grow light or a shop light positioned about 6 inches above the flat will help seeds germinate. Maintain a moderate air temperature around the flat. Strawberry seeds germinate best at 65 to 70℉. Alpine strawberries can also be seeded directly in the garden after the last frost.

  1. Let Seeds Germinate

Strawberry seeds are slow to germinate. Expect to wait at least 14 days to as long as 45 days for tiny leaves to pop out of the soil. Continue to mist the soil, not allowing it to dry out, and providing plenty of light as you wait. The long germination time adds to the importance of planting seeds at least 8 weeks before the last frost in spring to ensure berries are produced the first year.

  1. Prepare Seedlings to Be Planted

Help berry seedlings transition from consistently warm indoor growing conditions to more unpredictable outdoor weather by making the move slowly. When seedlings have multiple sets of leaves and are at least 3 inches tall, acclimate them to outdoor growing conditions by setting seedlings outside for several hours each day and bringing them inside at night. After seedlings are acclimated to the outdoors for a week or so, they are ready to be planted in the garden.

Published
Categorized as Garden

Cheese – Mozzarella Recipe with Instant Nonfat Dry Milk


This recipe for Mozzarella involves adding cream to Non Fat Dry
Milk Powder. We’ve had great success using “Carnation” brand
milk so if you’re having problems with other brands give this one
a try. We’ve used many other brands along the way that also
work well.
Yield: 2 Pounds

Ingredients

Non Fat Dry Milk Powder for 7 Pints of Milk
1 Pint of Cream
Salt (optional)
1.5 tsp Citric Acid
1/4 rennet tablet or 1/4 tsp Single Strength Liquid Rennet

Instructions

Selecting Powdered Milk and Cream
This recipe for Mozzarella involves adding cream to Non Fat Dry Milk Powder. We’ve
had great luck using “Carnation” brand milk here so if you’re having problems with other
brands give this one a try. We’ve used many other brands along the way that also work
well.
Note: UltraPasteurized cream is fine to use since the calcium and proteins for the
cheese are already in the milk. To make the milk, mix 1 pint of cream with 7 pints of Dry
Milk Powder for one gallon of milk.
Below are is a list of the final fat % in 1 gallon of milk for varying types of cream:
Cream Type (1 Pint) Cream % Fat % for 1 Gal Milk
Double (rich) Cream 48% 6%
Heavy Whipping Cream 36-40% 4.5-5%
Light Whipping Cream 30-36% 3.7-4.5%
Light or Coffee Cream 18-30% 2.2-3.7%
Single Cream 20% 2.5%
Half and Half 10.5% 1.3%
The higher the fat content, the more difficult it is to retain the fat in the final cheese but
the better the flavor. When using a higher fat % the whey will be somewhat milky
looking. You can minimize this by treating the curd very gently at all stages.
Since your mix for this cheese is 7 pints of milk to 1 pint of cream you can either follow
the package mix directions for 1 gallon and drink the 1 pint of Non Fat Milk you remove
to make room for the cream addition or simply multiply the total dry milk powder
needed by .875 (7/8ths of a gallon) to make just the 7 pints. This will leave room for your
pint of cream. The easiest thing for us is to add 2 quarts of cool water with the dry milk
powder in a clean container and stir until the powder dissolves, then add this to an
empty sanitized gallon jug. The 1-pint of cream can now be added and then the jug
topped up to 1 gallon with cool water. Refrigerate this overnight and you have one
gallon of great milk to make your mozzarella.
1 Prepare Ingredients
Collect and sanitize all of your equipment and gather the ingredients.
A 2 gallon pot for the milk, a long knife, a colander, a couple of bowls, measuring cup,
and slotted spoon plus the ingredients and thermometer that came in your 30 minute
mozzarella kit are what should be in front of you now.
Next add 1/4 rennet tablet or measure 1/4 tsp. of liquid rennet into 1/4 cup of cool water
and set aside. Try to cut the tablet as carefully as possible into quarters but it does not
always work out that way. No worries- just do the best you can. You may notice that this
does not dissolve totally but it is OK. Simply add the entire mix when adding rennet.
Then measure out 1.5 tsp. of citric acid into a 1 cup measure of cool water. Make sure
that this is stirred until it all dissolves.
2 Acidify & Heat Milk
Your next step will be to add the citric acid to the milk. This will increase the acid and is
responsible for the final stretch of the mozzarella. It will also assist the rennet in forming
the curd.
Pour the citric acid solution you prepared above into the cold pot and then quickly pour
the milk on top of this. It is very important to stir well as you do this to prevent any
localized coagulation which will appear as curds floating to the surface. There should
be little to no curds forming at this stage.
Next, begin to heat the milk slowly at medium heat to 90-92°F. Stir well enough to keep
the milk from sticking/scorching. We usually turn the burner off a degree or two before
we reach our final temp to keep from overheating. The milk always seems to coast up
that last few degrees.
3 Coagulate with Rennet
At 90-92°F add the 1/4 tsp rennet or 1/4 rennet tablet dissolved in 1/4 cup water and stir
for 20-30 seconds. Then allow the milk to rest at this temp totally still for coagulation.
Initial firming of the milk will take place at about 2-2.5 minutes but allow the milk to firm
a full 7-10 min. before cutting.
4 Cut Curds to Release Whey
Once the curds form cut them into a checkerboard pattern of 3/4 -1 squares (larger for
moister mozzarella). Wait 1-2 min. then very gently (curd is very soft at this point still) cut
horizontal layers with ladle or spoon. Result should be as equal in size as you can
manage.
NOTE: The longer the curd is stirred at this point and the higher the temp (95-105°F),
the drier the final cheese will be because the heat causes more whey to be released.
The curd at this stage will hold a good shape but these are very fragile (see what
happens if you drop one on the floor). Stirring should be very gentle until they have
been cooked for a while.
5 Remove Whey
Once the curd forms well and seems to be releasing whey it is time to separate the
curds from whey. Allowing the curds to settle and consolidate for a minute or two will
initially separate the whey.
Then the excess whey that rises can be poured off while holding the curds back with
your hand. The curds should now be carefully transferred to a bowl with a spoon or
perforated ladle (best). Further whey separation can now be done by pulling the curd
back to the center of the bowl. You will see more whey running off at this point and this
should be removed. Once the curd begins to consolidate well it is time to heat the
curds to develop the stretching character of mozzarella.
6 Heat the Curd
Choose one of the following methods to heat the curds:
A) Our 30 minute system is quicker because we simply use 3 cycles in the microwave to
heat the curds to the point of stretching.
1. The first stage of 60 seconds on High will cause more whey to be released as the
curds heat. The cheese is removed and folded back on itself several times releasing
more whey which is removed.
2. The next step is back into the microwave for 30 seconds on High. This will now
cause the curds to consolidate more and begin to stretch. Folding and removing
whey now have your cheese looking more like mozzarella. At this point the cheese
may simply stretch of its own weight.
3. The final cycle is again 30 seconds and your cheese should now be stretching well.
Following this cycle it may be too hot to handle so using gloves or a pair of sanitized
wooden spoons will help.
B) Traditional hot whey or water for stretching.
This is more in line with the traditional process but takes a bit more time. 2 quarts of
water or whey are heated to 175F. This will be too hot for your hands so use heavy
rubber gloves or a couple of sanitized wooden spoons to manipulate the curds. The
curd you have made is now placed in the water and folded back and forth on itself to
distribute the heat. This may take 3-5 minutes and you should note that the curd is
ready to stretch on its own when it is ready.
Click HERE for a detailed description of this process without using a microwave.
As the curds are heated note the whey that has been released as the curds are heated.
Quickly as in the previous step, press/knead the curds while pouring off the whey. Do
this several times.
NOTE: the more you press the curds during this phase the more whey will be removed
and the drier the cheese will become. This is a matter of personal preference and with
experience you will be making the perfect cheese to your own taste.
7 Stretch the Curd
The Mozzarella should now be ready to stretch. Begin by allowing the cheese to stretch
under its own weight as in the photo to the left. Once your mozzarella begins to stretch
you can now give it the characteristic smooth texture of mozzarella by stretching and
folding the curds like taffy. If the cheese begins to stiffen up and resist the stretch,
reheat it in the microwave or in the hot water.
The more times you do this the smoother it will become. This is also the point where
you add the quantity of salt you like (1/4-1/2 tsp. should be good to start with) to the
cheese as you stretch it. In Italy this is the point where they become creative and shape
little pigs and cows from the fresh cheese.
Here is also where you need to exercise restraint to keep from playing with your food.
Once you are happy with your cheese you can form it into a nice round ball to chill and
store.
8 Chill & Salt
It is now time to cool the cheese to retain its shape. While warm the cheese will simply
slump into a flat disk. Once you have formed the cheese as you wish, it should be
dropped into a pan of ice-cold water. You can also drop it into a cheese form or small
plastic container to hold its shape. An hour or so here should cool it through. Then
move it to the fridge for further cooling. If it sits in the cold water too long the surface of
the cheese will soften too much and salt will be pulled from the cheese.

Cheese – Paneer

Yield 1lb

This is an easy cheese to make, so much so that it is usually
made fresh daily in India. Paneer is the most common cheese
used in south Asian cooking and can appear in several formats,
from crumbly and open textured, to a firm, well consolidated
cheese for cutting. It is a perfect cheese for vegetarians to use in
cooking because it has no rennet used in the production. Paneer
can be diced and pan-fried, then added to veggie dishes. Buffalo milk was most traditionally used for this with its butterfat content of about 6%,
but whole milk in the 3 – 4.5% range is commonly used today and much more readily
available.
A low fat version using skim milk has been produced but has developed a reputation
for being chewy and rubbery.
The milk used should be as fresh as possible; even cold stored milk has enzymes
working at the cold temperatures to break down the proteins and compromise the milks
flavor and ability to form a good cheese.

Ingredients

1 Gallon of Milk (not ultra-pasteurized)
Salt (optional)
1 tsp Citric Acid

Instructions

1 Heat Milk
Begin by heating 1 gallon of fresh milk to 185-194F (85-90C). You can best do this by placing the pot with milk into a sink of very warm water. If you do this in a pot on the
stove make sure you heat the milk slowly and stir it well as it heats.
Once the milk has reached the correct temperature, continue to hold the milk at this
temperature for about 20-30 minutes. This will prepare the milk proteins to respond
well to the acid addition in the next step.

2 Add Citric Acid
Spoon or ladle to Stir Curds
Add 1tsp of citric acid to 16oz of 170F water. This is a very diluted acid of about 2%. This
will be about the same temperature that we will be cooling the milk to.
Before adding the diluted citric acid, allow the milk to cool to 170F. This is a more
protein friendly temperature and allows the acid to easily mix into the milk before the
proteins begin to coagulate. The result will be a more even curd development.

Once cooled to 170F, slowly add the diluted citric acid to the milk while gently stirring.
This will begin separating the milk solids from liquid. Continue the slow stir until you see
a separation of white curd and a yellow green whey, milk with a high fat content may have a cloudy whey.

When you see a nice separation stop stirring. The pot can now sit quiet for 20 minutes.

While waiting, line a sterilized colander with butter muslin in preparation for draining
the curds.
Note: You can place the colander inside a large bowl to collect the whey for other uses, even if it’s just for the garden or compost pile.

3 Drain Curds

The curds can now be transferred to the colander lined with butter muslin. Begin by
ladling the whey from the surface into the lined colander. Once the whey has been
partially removed, the remaining curd can be poured into the drain cloth.
The curd should be allowed to drain for 30 minutes, a gentle stir half way through will
help the to whey drain.

4 Press Curds

Once the curd has drained for 30 minutes, the cloth can be pulled up and tied into a
ball. Make sure the cloth is pulled tightly around the curd mass. Then place a plate or lid
over the curd. Place about 1-2 gallons of warm water into a pot and set it on top of the
plate, this is a quick and easy “cheese press.” Press the curd for 10 to 15 minutes. The amount of weight and time for pressing will depend on how dry and compact you want your final Paneer to be.
If you saved the whey, it contains a lot of flavor and nutrients and is great to use in
stocks and soups, some folks have found it to be very tasty when cooled for just
drinking. Taste it and see. If nothing else take it to the garden or compost pile.

5 Finished Cheese

Fresh Paneer won’t last long in the fridge and should be used within a few days. Many
people think that because the milk has been heated to such a high temperature, that it’s
stable for long term storage, this is not true.
The problems with storing this cheese are two fold:
It contains a high level of lactose that will fuel any bacteria that it is exposed to
during the post process.
Tests have found that the ambient bacteria that it is exposed to (not traditional dairy
bacteria, so not good) will multiply several thousand times within a week.
It can be stored at fridge temperature for 4-7 days with no salting and for 10 days to 2
weeks if lightly salted (2%) and packed in an air tight container.
When pressed the cheese will be firm and compact and once chilled it can be easily cut
and cooked or fried. Traditionally, Paneer is made fresh and used within a day.

In making your own Paneer, you have control over how you want to use the cheese.
The curd can be drained for a soft, crumbly cheese or lightly pressed for a firm slicing
and grilling cheese.

By changing the cream content of the milk, the type of acid and the draining method,
you can make a wide variety of cheeses.

Fresh Paneer that hasn’t been pressed very long tends to be more crumbly and is best
for sauces.

Firm Paneer can be sautéed, seared, or grilled, and still retain both it’s shape and

texture.

Graham Cracker Pie Crust

9 graham crackers (1 sleeve), finely crushed (about 1 1/4 cup) can be crushed in a Ziploc baggie.
1/4 c. granulated sugar
5 Tbsp. butter, melted
Pinch kosher salt
Directions
In a medium bowl, combine crushed graham crackers, sugar, melted butter, and a pinch of salt.

Mix until mixture resembles wet sand and holds together when pressed.

Pour into a 9” pie plate or spring form pan and press into an even layer, going up the sides. Use the back of a spoon or measuring cup to help pack firmly.

If baking, bake at 350° until golden, about 12 minutes.

Published
Categorized as Desserts

Farmer Cheese or Ricotta Pie

2 cups farmer cheese, or ricotta
1/2 cup whole milk
1/3 cup honey or light corn syrup, *brown sugar is also an option, see below.
1/4 teaspoon kosher salt
3 large eggs
1 Frozen or homemade pie crust or*Graham cracker crust parbaked or not, is good also.
Parbake frozen pie crust: Remove the pan from the freezer and use a fork to prick holes throughout the dough. (This is called “docking,” which helps maintain the shape as the crust bakes.) Cover snugly with aluminum foil. Fill the shell with ceramic pie weights; push them toward the edges, which keeps the crust from shrinking as it bakes. Place on a rimmed baking sheet and bake for 20 minutes, or until the crimped edges are set but not browned. Remove from the oven and lift the foil and pie weights out of the shell. Let the shell cool. Lower the oven heat to 350 degrees F.
Filling: In a mixing bowl, combine farmer cheese and milk. Stir well to remove large lumps. Add honey and salt, and stir well. Whisk eggs in a separate bowl, add to cheese mixture, and whisk until well blended; then stir in thyme.
Assembly: Pour the filling into the shell and bake on the middle rack of the oven for 35–40 minutes.
* Brown sugar A low sweetener that can be used as a 1 cup to 1 cup ratio for honey, but you may need to add 1/4 cup of liquid to the recipe.
*Graham Cracker Crust
9 graham crackers (1 sleeve), finely crushed (about 1 1/4 cup) can be crushed in a Ziploc baggie.
1/4 c. granulated sugar
5 Tbsp. butter, melted
Pinch kosher salt
Directions
In a medium bowl, combine crushed graham crackers, sugar, melted butter, and a pinch of salt.

Mix until mixture resembles wet sand and holds together when pressed.

Pour into a 9” pie plate or spring form pan and press into an even layer, going up the sides. Use the back of a spoon or measuring cup to help pack firmly.

If baking, bake at 350° until golden, about 12 minutes.

Tower Garden in Arizona

Tap each section when building (don’t hit hard).

Lower nutrients to 1/4 strength in heat of summer.

Flush tank more frequently.

Plant stress (leaves yellowing or wilting)  ck PH (5-5.5) – ck for Pests – Use less nutrient.

To keep water cool – keep revivor full – put in 3 – 6 frozen water bottles during the day – keep out of sun for part of the day.

Best time for strawberries is during cool days.


Published
Categorized as Garden

Knife Sharpener


This unit is designed to work with both straight-edge and serrated knives. For best results, it is recommended to sharpen your knives at a 20-degree angle, ensuring that both sides of the blade receive equal attention.
1-Sharpens – 3-4 times more if knife is really dull up to 8-9 times. Carefully ck for burr on blade .

2- Hones  –if there is a burr pass though 3-4 times. 

  • Turn off machine for manual polishing stage.

3- polishing – Pull back and forth 3-4 times creates a polished finish to straight-edge and serrated knives.

Serrated Knives

If very dull make 2 fast pulls in stage 2  only.

Mostly use manual polishing stage to sharpen serrated knives, pulling back and forth 6-8 times or more, up to 25 times.

Calabrate ph tester

Calabrate ph tester

HOW TO STORE THE PH SOLUTIONS LONG TERM (re-use in the future):
1. Place each solution in a clean jar and store out of sunlight (i.e. cupboard or pantry).
2. Label the jar with the correct PH value of the solution
3. The solution will keep for about 8 months before a weird slime begins to develop. Maybe this will never happen, maybe it will happen sooner. None the less, this is how I store mine and they last 8-12 months before it’s time to dump them.
4. Recalibrate the meter, or check in on it’s accuracy using the stored solutions anytime.

Published
Categorized as Garden

Rockwool Cubes

  1. Prepare the rockwool cubes for use, making sure to soak them in pH adjusted water to bring their pH down between 5.5 and 6.5.
  2. You can add a few drops of lemon juice or pH down to the water, or use pH test strips. 
  3. Add nutrients to the water. You can use a mild vegetative hydroponic nutrient solution, or add a teaspoon of rapid start for every five gallons of water. 
  4. How to use FloraGro with seedlings?
    A general rule of thumb is to use 1/4 teaspoon of each FloraSeries nutrient per gallon of water for seeds, cuttings, or delicate seedlings. 
  5. Soak for 5 hours.
  6. Drain with a strainer for 1/2 to 1 hr.
  7. To Plant Seeds:
    1. Insert 2 seeds in the hole on the top of the rockwool cube. Use a toothpick or other similar object to press the seeds down to the bottom of the hole.
    2. Pinch the hole closed.
    3. Place the cubes in a nursery tray and cover with a humidity dome to lock in moisture.
    4. Maintain at 70 – 80°.
    5. Keep rockwool cubes moist by watering sparingly every couple of days or misting with a spray bottle when they start to dry out.
    6. Remove from humidity dome and place under lights as soon as seeds sprout.
    7. Cut the tops off the seed in each cube (if you planted 2 per cube) that isn’t the strongest or tallest. Do not pull them out as it may dislodge the healthier plantlet at the same time.
    8. Transplant when plantlets reach 2-3” in height.
  8. To Propagate Cuttings
    1. Water the stock plant well the night before beginning the propagation process.
    2. Remove a 3-4” leaf stem cutting from the main stem of the plant, cutting it off as close to the main stem as possible without damaging the node.
    3. Dip cut end in rooting hormone.
    4. Plant the cutting in the rockwool cube making sure it doesn’t poke out the bottom of the cube.
    5. Fill a nursery tray part way full with perlite or vermiculite.
    6. Set rockwool cubes on top of growing media.
    7. Cover nursery tray with a humidity dome to lock in moisture.
    8. Maintain close to 80°.
    9. Crack humidity dome when roots begin to emerge, gradually increasing the day after.
    10. Remove the humidity dome a couple of days after roots first appear.
    11. Transplant when roots begin to poke out the bottom of the cubes.
Published
Categorized as Garden

How to Grow a Tower Garden All Winter Long

Keep your Reservoir Full. 20 gallons of water will hold on to the heat much longer than 5 gallons will. By keeping your reservoir full the water stays warmer on those cold frosty nights (which your plants prefer). The Tower Garden FLEX has a 20-gallon reservoir, compared to a 13-gallon reservoir with the Tower Garden HOME. For this reason, we recommend your winter Tower Garden is a Tower Garden FLEX.
Use a Dolly. Have you ever stood barefoot on a concrete surface, or even a wooden deck, in the middle of a cold winter night? It’s pretty cold, isn’t it? If your Tower Garden Reservoir is placed directly on concrete or other similar surface, the cold transfers to the reservoir, and the water cools much quicker. By using a Dolly or a thick rubber mat under your Tower Garden Reservoir you allow air to flow underneath it and reduce the rate at which it cools.
Heat the water. Add a submersible heater and set it to the lowest temperature (usually 68) when temperatures are falling below approximately 50 degrees. If the heater is longer than the reservoir is deep, stick it to the side of the reservoir at an angle with the suction feet. This is one of the most important things to do to enable you to grow a Tower Garden all winter long!
Place your Tower in the sunniest location you have. The days are shorter and the sun is much less intense in the winter. Give your crops as much sun as possible and in return, they will grow much faster. Remember, 5 hours minimum for leafy greens, lettuce, and herbs and 8 or more hours for fruiting crops. Screen rooms are going to give you around 10-20%. That’s not something you need in the winter!
Add Tower Tonic at full strength. In the summer you reduce the amount of minerals you add (see the post here for more details.) Be sure you revert back to regular strength (20ml of A and 20ml of B for every gallon of water you add) when temperatures are below 85 degrees. Read this post if you want to learn how to measure the Total Dissolved Solids with a TDS Meter, however, it’s not necessary providing you add nutrients at the right dose and empty the reservoir every two months or so.
Bypass the timer or set your timer to run continuously through the cold nights. The exact hours will depend on your temperatures. If temps are below about 40 degrees bypass the timer, or set the timer to run continuously through these hours. Plug the pump straight into the wall or follow the instructions on your timer and ensure the time is set correctly on the timer before setting it to run the pump continuously for a few hours.
Cover your Tower Garden. A Frost cloth or frost bag can be used to cover your Tower Garden on frosty nights. It can be purchased online or at nursery stores and is pretty inexpensive. A small pop up greenhouse could be used to dramatically extend your growing season in many parts of the country (there is not much need for one in Florida). Check the specifications of the greenhouse to ensure it will stand up to your specific weather conditions and is the correct size for the number of Tower Gardens you have. You could also use a submersible heater and/or a small space heater when using a pop-up greenhouse. Beware of fire hazards though!
Use Grow Lights. Grow lights will allow you to grow year-round inside your house, garage, office or other indoor area where you have space. There are many different types of grow lights so you will need to research them to be sure they are suitable to grow what you would like to. Tower Garden LED Grow Lights are full-spectrum and will allow you to grow fruiting crops inside. You’ll just need to consider the size they will grow to and whether you will need to be the bee and pollinate them.
Select the Correct Crops. One of the biggest mistakes we see new Tower Gardeners make is simply selecting the wrong crops. While the Tower Garden does extend the growing season, you still have to select the right crops. There are a handful of crops that we just cannot trick into growing outside of their preferred season. You’ll be able to grow peas and strawberries in temperatures as low as 30 degrees Fahrenheit, but you’ll have to wait until it warms up to grow virtually every other fruiting crop. Lettuces, leafy greens, brassicas, and many herbs love the cool weather. These are the seedlings we offer that love the cool weather. If you are growing inside with grow lights, you will need to consider the size the crop will grow, whether it will need to be pollinated and whether you are willing to do the pollinating.

Published
Categorized as Garden

Tower planting


PH average 6.4

Planting Your Tower Garden
This section will tell you all about what plants should go where on your tower.
1. Bottom Row: On the bottom I have had the best success growing my vines. I send them away from the garden as soon as I can. I like to give my vines places to climb and stretch around the garden, this creates a “larger than life” tower garden effect.
2. Second Row: above the vines, I plant my large plants and my cruciferous greens. This is because these larger plants need space to grow. I have noticed that if the larger plants grow toward the bottom the roots do not interfere with everything growing in the garden. They also do not cast shadow on plants below them this way.
3. Third Row: Next I like to plant my Herbs, preferably in the mint family. This is because herbs are versatile. They don’t mind taking a trip up and around something in their way. They also like to “hug” the tower garden and do quite well in this position on the third row.
4. Top Row: On the top I plant all of the lettuce or fast growing plants that I plan to remove and re-harvest. This is because the lettuce grows so fast up here on top, that the roots never mingle with the lower layers. Therefore, you can remove these net cups easily and replace them a few times.

Published
Categorized as Garden

Grow Flowering Herbs In A Hydroponics System

Here are some tips for growing flowering herbs in a hydroponic system:

  • Light: Herbs need a lot of light to grow well, so use LED grow lights for 14–16 hours per day. Carnations need at least 12–16 hours of light per day, and the spectrum of light should be suited to flowering plants.
  • pH: Maintain a pH level of 5.5–6.5 in the hydroponic solution to help herbs absorb nutrients.
  • Temperature: Most herbs grow best in a temperature of 60–70°F (15–21°C).
  • Humidity: Keep humidity around 40–70%.
  • Air circulation: Use fans or ventilation systems to maintain a gentle breeze and prevent fungal diseases.
  • Nutrients: Monitor nutrient levels and adjust as needed.
  • Pests and diseases: Regularly inspect herbs for pests and diseases.
  • Harvesting: Harvest herbs as needed, but avoid taking more than one-third of the plant at a time.

Basil – wait till 4-6 inches tall before placing in tower
Calendula – harvest blooms
Chamomile – harvest blooms
Chives
Cilantro – use only 1 seedling in winter 1-3 summer
Dill – use only 1 seedling
King of the bitters – medicinal
Lavender – slow growing – may need to be cut back if over large
Lemon balm –
Oregano – use only 1-2 seedling
Peas- perennial pride – bush
Rosemary
St Johns Wort grows tall
Stinging nettle – wear gloves – boil it before using
Thyme – use only 1 -2seedling
Water cress –

How To Make Sauerkraut

Easy Fermented Sweet Sauerkraut
Author: Emillie minutes Yield: 1.5-quart jar

Ingredients
1 medium-sized head of cabbage (approx. 2 lbs.)
1–2 tablespoon pickling salt (to taste – I like 4 tsp)
Sweet: Add 1 cup of grated apple, fennel, beets, or carrots to the kraut and only let it ferment for 3 to 5 days.
Instructions
Grate or finely chop the cabbage and any other vegetables or fruit additions. Mix the prepared cabbage with the salt and any additional flavors.
Leave the cabbage to rest for about 5 minutes while you prepare your jars. The salt will start softening it and drawing the moisture out. This will make it easier to pack the kraut into the jars.
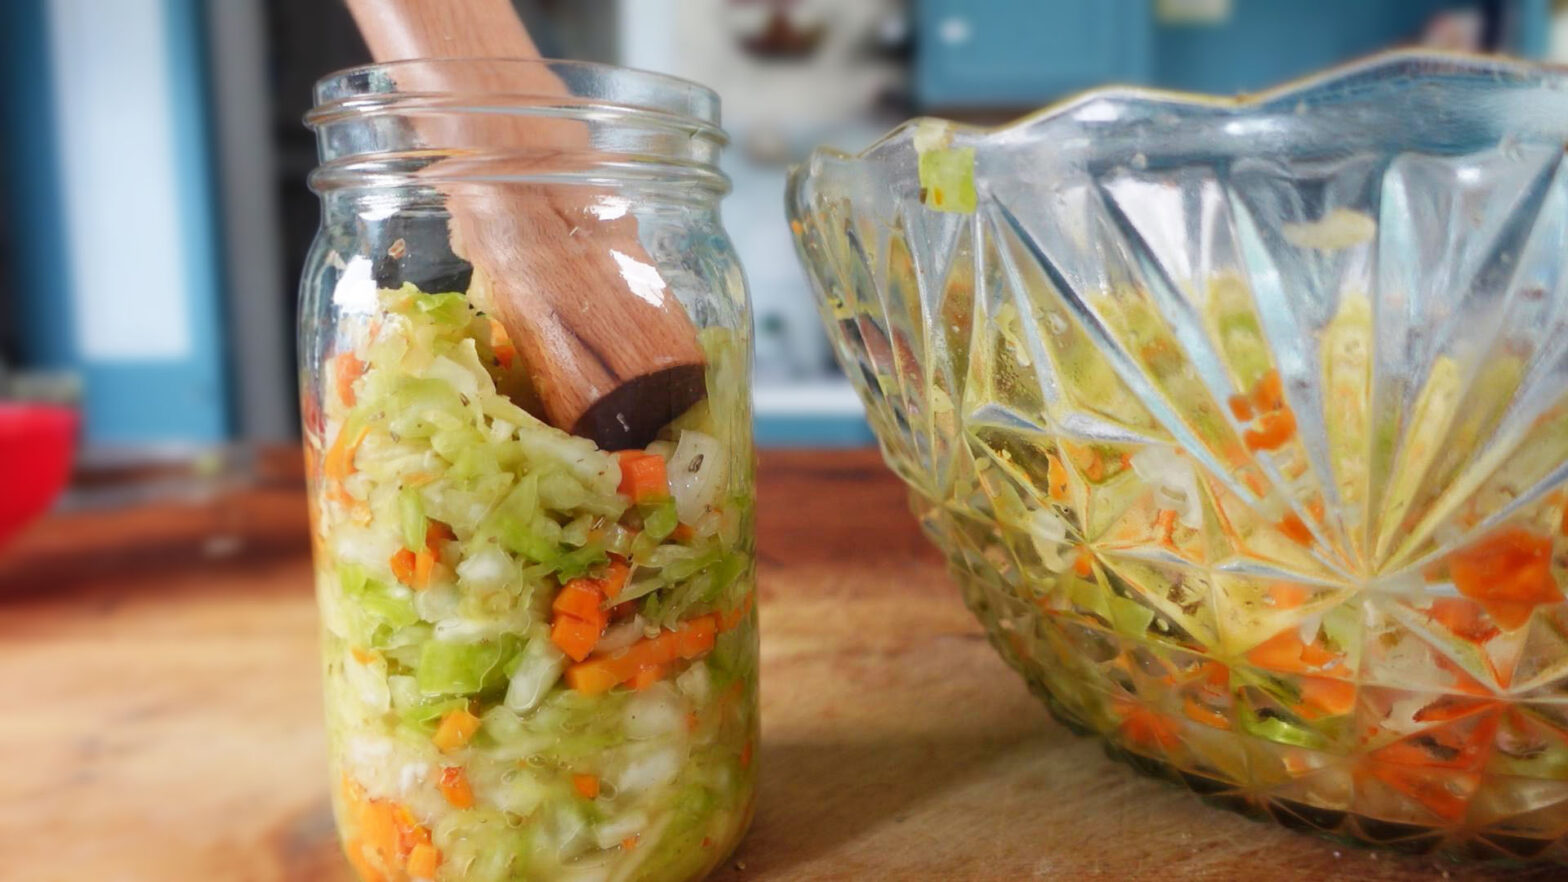
Pack the cabbage into a 1.5-quart container for fermenting. (Two quart-size mason jars work well. Leave at least 1 inch of headroom at the top because the cabbage will bubble up during the first week of fermenting. Use the back of a spoon to pound all the cabbage into the jar. Pack it down firmly enough for the liquid to be pressed out of the cabbage. You want enough liquid to fully submerge the cabbage. It’s also important to pack the cabbage into the jar because air bubbles increase the risk of contamination. Don’t worry if you don’t have enough liquid right away, it should produce enough within 24 hours. So you can leave your cabbage to sweat a bit then pack it down again. Alternatively, feel free to add a bit of filtered water (2 to 4 Tbsp).
Top the kraut with a weight (a small jam jar or the cabbage core will both work as well). For the first three days, the cabbage will bubble a lot. The weight helps to keep the cabbage under the liquid (brine) while it bubbles.
Cap the jar with a lid that will allow gas to escape as it bubbles. A Fido jar is my favorite option because it prevents any chance of contamination and doesn’t require burping. But you can also use a loosely-tightened lid or a tea towel held in place with a rubber band. Place the jar in a dark location to ferment. A closet or a kitchen cupboard is perfect.
The sauerkraut is ready when you decide it is done! After 3 days you will have sweet-tasting kraut that is packed with probiotics. However, sauerkraut will continue to ferment and sour for up to 7 weeks. I often permanently leave my kraut in my pantry since I’m short on space in my fridge.
Store the jar in the fridge after opening it.
Notes
There’s a whole science around how the bacterial culture in sauerkraut changes with the fermentation process. However, it should never be moldy, yeasty, or smelly. Keeping everything clean is necessary for a good ferment.
Wondering how to serve a batch of sauerkraut? It’s not just a hot dog topping! Here are 15 different ways to serve sauerkraut.
Nutrition
Serving Size: ¼ cup Calories: 5Sugar: 0.3gSodium: 90mgFat: 0gSaturated Fat: 0gCarbohydrates: 0.8gFiber: 0.3gProtein: 0.3gCholesterol: 0mg

OR

  • Ingredients
  • 4-4.5 lb. Cabbage Sliced
  • 2 c Carrots Chopped
  •  c Ginger Root Peeled and chopped
  • 2 tbsp Whole Fennel Seeds Freshly ground. Sub with dill seeds or caraway seeds.
  • 2 tbsp Salt Pure salt without anticaking agents.

Instructions

The Cabbage

  • Unless the cabbage has dirt on it, there is no need to wash the cabbage because the outer leaves are being removed. Inspect the cabbage and remove any imperfect leaves. The inner leaves are typically pristine after a few of the outer leaves are removed.
  • After the scrubby outer leaves are removed, next remove 2 to 3 of the newly exposed good condition leaves. Keep these leaves in tact the best you can and set aside for later use.
  • Quarter the cabbage and cut out the stem portion.
  • Slice the cabbage with a sharp knife or in a food processor. A medium to thick slice is best.
  • Add all the shredded cabbage to a large mixing bowl.

The Other Ingredients

  • Peel and chop the carrot and add to the mixing bowl.
  • Peel and chop the fresh ginger root and add to the mixing bowl.
  • Grind the spice seeds in a spice/seed grinder or a coffee bean grinder (completely cleaned out of course!) Then sprinkle over the ingredients in the mixing bowl.
  • With your clean hands, give the vegetable mixture a light mixing as to incorporate everything.

The Salt

  • Sprinkle the salt over the vegetable mixture a little at a time. In between each sprinkle, move the ingredients around as to fully incorporate the salt from top to bottom.
  • Allow the cabbage/vegetable mixture to rest for 30 to 60 minutes. During this time the salt will begin working on the cabbage by drawing out natural juices as well as softening the cabbage.

Tenderize the Cabbage

  • After the first rest period is complete, use your freshly washed hand to firmly massage the cabbage. Additionally, you may use a wooden dowel to pound the cabbage. Or, switch back and forth using hands and dowel. Work the cabbage for 15-20 minutes.

    If you would like visual understanding of how to massage & pound the cabbage, watch the video where I provide a demonstration.

  • After working the cabbage by massaging and/or pounding, it should be very tender and juicy. An accumulation of natural juices will be at the bottom of the bowl and when you pick up & squeeze a handful of the mixture, ample juice will release.

    Allow the cabbage to rest a second time for 15 to 30 minutes. After this second rest period, the cabbage will be loaded into the jars. Optionally, a large fermenting crock may be used in place of jars.

  • If little to no juice has released from the cabbage, then you have a “dry cabbage” meaning it does not have sufficient hydration for the salt to draw from. See the alternate “Dry Cabbage” instructions below to know what to do.

Alternate Instructions For A Dry Cabbage

  • Skip these alternate instructions if your cabbage became nice & juicy after the 1st resting period accompanied by massaging and pounding.

    However if you’re cabbage is lacking natural juice formation, follow these alternate instructions to create a handmade brine.

    First, you won’t know you have a dry cabbage until after the 1st rest period when it’s become obvious that little to no juice has formed. Additionally, the cabbage will still feel stiff and will resist softening when massaged or pounded.

    Since the needed amount of salt is already added, simply pour 3 cups (700 ml) water over the cabbage mixture in the bowl. Lightly toss the mixture around as have everything coated by the water.

  • Allow the cabbage to rest in the salty water for 15 to 30 minutes.
  • When you feel the cabbage after the second rest period, you will notice that it still has firmness to it. This is normal for a dry cabbage.
  • Load the jars in the exact same manner as given in the next group of instructions.

    Be aware that due to the firmness of the ‘dry cabbage’, it will not pack down as tightly as the natural-brine cabbage. Therefore an extra jar will most likely be needed.

Load the Jars

  • Prepare the jars and fermenting weight by washing them with hot soapy water. Sterilization is not required, hot & soapy water is sufficient.
  • Take 2 large handfuls of the cabbage mixture and drop it into the jar. A canning funnel is very helpful with this step because it prevents the cabbage mixture from spilling out during the loading process. However, it is not required.
  • With either your fist or a dowel, firmly press the mixture down as to push out any air pockets.
  • With each handful of cabbage mixture, make sure it is nice & juicy by grabbing the wet stuff toward the bottom of the mixing bowl.

    If you are working with a ‘dry cabbage’, add a small scoop or two of the handmade brine and add to the jar.

  • Repeat this process of loading and packing until the jar is 75-80% full.

Cabbage Leaf Topper

  • It is time to make the cabbage leaf topper. With the cabbage leaves set aside from earlier, tear off pieces of the leaves to fit into the jar overtop the sauerkraut.

    Use the friction of the leaf piece against the glass to create a secure hold. The cabbage leaf topper will help hold the sauerkraut beneath the brine during the fermentation period. It also helps protect the finished sauerkraut during long term storage.

    Use several pieces of the leaves to completely cover the top of the sauerkraut. It doesn’t have to be perfect since a glass fermenting weight will be used next.

    If you would like to see a demonstration of how to create the cabbage leaf topper, watch the video at the 9min,15sec time stamp where I provide a visual example.

  • Load the 2nd jar exactly in the same way including the cabbage leaf topper.
  • Evenly distribute any remaining juice/brine from the bottom of the mixing bowl by pouring it over the sauerkraut in both jars.
  • Add the fermenting weight to each jar and press it down. The brine should either cover the weight completely or by at least 80%.
  • If you find yourself significantly short on natural brine do this: Add 1½ teaspoon of fine salt to 1 cup of water or 10g salt to 250ml water. Mix thoroughly then pour the additional handmade brine into the jars that need it.
  • Place a loose, regular lid on the jar. So long as the lid is loose and not tight, the fermentation gasses will be able to escape and you will not need to burp the jar during the fermentation period.

    Alternatively, you can use a specialty fermenting lid but it is not required.

The Fermentation Period

  • Place the jars of sauerkraut on a dish towel and leave on the counter for 21 to 30 days. The dish towel under the jars will catch any possible brine overflow that may occur during the 1st week of the the fermentation period.
  • The ideal environmental temperature between 70-85°F (21-29°C). This is an optimal range that will allow the sauerkraut to ferment at a nice pace, not too fast and not too slow.

    Note: The cooler the environmental temperature is, the slower the fermentation will take place. The warmer the environmental temperature is, the faster the fermentation will take place.

What To Expect

  • Colors will change from vibrant to muted.

    Carbon dioxide bubbles will form during the 1st week of fermentation, then die off during week 2 and 3.

    A healthy fermentation should have a light soury-sweet smell with hints of sulfur due to cabbage being high in sulfur compounds. If the fermentation smells offensive or rotten, throw it away.

Ending The Fermentation

  • By the third week, the sauerkraut will have reached its desired level of fermentation. The flavors will have intensified, the probiotics will be maximumly developed and the nutrients of the ferment will be increased such as B-vitamins and enzymes.

    At this stage, you can choose to end the fermentation or continue fermenting for another week if you prefer a stronger sour flavor.

  • With clean hands, remove the fermenting weight.
  • With a clean utensil, pull back the cabbage leaf topper. Then take out a bite to taste test! Be sure not to double dip if you eat from the utensil.
  • To store the sauerkraut long term, do not return the weight to the jar. Place a tight lid on the jar and store in the refrigerator.

    If everything was done correctly, the sauerkraut can last 1 to 2 years properly stored in the refrigerator.

  • If you plan on eating the sauerkraut starting now, you don’t have to keep the cabbage leaf topper on.  You can take it out and eat it!

    If you plan on storing the sauerkraut for some time before getting to it, keep the topper on because it will help preserve and protect the sauerkraut below until the jar is opened later.

Hydrogen Peroxide

Shelf Life: Hydrogen peroxide typically has a shelf life of around 1-6 months once opened, and should be stored in a cool, dark place to maximize its effectiveness; to test if it’s still good, pour a small amount into a sink – if it fizzes and bubbles, it’s still potent, but if not, it’s time to replace it; unopened hydrogen peroxide can last up to 3 years depending on storage conditions.
Key points about hydrogen peroxide shelf life: Storage matters: Keep hydrogen peroxide in a cool, dark place, ideally in its original brown bottle to prevent light exposure which can accelerate decomposition. 
  • Check for fizzing: To test if your hydrogen peroxide is still effective, pour a small amount into a sink – if it fizzes, it’s still good. 
  • Once opened, use quickly: Once the bottle is opened, hydrogen peroxide starts to break down rapidly, so use it within a few months. 
  • Unopened shelf life:  A sealed bottle of hydrogen peroxide can last up to 3 years. 

    Food Grade Hydrogen peroxide (H2O2) can be used in hydroponics for a variety of purposes, including:
    Cleaning & Maintenance
    2–3 teaspoons of 3% Regular or Food Grade hydrogen peroxide (H2O2) per gallon of water.

    Use Food Grade for Tower Plants 3/4 – 1 cup for 20 gal. tank. You can add the solution as often as three times a week, or when you notice a problem. 
    Boosting oxygen Tower Garden
    H2O2  Food Grade, can help combat low oxygen levels in warm water, which can be harmful to bacteria in hydroponic gardens.
    How Much to Add:
    Add 15 ml per Gallon – 3% FOOD GRADE H2O2 – That’s 300ml for a 20 gallon res.
    How Often to Add:
    When the plants are smaller (first month or so) add H2O2 every 6 days. Once the plant becomes larger and hungrier, add H2O2 every 4 days.300ml per 20 gal is 1.25 cups
    Speeding up germination
    You can soak seeds in a solution of 1 ounce of 3% food grade H2O2 to 1 pint of water for 2–24 hours. Food grade H2O2 is safe to use around food because it doesn’t contain stabilizers or heavy metals.
    One recipe to rejuvenate old seeds, calls for:
    1 TB 3% hydrogen peroxide
    1.5 Distilled Water
    1 tsp. sugar
    soak 5 min,. to 1 hr.

    When using hydrogen peroxide, you should:
    Ventilate the area by opening doors and windows, or using a fan. Wear gloves and eye protection.
    Avoid sitting in the same room as the activated hydrogen peroxide, as it can irritate your eyes and throat.

    Soaking seeds in 3% hydrogen peroxide and water. Studies show that seeds soaked in solutions of various percentages of hydrogen peroxide and water improve germination rates by helping to break down the seed coating. This allows the seed to receive oxygen Soaking seeds in hydrogen peroxide greatly increases germination rates. Use 20 or 30% peroxide and soak seeds for about 15 minutes. It softens the shell or husk and provides high oxygen levels for the sprouting process. Peroxide also kills many if not most pathogens that may be present.

    To control fungus gnats using hydrogen peroxide, mix a solution of 3% hydrogen peroxide with water and use it to water your plants. Hydrogen peroxide is safe for flowering plants but it may not be as effective as neem oil, and on the other hand, neem oil is more effective but it can only be used on growing plants, not seedlings or flowering ones.

    In Soil:  To get rid of fungus gnats, mix a solution of one part hydrogen peroxide with four parts water. Pour the mixture onto the soil around the infested plant.

    For a soil drench?
    1 part 3% peroxide to 3 parts water into the soil.

    Repeat as often as needed as diluted mixture only lasts about 1-2 hrs.


Published
Categorized as Garden

Roasting Garlic

You’ll laugh when you hear how easy it is to roast garlic. The result is smooth, spreadable garlic that has mellowed in flavor. It’s tasty as a spread, but you can toss the roasted cloves into sandwiches or mashed potatoes to add a zippy flavor.

You don’t even have to peel the cloves.

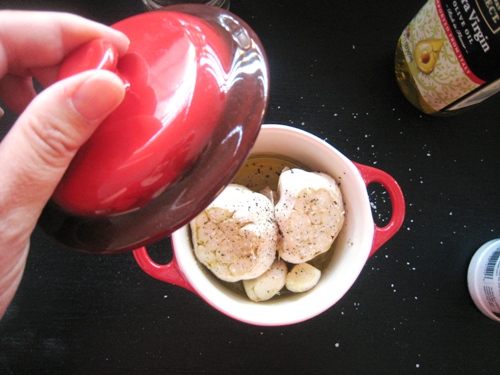
Just chop off the top of the head of garlic. I used two and crammed them into a small lidded baking dish I have. You can use any small dish. I had to separate a few cloves from the mother just to fit them, but it works fine.

Drizzle over the oil and season to taste with freshly ground pepper and kosher salt.

Cover and bake for an hour at 350°.


Glazed Carrots

Servings 4

Ingredients

1 pound fresh, frozen or canned whole baby carrots
1-2 tablespoon orange juice
2 tablespoons butter
1 teaspoon grated orange peel
½ teaspoon salt
¼ cup brown sugar (I like less) or 2 Tb. Honey
1/4 cup chopped flat-leaf parsley or 1 tsp. Dried parsley

Directions

  1. Cook carrots in a small amount of water with salt until tender. Drain. In a saucepan, combine orange juice, orange peel, butter and brown sugar; heat until sugar dissolves. Add carrots and other ingredients, toss to coat. Heat through. Yield: 4 servings.

Nutritional Facts

1 serving (3/4 cup) equals 150 calories, 6 g fat (4 g saturated fat), 15 mg cholesterol, 152 mg sodium, 23 g carbohydrate, 2 g fiber, 1 g protein.


Published
Categorized as Sides

Seed Starting

Starting Seeds
If they are large seeds like bean or squash seeds…1-2 seeds per cube will be fine.
If the seeds are smaller, feel free to use 3-5 seeds per cube.

Start pepper seeds (sweet and hot) in damp paper towel.

Tomato seeds 
Keep the seeds at a consistent temperature of 70–80°F (21–27°C). You can use a heat mat to keep the temperature consistent. 
Keep moist
Keep the growing mix moist but not wet. You can water from the bottom by placing the container in a tray of water for a few minutes. You can also mist the seeds.
Provide light
After the seeds germinate, move them to a sunny location with at least 14 hours of light per day. If you’re growing indoors, you can use a grow light or place the pots in a sunny window. If the seedlings are growing toward one side, rotate them every day. 

Spinach seeds: Spinach germination likes a dark cool place to germinate.  Best in medium temperatures between 55–65°F and usually take 7–10 days to emerge. Soil temperature: Spinach seeds germinate poorly in warm temperatures. Temperatures above 80°F can reduce germination rates to 30%.
Seed preparation: To improve germination rates and decrease germination time, you can soak seeds in room temperature water overnight and then let them air dry for a couple of days. This process is called “priming”.
Thinning: When the plants have 3–4 true leaves, thin them so they are 4–6 inches apart. In aeroponics, 1-2 to 1 rockwool.

Kale seeds can germinate in a variety of conditions, but here are some tips that can help:
Soil temperature: Kale seeds germinate best in soil that’s between 50–85°F (10–30°C).
Germination time: Kale seeds usually germinate in 6–12 days.
Germination in paper towels: You can germinate kale seeds in paper towels and a sandwich bag to avoid using seed starting trays.

Tucson Seasonal Growing

In Tucson, Arizona, the best time to start seedlings for spring planting is in December through February. The last frost date is usually around mid-March, which is the ideal time to plant warm-season crops. 

Here are some tips for starting seeds in the Tucson desert: 
  • Start tomato seeds early

    Sow tomato seeds indoors 6–8 weeks before the last frost, which is usually early December to mid-January. 

  • Consider the weather

    Unseasonably warm weather can cause cool weather plants to bolt and go to seed instead of growing. 

  • Plant wildflowers in early winter

    Desert wildflowers need the soaking rains of autumn and winter to germinate, so it’s best to plan and plant them by early winter. 

  • Cover seeds
    Keep seeds covered before they sprout to create a greenhouse effect and keep them moist. 
    The ideal soil temperature for planting most plants is between 65–75°F.
    Garden planting calendar for Tucson: https://www.harvestingrainwater.com/resources/plant-gardening-calendar/
Published
Categorized as Garden

Hydroponics – What to Grow & How

Here are some tips for growing a tower garden in Arizona during the winter:
Location: Place the tower garden in a sunny location to give crops as much sun as possible.
Water temperature: Use a submersible heater to maintain the water temperature at a higher level, especially when temperatures fall below 50°F.
Insulation: Cover the tower garden with insulation to help crops last longer.
Tower tonic: Use full strength tower tonic when temperatures are below 85°F.
Airflow: Place a dolly or thick rubber mat under the reservoir to allow air to flow underneath and reduce cooling.
Move indoors: If possible, move the tower garden indoors during the winter.

Tower gardens can produce winter crops, but they don’t perform well in freezing conditions or temperatures above 90°F. Some tower farm owners only operate outdoors seasonally from spring to fall.

The best water temperature for hydroponics can vary depending on the specific plants you are growing and the stage of growth they are in. However, as a general guideline, most hydroponic systems maintain a water temperature between 65 and 75 degrees Fahrenheit. This range is considered ideal for many common hydroponic crops like lettuce, tomatoes, and herbs. Here are some factors to consider:
Hydroponic Plants That Prefer Warmer Water
Some hydroponic plants tend to thrive in warmer water temperatures, typically toward the upper end of the recommended range (between 70°F to 75°F). These plants include:
Tomatoes: Tomatoes are warm-season crops and generally perform well in hydroponic systems when the water temperature is in the upper range. Warmer water can encourage robust growth and fruit production.
Peppers: Like tomatoes, pepper plants prefer warmer conditions. Maintaining a water temperature in the 70-75°F range can help peppers grow well in hydroponic setups.
Cucumbers: Cucumber plants are also warm-season crops. They benefit from slightly warmer water to support healthy growth and fruit development.
Eggplants: Eggplants, or aubergines, are another warm-loving crop. They tend to do better when the water temperature is in the upper range of the recommended temperatures.
Squash: Various types of squash, such as zucchini and summer squash, prefer warmer water temperatures for optimal growth.
Basil: While many herbs can tolerate cooler water, basil tends to thrive in slightly warmer conditions, making it a suitable choice for hydroponic systems with elevated water temperatures.
Cilantro (Coriander): Cilantro is another herb that may benefit from warmer water temperatures, especially during the vegetative growth stage.
It’s important to note that while these plants may perform well in higher temperatures, they still require proper care, nutrient management, and attention to other environmental factors like light and humidity to achieve their full potential in hydroponic systems. Additionally, be mindful of the specific varieties or cultivars of these plants you are growing, as individual preferences may vary slightly. Always monitor and adjust the water temperature based on the specific needs of your plants and the recommendations of your chosen hydroponic system.
Hydroponic Plants That Prefer Cool Water Temperatures
Cooler water temperatures can help inhibit the growth of harmful pathogens and reduce the risk of root diseases. Warmer water temperatures can promote the proliferation of pathogens, potentially leading to root rot or other diseases that can stunt plant growth.
Certain hydroponic plants thrive in lower temperatures, generally within the lower end of the recommended range (between 65°F to 70°F). These plants are often referred to as cool-season crops, and they include:
Lettuce: Lettuce is one of the most popular hydroponic crops, and it prefers cooler water temperatures. Keeping the water between 65°F and 70°F helps prevent bolting (premature flowering) and promotes the growth of tender, crisp leaves.
Spinach: Spinach is another cool-season leafy green that performs well in hydroponic systems with cooler water.
Arugula: Arugula, with its peppery flavor, is well-suited for hydroponic cultivation in slightly cooler water.
Kale: Kale is a robust cool-season crop that can thrive in hydroponic setups with water temperatures on the cooler side.
Swiss Chard: Swiss chard is a versatile leafy green that can tolerate cooler water temperatures, making it suitable for hydroponic gardening.
Bok Choy: Bok choy, or Chinese cabbage, prefers cooler conditions and can be grown successfully in hydroponic systems with cooler water.
Cilantro (Coriander): While cilantro can tolerate slightly warmer water, it can also grow well in cooler conditions.
These cool-season crops are well-suited to hydroponic gardening because you have greater control over the growing environment, allowing you to maintain consistent and optimal conditions, including water temperature, for their growth. When growing these plants hydroponically, it’s important to monitor and adjust the water temperature as needed to ensure they remain in their preferred range for best results.
Vegetables that grow well in Hydroponics:
1. Lettuces
2. Tomatoes https://joybileefarm.com/hydroponic-tomatoes/
3. Radishes
4. Kale
5. Cucumbers
6. Spinaches
7. Beans https://igworks.com/blogs/growing-guides/growing-hydroponic-beans
Fruits
8. Strawberries https://www.simplegreenshydroponics.com/blog?tag=hydroponics
9 Blueberries
10. Peppers
Growing melons: Fruits https://benchmarkhydroponics.com.au/blog/hydroponic-fruit
11. Strawberries
12. Blueberries
13. Peppers
Lettuce in Hydroponics
Lettuce (and most other leafy greens) should be your first plant to try with a hydroponic system. These plants have a shallow root system that matches their short above-ground height. That means there’s no need to tie stakes or set guides for the plant. Instead, you just let them grow while regularly changing their nutrient solution. Eventually, they will look good enough to eat, and you can!
Grow time: About 30 days
Best pH: 6.0 to 7.0
Tip: Stagger plantings so you have a continuous supply of lunchtime lettuce!
Variety options: Romaine, Boston, Iceberg, Buttercrunch, Bibb
Spinach in Hydroponics
Spinach grows quickly in a hydroponic system, particularly when using the Nutrient Film Technique or other methods that keep the nutrient solution highly oxygenated. You’ll also use far less water than an in-the-ground garden. It’s easy to start these plants from seed and a week after sprouting, move them into your system.
Grow time: About 40 days
Best pH: 6.0 to 7.5
Tip: For sweeter spinach, keep your grow temperatures between 65 degrees F and 72 degrees F. The lower temperatures may slow grow time, though.
Variety options: Savoy, Bloomsdale, Smooth Leafed, Regiment, Catalina, Tyee, Red Cardinal
Strawberries in Hydroponics
The worst thing about strawberries is how seasonal they are. If you don’t get them locally when the crop is ready, you’re relying on trucked-in berries that begin deteriorating as soon as they’re picked. With hydroponics, you can have a ready-to-eat crop of strawberries all year long. Harvesting is super-convenient as well – no bending over! Strawberries seem to do best with an ebb and flow system, but deep water culture or nutrient film technique can do for a small crop.
Grow time: About 60 days
Best pH: 5.5 to 6.2
Tip: Don’t buy strawberry seeds, which won’t be berry-ready for years. Instead, you want to buy cold-stored runners that are already at that stage.
Variety options: Brighton, Chandler, Douglass, Red Gauntlet, Tioga
Bell Peppers in Hydroponics
Bell peppers are a slightly more advanced hydroponic plant. Don’t let them grow to their full height, instead, prune and pinch plants at about 8 inches to spur pepper growth. Deep water culture or ebb and flow systems are best for peppers.
Grow time: About 90 days
Best pH: 6.0 to 6.5
Tip: Plan to provide up to 18 hours of light for these plants each day, and raise your light rack as the plants grow, keeping plants about 6 inches from the lights.
Variety options: Ace, California Wonder, Vidi, Yolo Wonder
Herbs in Hydroponics
There are a wide variety of herbs that work wonderfully in hydroponic gardening. Studies have shown that hydroponic herbs are more flavorful and aromatic than those grown in the field. What herb do you want to grow? Basil, chives, cilantro, dill, mint, oregano, parsley, rosemary, thyme, and watercress are all great options. Herb production is another great way to test out your new hydroponic system, and nearly every system style is suitable for a round of herbs as you learn the ropes!
Grow time: Varies by plant
Best pH: Varies by plant
Tip: Flush your growing medium about once a week to get rid of any extra nutrients that your plants haven’t (or won’t) absorb.
Medicinal herbs:
https://www.reiziger.com/15-medicinal-herbs-you-can-grow-hydroponically/
Flowering herbs: https://www.bootstrapfarmer.com/blogs/hydroponics/hydroponic-edible-flowers-how-to-grow-edible-flowers-without-soil
Regrow used produce
https://www.mygardenlife.com/recipes-edibles/the-garbage-garden

Published
Categorized as Garden

Hydroponic Nutrients & Mix ratio

Flora Grow
Shake up each nutrient after each solution and rinse syringe.
Check ph after mixing solution. Under 6 is best. Couple dollops at a time of ph down and mix or shake gallon jug
2.5 each per gallon for seedlings
5m each per gallon for grow
Only refill water when 1/3 water left in passive Kratky container
One grower uses: Cal mag and Epson salts in the mix
for his greens and  seedlings use 1/4 tsp eahc per gal.
Flora Series: For reg. Kratky Method
1 Gallon of water, pH is between 5.9 – 6.5
1 Tsps. of Micro
1 Tsps. of Grow
1 Tsps. of Bloom
1 Tsps. of Cal Mag liquid
1/2 Tsps. of Epsom Sal -t½ tsp in a little warm water – stir and pour into mix

Masterblend:
1 Gallon of water, pH is between 5.9 – 6.5
2 Grams of Masterblend 4-18-38
2 Grams Calcium Nitrate
1 Gram of Empson Salt

How to use A & B:
Step 1: Fill bottles A and B with water and shake well to ensure the contents are thoroughly mixed.
Step 2: Utilize the bottle caps to measure, with scale marks from 1ml to 15ml. Mix 5ml of hydroponic nutrients from both bottles A and B into 1L of water. Use the table below to determine the correct mixture for your hydroponic growing system’s requirements.
Hydroponic Growing Nutrient Proportion
ater Nutrient
1.5L (Mini’s water tank) 7.5ML A + 7.5ML B
2L 10ML A + 10ML B
3L 15ML A + 15ML B
4L 20ML A + 20ML B
5.5L (Senior’s water tank) 27.5ML A + 27.5ML B
7.5L (Max’s water tank) 37.5ML A + 37.5 ML B

MASTERBLEND 4-18-38
Calcium Nitrate 15.5-0-0
Contains MasterBlend 4-18-38,
and Epsom Salt (Magnesium Sulfate)

Published
Categorized as Garden

Bug Spray with Catnip oil

How to Make Homemade Bug Spray
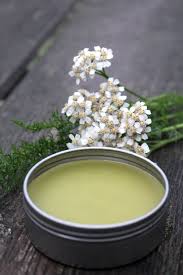
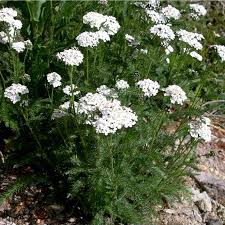
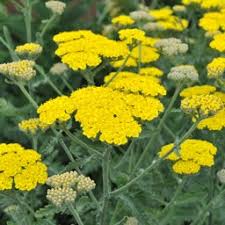
We are going to show you how to make an herbal bug repellant spray using yarrow (Achillea millefolium). Yarrow grows abundantly all over the world and has a multitude of uses, ranging from first aid to colds and flus. It is also a fabulous homemade bug repellent!
What you’ll need…
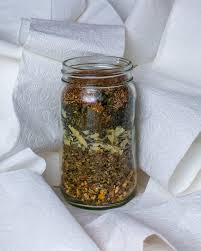
yarrow (either fresh or dried flowers and leaves)
alcohol (vodka works fine)
catnip essential oil
If using fresh yarrow, fill a jar with yarrow flowers and leaves,use pruners to cut them up.
If using dried yarrow, fill a jar about half full with yarrow.
Cover this with vodka and let sit for a week.
Strain off the yarrow. Preserve the liquid and compost the yarrow.
Fill a spray bottle with half the liquid and then fill the rest of the way with water. You could also just use the alcohol extraction without any additional water. Of course this costs more in the long run.
Place a few drops of catnip essential oil in the spray bottle. Catnip essential oil has been shown to be more effective than DEET at deterring mosquitoes. You could also try using lavender or sage essential oils.
Spray works best when I apply often – every hour or so. I personally dislike the smell of citronella bug sprays, but this one smells wonderful.

Tere are many variations to this homemade bug spray, so I encourage you to experiment with what works best for you.
You could simply make a tea out of yarrow and use that as a spray. This will not keep as long as an alcohol extraction.
There are a variety of essential oils that you can use besides the ones listed above.
Note: There is a rare possibility that yarrow may cause photodermatitis in sensitive individuals. If you have sensitive skin, it would be best to test this bug spray on a small area. (The area needs to receive sunlight to see if there is a reaction.)

Meadowsweet for Pain

If you’ve ever seen Meadowsweet growing wild in a meadow, you’ll know why it is called the Queen of the Meadow. This ubiquitous plant with brilliantly white flowers dominates the meadows it calls home. Its contemporary common name, meadowsweet, may not just refer to the plant’s favorite living space, but also to its common use as a flavoring agent in meads and ales.

Meadowsweet (Filipendula ulmaria) is a sweet-smelling astringent herb that is commonly used for excessive diarrhea, ulcers, pain, stomach aches, fevers and gout.

Let’s make a delicious-tasting meadowsweet elixir. Before we get to our recipe, here’s a bit more about this beautiful plant.

“Meadowsweet was one of the three most sacred herbs used by ancient Celtic Druid priests. It is mentioned in the Knight’s Tale by Geoffrey Chaucer (fourteenth century C.E.), and described in old European herbals, including those of John Gerard (The Herball, 1597) and Nicholas Culpepper (The English Physitian, 1652).”
–Commission E Monograph

Meadowsweet for Pain

Meadowsweet is high in salicylic acid, which is well known for its ability to relieve pain. I find the plant to be a mild to moderate pain reliever that is especially suited to stagnant pain (in a fixed location, possibly with a pounding sensation) and for those with symptoms of heat.

“The Iroquois used the mashed and powdered dried root as part of a compound decoction with yarrow for side pain, and nausea.”
–Robert Dale Rogers

Headaches

Meadowsweet is especially suited to headaches in which the person has a hot head and feels a pounding sensation in the head. Meadowsweet is cooling and it promotes circulation, which can relieve stagnant energy in the head.

Rheumatism

Besides having the ability to relieve pain, meadowsweet is also anti-inflammatory in nature. Taken daily as a tea or tincture it can help relieve chronic arthritic pain and inflammation.

Stomachaches and Acid Reflux

My two favorite herbs for stomach aches and nausea are ginger and meadowsweet (okay, twist my arm, peppermint too).

Meadowsweet shines as an herb for stomach aches, nausea and poor digestion and is especially helpful for those who find herbs like ginger to be too warming. Meadowsweet removes stagnation (like when you eat a meal and it stays in your stomach too long) and relieves discomfort in the stomach.

“If someone asks you what to do for reflux but isn’t going to come in and do a consult or listen to a lengthy exposition on the nuance of gastric tissues and processes I say, ‘You could try meadowsweet and see if that helps.'”
–jim mcdonald

Madowsweet Elixir

This is a home remedy for pain. This meadowsweet elixir recipe extracts the medicinal properties of the herb with alcohol and glycerine. Glycerine is added to this recipe because it does a good job of extracting tannins found in the plant.

If you avoid alcohol, you can also enjoy the benefits of meadowsweet by simply making a tea from it.

What you’ll need…

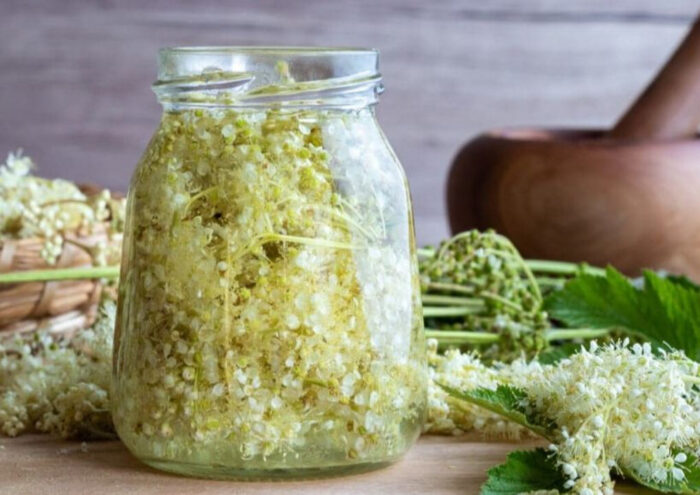
  • 100 grams dried meadowsweet flowers (roughly 2 cups)
  • 400 milliliters vodka (50% ABV is best)
  • 100 milliliters vegetable glycerine

  1. Place the meadowsweet flowers in a jar.
  2. Add the vodka and glycerine to the jar.
  3. Shake well. Let this macerate for 4 to 6 weeks and check on it often.
  4. You may find that as the flowers soak up the alcohol and glycerin, the liquid will no long cover the herb.
  5. To remedy this, you can take a clean stone or weight and use it to weigh down the flowers below the liquid. If necessary, you can add a bit more alcohol to cover the herb. I opened my jar frequently and pushed down the flowers and that seemed to work just fine.
  1. Once you are done macerating the herb, it’s time to strain off the mixture. The easiest way to do this is strain it through a cheesecloth, which you then squeeze the dickens out of until you get all the moisture from the flowers. A tincture press works well, too.
  2. Once it is strained you can bottle and label it. Here’s an image of my label, which you can print for your own use.
  3. A standard dose is 30 to 60 drops as needed. Depending on age, weight and sensitivity, someone may find that more or less works best for them.

Meadowsweet is safe for most people. However, it should be used with caution for the following people:

  • children under 16 who have the flu or chickenpox symptoms (because of the rare but serious Reye’s syndrome)
  • people with asthma (may stimulate bronchial spasms)
  • people who are allergic to aspirin


#1 Remedy for a Poison Ivy or Oak Rash


One Natural Poison Ivy Remedy is an Herb: Jewelweed
If you have come into contact with poison ivy or poison oak, the first thing to do is wash the area with cold soap and water. Once you’ve done this, now you can call on jewelweed.

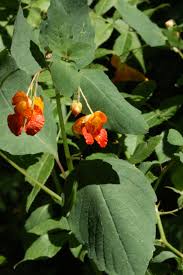
Jewelweed (Impatiens capensis) is a plant that grows in wetter conditions, such as near a stream.
Pick a bunch, crush it, and rub it on exposed parts of your body that might come in contact or have already come in contact with poison ivy. It is a juicy plant. It is more effective before the urushiol oils (the poison ivy oils) set into your skin that cause the skin rash.
Knowledge of jewelweed coupled with awareness is the true poison ivy remedy.
Preparing for Poison Ivy Season: Jewelweed Ideas
Collect a bunch of jewelweed and make a tea. That is, bring a pot of water to a boil (4 cups or so), put the jewelweed in (chop a large handful), and let it sit for 20 minutes. Then strain it out.
You can bathe in this tea, just treat the affected area, or freeze it into ice cubes. You can apply the ice to exposed areas or areas that are already suffering from the rash.

Bee Sting Relief

When it comes to mild bee stings, wasp stings, or yellow jacket stings, there are a few simple things I do to address the sting — one of which includes a common herb that’s probably growing near you…

Now, for most of us, bee stings aren’t a big deal. However, for some they are fatal. Seek IMMEDIATE medical attention if the person’s tongue swells, if the person has difficulty breathing, you observe a sudden rash, the person complains of nausea or blurred vision, or if the person has had a severe reaction to a previous sting. If a person is allergic, make sure you check to see if they have a special “pen” that injects epinephrine. It helps dilate their airways.

Basically you have 3 things to do for most people when they get a sting…

  • Extract the wasp or bee stinger
  • Clean the wound
  • Find relief

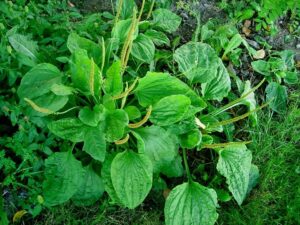
The plant is plantain (Plantago major or broadleaf plantain, and Plantago lanceolata or narrowleaf plantain). This is a common “weed” found anywhere where soil has been disturbed. You’ll recognize it growing in the cracks of your neighborhood sidewalks. (Just remember to gather from a place that is not sprayed or frequently walked or peed on.)

Plantain is a common herb that grows in lawns, along pathways, and areas with disturbed soil.

Plantain is well known for its ability to “draw.” That may come from its ability to draw up minerals to the soil in disturbed soil. Well, it also draws things like dirts, stingers, insect venom, and infectious materials — perfect for a bee sting remedy. A plantain poultice can also soothe other types of bug bites too, like itchy mosquito bites.

It’s an herb that you can access simply by chewing it up and placing it on a minor wound or sting. This is called a spit poultice. The laying on of leaves is very powerful remedy. And, it’s one you can easily share with anyone: a friendly plant that is always around to help us in need when we’re engaged in outdoor activities and a great bee sting remedy.

Hydrogen Peroxide for seedlings

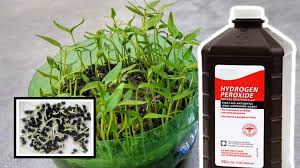
All the recipes for using hydrogen peroxide indoors for you seed starts and transplants.

Food Grade 3% Hydrogen Peroxide

Initial Soil Drench for Sterilizing & Germination
Soil Drench: 4 parts water and 1 part hydrogen peroxide

Managing Molds and Fungi
Spray: 6 parts water and 1 part hydrogen peroxide
Soil Drench: (maintaining health) 5 parts water and 1 part H202

Fungus Gnat Infestation
Spray: 4 parts water and 1 part hydrogen peroxide
Soil Drench: 3 parts water and 1 part H202

Kratky Method

Peroxide for Kratky Method
10 ml peroxide per gallon water


https://www.youtube.com/hashtag/humblegrowthhydroponics

Finding the right amount of hydrogen peroxide for your hydroponic system is crucial. Too little might not help, and too much could harm your plants.

  • Start small: Begin by adding a low dose of 3ml of 3% hydrogen peroxide solution per liter of water.
  • Watch closely: After you add hydrogen peroxide, observe your plants for any changes in health or growth.
  • Increase gradually: If there are no negative effects on the plants, slowly increase the dose while monitoring them.
  • Follow a schedule: For every gallon of water in your system, add 2-3 teaspoons of the solution. Do this every four days.
  • Adjust for size: Tailor the amount to fit the size of your hydroponics setup. Larger systems may require more hydrogen peroxide.
  • Use food grade: Always choose food-grade hydrogen peroxide for your plants. It’s safer and more effective for gardening use.
  • Be precise: Use a measuring tool to ensure you’re adding just the right quantity. Guessing can lead to over or under-dosing.
Published
Categorized as Garden

Home made bug spray


Recipe for bug spray

•1 cup water
•1/3 cup witch Hazel
•30-50 drops lemon grass essential oil

Shake well before each use.
Or
Homemade Mosquito Repellent {Just 3 Ingredients}

2oz water or distilled water
2oz Apple Cider Vinegar or Witch Hazel (I used Witch Hazel)
20-55 drops of Bug Off Oil (Plant Therapy Nature Shield Essential Oil Blend) depending on the level of protection you need

You might consider 20 drops for children or to spray clothing and furniture and stuff and up to 55 drops if you are going to a heavily infested area.
And one important note- we all know normal bug spray can smell horrible. I find this spray much less offensive- it does have Citronella but I find the scent to be very mild.

Mennonite Egg Noodles, Shelf Stable Pasta.


Mix with blender or whisk
12egg yolks6 whole eggs
3/4cup water
1 T.oil (I use melted tallow)
1 tsp. salt
Add:6-7 cups all-purpose flour
Mix by hand like bread dough until dough is like a soft playdough. If it’s too dry add more water, if it’s too sticky, add more flour. Wrap dough in plastic wrap and allow to rest on counter for 2-3 hours for gluten to develop. Alternately, refrigerate the dough for up to 12 hours and then allow to come to room temp on counter for a few hours. Cut off golf ball size pieces of dough and cover them in flour by dropping them into a dish of flour. Smash the piece flat with your palms and then put them through your pasta machine on the thickest setting, then on a thinner setting. On my pasta machine I use setting three for the final dough sheets. Allow the pasta sheets to dry for1 to 2hours and then run them through the cutter. Alternately, Iron the dough sheets until they are partially dry before running through the cutters. Place cut pasta on clean surface (I use bed sheets for easy clean up)to dry for 2-3 days. When dry, place in tightly closed containers and store in a cool dry place (or store in freezer)*How to video on our YouTube channel: Homesteading with the Zimmerman

Water Bath Canning

Foods that are high in acid and have a pH of 4.6 or lower can be safely canned using a water bath canner, including:
Fruits: Most fruits, including apples, apricots, berries, cherries, cranberries, peaches, pears, plums, and rhubarb
Fruit juices: Fruit juices from high-acid fruits
Jams and jellies: Jams, jellies, and marmalades
Pickles: Pickles and pickled beets
Salsas: Salsas made with vinegar, lemon juice, or lime juice
Tomatoes: Most tomatoes, but some may need to be acidified with lemon juice, vinegar, or citric acid to reach a pH of 4.6 or lower
Foods that are not safe for canning: include butter, milk, cheese, cream, yogurt, eggs, tofu, soy, and any recipes that use these ingredients.

The Water Bath Canning Process—You Can Do It!
1. Fill water bath canner at least half-full with water. Cover and maintain a simmer (180°F) until canning jars are filled and placed in canner.
2. Check canning lids, jars, and bands for proper functioning. Jars with nicks, cracks, uneven rims, or sharp edges may prevent mason jar sealing or cause jar breakage. The underside of lids should not have scratches or uneven or incomplete sealing compound as this may prevent sealing. Bands should fit on all jars for canning. Wash all in hot, soapy water and dry well.
3. Preheat your Ball® canning jars in hot (180°F) water. Keeping jars hot prevents them from breaking when filled with hot food. Leave lids and bands at room temperature for easy handling (see tip at bottom).
TIP: It is not necessary to purchase special cookware for water bath canning. A large, deep saucepot equipped with a lid and a rack works well. As long as it is large enough to fully immerse the jars in canning water by 1-2 inches—and allow the water to boil rapidly when covered—the pot is adequate. If you don’t have a rack designed for home preserving, use a cake cooling rack or extra bands tied together to cover the bottom of the pot.
4. Prepare the desired tested high-acid, preserving canning recipe. Browse our online recipe collection, The Ball Blue Book, or one of our other recipe books for ideas!
TIP: For the simplest recipes, use Ball® Food Products (recipes are included on packaging)!
Pickle mixes: Special spice blends for crunchier pickles. Available in Bread & Butter and Kosher Dill varieties.
Fiesta Salsa Mix: Add tomatoes and make it mild, medium, or hot.
RealFruit Pectins: For making homemade jams and jellies. Available in Classic, Liquid, Low or No-Sugar Needed and Instant No-Cook varieties.
5. Use a Jar Lifter to remove the pre-heated jar. Fill canning jar one at a time with prepared food using a Jar Funnel, leaving headspace recommended in recipe. Remove air bubbles, if stated in the recipe, by sliding the Bubble Remover & Headspace Tool or rubber spatula between the jar and food to release trapped air. Repeat around jar 2-3 times. For successful sealing, you need to leave the correct amount of space between the food and the rim of the jar.
6. Wipe the rim and threads of the jar using a clean, damp cloth to remove any food residue. Center lid on the jar, allowing sealing compound to contact the jar rim. Apply band and adjust until fit is fingertip-tight. Place jar in canner. Repeat steps 4 and 5 until all jars are filled. Ensure water covers jars by 1-2 inches.
7. Place lid on water bath canner and bring water to a rolling boil. Begin processing time.
8. Process in the boiling water for the time indicated in tested preserving recipe. When complete, shut off heat and remove the lid. Allow jars to rest in canner for 5 minutes to be acclimated to the outside temperature.
9. Move jars from canner and set upright on a towel. This will prevent jar breakage that can occur from temperature differences. Leave jars undisturbed for 12 to 24 hours. DO NOT tighten bands as this may interfere with the jar sealing process.
10. Inspect lids for seals. There should be no flex when center is pressed. Remove the bands and attempt to lift lids off with your fingertips. Properly sealed lids will remain attached. If a lid fails to seal within 24 hours, immediately refrigerate the product. Clean canning jars and lids, label and store in a cool, dry, dark place for up to for up 18 months when using SureTight Lids according to our instructions for Food Preservation.
TIP: Preheating Ball® lids is not advised. The sealing compound used for our home canning lids performs better at room temperature than it does pre-heated in simmering water (180°F). Simply wash lids in hot, soapy water, dry, and set aside until needed. Preheating can lead to less vacuum being achieved during water bath canning, and to buckle failures during pressure canning.

Farmer Cheese Pie

Yields: 2 pies

Ingredients:
2 homemade pie crust, rolled out to a circle, 10-inches in diameter, 1/8-inch in thickness
Or
2 Marie Callender’s Pastry Pie Shell, store-bought ready-made frozen pie crust shell, pan included.
2 (7.5-ounce) bars of Farmer cheese, room temperature
3 1/2 cups powdered sugar
1 teaspoon of Kosher salt
5 large eggs, room temperature
2 tablespoons pure vanilla extract
zest of 1 lemon
1 1/2 cups of heavy cream
all-purpose flour

Note: Transfer the store-bought ready-made pie shell to the refrigerator the day before you plan to blind bake (pre-bake) the pie crust.

Preheat oven to 375-degrees F.

Directions For Partial Blind Baking:
After allowing the pies shells to rest n the refrigerator for 1 hour, place a piece of parchment paper in the bottom of the pie crust, making sure to make the parchment flush with the crust. Add dried beans (or pie weights) to both pie shells. Push the beans towards the edges of both pies. Place on a rimmed baking sheet and bake for 20 to 25 minutes, or until the crimped edges are set but not browned.

Remove the pie shells from the oven. Next, carefully remove the parchment paper with the dried beans.

Note: DO NOT remove the silicone cover and or aluminum foil covering the edges while the pies are cooling.

Reduce oven temperature to 350-degrees F.

Directions For the Filling:
Using an electric mixer on low speed, mix the farmer cheese and powdered sugar together. Add the 5 eggs, one at a time, until they’re all combined. Add vanilla extract, Kosher salt, lemon zest, and heavy cream.
Evenly distribute the pie filling into each pie.

Place the pie’s, on a rimmed baking sheet, on the center rack and bake for another 35 to 40 minutes.

After the pie comes out of the oven, remove the silicone cover, and let cool for 30 minutes on a cooling rack. Dust the pies with some powdered sugar.  Farmer Cheese Pie is delicious at room temperature or chilled. Refrigerate the pies to store them.

Note: Times may vary depending on whether you’re baking in a glass or some type of metal pan. These vessels can affect the outcome of the pie.

*Dock: Pricking holes in the rolled-out pie dough allow the steam to escape while it’s baking. Without this, the steam would puff up in bubbles and pockets throughout the crust.
*Partial Blind Baking: Sometimes called pre-baking, is the process of baking a pie crust or other pastry without the filling.
*Fully Blind Baking: First, follow the steps above, in the section marked, directions for partial blind baking.
Next, cover the crimped edges, of the pie, with either a silicone cover or aluminum foil to prevent the edges from burning. Bake for an additional 15 to 20 minutes, or until the bottom crust is browned and cooked through. Fully Blind baking a pie crust is necessary when it will be filled with an unbaked filling (such as pudding or cream pies in which case the crust must be fully baked. Cool before filling.

Note: For best results, use the frozen pie dough or frozen pie crusts within 3 months. You can also refrigerate unbaked pie dough or unbaked pie crust for up to 3 days. Keep tightly covered with aluminum foil or plastic wrap.

Published
Categorized as Desserts

Good Sandwich Bread Farmers Table

Yields 2 loaves
Amanda Paladini- Welcome Grove Homestead, shared by Jess Sowards – The Farmer’s Table

Ingredients
6 1/2 to 8 1/2 cups unbleached all-purpose flour
2 1/2 teaspoons salt
1 1/2 tablespoons instant yeast
1/4 cup sugar or honey
2 3/4 cups very warm water
1/4 cup neutral-flavored oil
Directions
In the bowl of an electric stand mixer fitted with the dough hook (or in a large bowl, if making the dough by hand), combine THREE cups of the flour, salt, yeast and sugar.
Add the water and oil and mix.
Let the batter rest for 10 minutes. The yeast should be bubbly.
With the mixer running (or stirring by hand). gradually add another 3 to 4 cups of flour (I’ve had to add up to 5), until the dough comes together in a cohesive ball that clears the bottom and sides of the bowl.
Knead for about 2-4 minutes until the dough is smooth and supple.
Lightly grease a large bowl. Transfer the dough to the prepared bowl, cover with greased plastic wrap or a light kitchen towel, and let rise until doubled, about an hour or so, depending on the warmth of your kitchen.
Lightly punch down the dough and divide it into two equal pieces
Grease two 8 1/2-inch by 4 1/2-inch bread pans.
Press each piece of dough into a thick rectangle about 8-inches long; roll it up, pressing on the seams, and pinching the final seam together.
Place the dough loaves into the prepared pans.
Cover with lightly greased plastic wrap or thin kitchen towels and let rise until doubled and the dough has risen about 1-inch above the top rim of the pan, about an hour or so, depending on the warmth of your kitchen.
While the dough rises, preheat the oven to 350 degrees F.
Bake the bread for 30-32 minutes until golden and baked through.
Remove from the oven and turn the bread out onto a wire rack. Immediately brush the tops of the loaves with melted butter (or use a stick of butter, peeling the paper back and rubbing it on the top of the hot bread).
Let the bread cool completely.
The bread can be stored at room temperature, covered in a bread bag, for a couple days, or frozen for up to a month or so.

Published
Categorized as Breads

Simple Southern Biscuits Farmers Table


by Jess Sowards- The Farmer’s Table

8 Biscuits (fills on 12 inch cast iron pan)

Ingredients
2 ½ C. All-Purpose Flour
2 Tablespoons Baking Powder
1 teaspoon salt
½ C. (1 Stick) Butter, cubed and cold
1 C. + 2T. Buttermilk (OR 1 C. + 1T. milk with 1T lemon juice added)
2 T. Butter, melted, to pour over top before baking
Directions
Preheat oven to 425°. Grease pan (I use a 12 inch cast iron pan)

Mix dry ingredients (flour, baking powder and salt) in medium mixing bowl.

Cut butter into dry mix until crumbly.

Mix buttermilk into crumbly mixture, mixing until incorporated.

Flour work surface and turn the dough out. Press until ¾ inch thick rectangle.
Fold the dough onto inself and press back to ¾ inch thick rectangle. Repeat this step again.

Cut into 3 inch biscuits with cutter or mason jar lid.

Place biscuits close together in pan.

Drizzle melted butter on top of biscuits.

Bake for 18-20 minutes until golden on top.

Enjoy!

Published
Categorized as Breads

Farmer Cheese

Farmer's cheese on a black plate

Farmer Cheese

Servings:16 servings
Ingredients:
1 gallon whole milk
1/2 cup vinegar or lemon
2 teaspoons kosher salt
6 tablespoons finely chopped fresh dill, chives or ground herbs of your choice

Directions:
1 gallon milk in large pan and slowly heat until 190 degrees. The top will be a fine foam of bubbles. Stir occasionally while heating. Remove from heat

Slowly add 1/2 Cup vinegar or lemon juice, and stir the milk. Curds will immediately begin to form.

Let the milk sit for 15 minutes without stirring.

After 15 minutes, add the herbs, if using.
6tablespoons finely chopped fresh dill, chives or ground herbs of your choice
Optional:
1 -1/2 teaspoon Citric acid can replace vinegar or lemon

Place a colander over a large bowl or pot. Drape either a dampened cheesecloth or thin dampened clean dish towel over the colander. Pour the curds into the cheesecloth. The whey, all the liquid in the mixture, will drain and be collected in the bowl below, while the solid curds will be caught in the cheesecloth.

Lift the cheesecloth and wrap it around the curds, twisting and squeezing to remove as much moisture as possible.

After squeezing out the moisture, the curds for farmer cheese will be dry and crumbly. If you want a creamier texture, mix a little of the reserved whey back into the curds.

Add 2 teaspoon kosher salt and stir it together.

To shape the cheese, keep it wrapped in cheesecloth and form it into a mound on a plate. Set another plate on top and press the curds into a flat disc that is 1 to 2 inches tall. Cover and refrigerate for 1 hour or so before removing the cheesecloth.

To make a ball, tie the cheesecloth with a length of butcher’s twine, attach it to a shelf in the refrigerator or a wooden spoon, and suspend it over a bowl. Gravity will help shape the cheese into a ball and remove any excess moisture.

How to Store
Farmer cheese will keep for up to a week in the refrigerator when stored in an airtight container.
You can freeze farmer cheese; wrap in plastic wrap and place in a zip-top freezer bag. Upon thawing it, however, the texture will be a bit crumblier.
If saving the whey, store it in a sealed container in the refrigerator for up to one week.

Corn Casserole – Preppy Kitchen

Notes
Use room temperature ingredients. Let the eggs and sour cream come to room temperature before you start this dish. Eggs will take 30 minutes to 1 hour to reach room temperature, and sour cream takes about an hour. Cold ingredients are harder to incorporate and might not yield a creamy batter.
Jazz up the flavor. Sauté 1 diced yellow onion, 2 minced garlic cloves, and 2 tablespoons of chopped fresh thyme leaves in the butter. Whisk together the sour cream and eggs, then stir in the onion mixture and corn along with the remaining ingredients.
Add sugar. While I prefer this easy casserole on the more savory side, you can add 2 tablespoons of granulated sugar to the sour cream and egg mixture for more sweetness. (Add it along with the corn.)
Add cheese. For extra creaminess and comfort, add 1 cup of shredded cheese like gruyere, Swiss, or cheddar cheese into the batter before pouring it into the pan. Buy a block of cheese and shred it at home. Pre-shredded cheese has additives to prevent clumping, and it therefore doesn’t melt very well.

Servings8 servings
AuthorJohn Kanell

Equipment
8×8” casserole dish

Ingredients
1 (8-ounce) box cornbread mix (like Jiffy Corn Muffin Mix)
1 (15-ounce) can whole kernel corn drained
1 (15-ounce) can creamed corn
2 large eggs
1 cup sour cream (120g)
½ cup unsalted butter melted
Salt and pepper to taste

Instructions
Preheat the oven to 350°F. Lightly grease an 8×8-inch baking dish.
In a large mixing bowl, combine the sour cream, egg, and melted butter, and whisk until well combined. Add the corn, creamed corn, cornbread mix, ¼ teaspoon of salt, and black pepper to taste. (Use more or less salt to taste depending on the salt levels in your canned corn.) Stir together until well combined and pour into the prepared casserole dish.

Bake for 40 to 45 minutes or until the top and edges are golden brown, and the center is only slightly jiggly when gently shaken. Let cool for a few minutes before serving warm.

Nutrition
Calories: 373kcal | Carbohydrates: 38g | Protein: 6g | Fat: 23g | Saturated Fat: 12g | Polyunsaturated Fat: 2g | Monounsaturated Fat: 7g | Trans Fat: 0.5g | Cholesterol: 95mg | Sodium: 485mg | Potassium: 222mg | Fiber: 2g | Sugar: 9g | Vitamin A: 673IU | Vitamin C: 3mg | Calcium: 58mg | Iron: 1mg

Hashbrown Casserole

Servings12 servings
Author: John Kanell – Preppy Kitchen
Notes
For an extra crunchy texture, you can add some panko breadcrumbs, cornflakes, or crushed Ritz crackers tossed in melted butter over the cheese. However, you’ll have to cover the baking dish with foil until the last 5 to 10 minutes to ensure the crunchy toppings don’t burn.

You can use frozen cubed hashbrowns if you can’t find shredded hashbrowns.

If you’re not a fan of cheddar cheese, you can use any type of melty cheese in its place, such as mozzarella, Monterey Jack, pepper jack, Gruyere, and provolone.
You can add some meat to this hashbrown casserole, such as shredded chicken, cubed ham, or crumbled bacon bits.Add some heat to this old-fashioned hashbrown casserole by adding some diced jalapeños.
Equipment
9×13″ casserole dish
Ingredients
½ cup unsalted butter melted (113g)
2 cups sour cream (480g)
1 (10.5-ounce/298g) can cream of chicken soup
3 cups shredded cheddar cheese divided (12 ounces/338g)
1 small onion finely chopped
1 teaspoon kosher salt
1 teaspoon ground black pepper
1 (30-ounce/850g) bag frozen shredded hash brown potatoes
Instructions
Preheat the oven to 350°F. Pour the melted butter into a 9×13-inch baking dish and swirl to coat.
In a large mixing bowl, stir together the sour cream, cream of chicken soup, 2 cups of shredded cheddar, onion, salt, and pepper. Fold in potatoes until well coated.
Spoon the mixture into the prepared baking dish and sprinkle with the remaining cup of cheddar cheese.
Bake for 45 to 50 minutes or until the casserole is bubbling and beginning to brown at the corners. Let cool for 15 minutes before serving.

Nutrition
Calories: 342kcal | Carbohydrates: 17g | Protein: 10g | Fat: 27g | Saturated Fat: 15g | Polyunsaturated Fat: 1g | Monounsaturated Fat: 6g | Trans Fat: 0.3g | Cholesterol: 73mg | Sodium: 581mg | Potassium: 297mg | Fiber: 1g | Sugar: 2g | Vitamin A: 804IU | Vitamin C: 7mg | Calcium: 253mg | Iron: 1mg

White Bread From Preppy Kitchen

Notes
Do not use hot melted butter. Melt the butter, then let it cool slightly, about 10 minutes. When added to the yeast mixture, it should be less than 105°F, or it could kill the yeast. I like to melt the butter first, then measure out all of my ingredients and bloom the yeast so it cools during that time.
For a softer loaf: You can replace up to 1 cup of water with warm milk.
Sugar swap: You can use honey in place of the granulated sugar to feed the yeast.
To make 1 loaf: You can halve the recipe to make one loaf instead of two.

Cook Time30minutes minutes
Rise Time1hour hour 10minutes minutes
Servings2 loaves
Author: John Kanell – Preppy Kitchen
Equipment
2 9-inch loaf pans
Ingredients
2 cups warm water (105 to 110°F) (480ml)
2 tablespoons granulated sugar
2 (0.25-ounce/7g) packets active dry yeast
6 cups all-purpose flour (720g)
4 tablespoons unsalted butter melted (56g)
2 teaspoons salt
Instructions
In the bowl of a stand mixer fitted with the dough hook attachment, stir together the warm water, sugar, and yeast until combined. Let it stand for 5 minutes, or until very foamy.
To the same bowl with the yeast mixture, add the flour, butter and salt. Mix on low speed for 1 minute or until the dough comes together in a shaggy ball and pulls away from the sides of the bowl. (If any small bits of dough remain on the sides of the bowl, stop the mixer and scrape them into the dough ball.)
Increase the mixer speed to medium-low and continue to knead for 5 to 7 minutes, until the dough is smooth and springs back quickly when pressed with a finger. The dough should feel moist, but not sticky.
Place the dough in a lightly greased bowl. Flip the dough over once so that the top is also greased. Cover it with plastic wrap and let it rise in a warm, draft-free spot (75°F) for 40 to 50 minutes, until the dough is nearly doubled in size and springs back slowly when pressed with a wet fingertip.
Meanwhile, grease two 9×5-inch loaf pans with butter or baking spray.
Punch down the dough and turn it onto a very lightly floured surface. Divide it into 2 equal pieces (630g each).
Form each piece into an 8×12-inch rectangle. Starting with a short end, roll each piece into a tight, log shape. Pinch the seams along the sides tightly together and gently tuck them under the loaf. Use a bench scraper to pick up the loaves and place them seam side down into the prepared loaf pans. Loosely cover both pans with plastic wrap sprayed with nonstick spray and let them rise again for 25 to 35 minutes, or until the height of the dough rises just above the top rim of the pan.
While the dough is rising in the pans, preheat the oven to 350°F. Once the loaves have finished their second rise, brush the top of each loaf with additional melted butter if desired.
Bake for 30 – 35 minutes until the tops are golden brown. Let them cool for a few minutes in the pan, then tip them onto a wire cooling rack to cool completely.
Nutrition
Calories: 1635kcal | Carbohydrates: 301g | Protein: 42g | Fat: 27g | Saturated Fat: 15g | Polyunsaturated Fat: 2g | Monounsaturated Fat: 7g | Trans Fat: 1g | Cholesterol: 60mg | Sodium: 2352mg | Potassium: 476mg | Fiber: 12g | Sugar: 13g | Vitamin A: 700IU | Vitamin C: 0.02mg | Calcium: 74mg | Iron: 18mg

Published
Categorized as Breads

How to make Basic herbal salve

Pro tip: The consistency of salves can easily be adjusted depending on your preferences. Use less beeswax for a softer salve and more beeswax if you’d like a firmer salve.

You can test the consistency by placing a spoon in the freezer before making your salve. When the beeswax melts, pour a little salve onto one of the cold spoons and place it back into the freezer for 1 to 2 minutes. This will simulate what the final consistency will be like.

Once cooled, you can make adjustments by adding more oil (for a softer salve) or more beeswax (for a firmer salve).

First make Make an infused oil
You can use a 1:2 ratio of dried herbs to olive oil, and simmer the mixture for an hour. You can also use a double boiler to gently heat the oil and beeswax together until the beeswax melts.

Basic Salve 1 Makes 5 ounces.

Ingredients
1 oz. beeswax (use carnauba wax for a vegan salve)
4 oz. herbal infused oil(s) of your choice (choose one or a combination)
10-20 drops essential oil of choice (optional)

Directions
Wrap beeswax bar in an old towel. On a sturdy surface, use a hammer to break bar up into small chunks.
Place beeswax in a double boiler and gently warm over low heat until the beeswax melts.
Add herbal oils and stir over low heat until well-mixed.
Remove from heat and add the essential oil(s).
Quickly pour warm mixture into prepared tins, glass jars, or lip balm tubes and allow to cool completely.
Store in a cool location for 1 to 3 years.

Salve 2 Makes approximately 9 ounces.
8 oz. infused herbal oil
1 oz. beeswax, either grated or pellets
a double boiler

Directions:
Warm oil in double boiler. Add beeswax and stir until melted. Test the consistency of your salve by dipping a clean spoon into the mixture, and putting it in the freezer for a few minutes. If it’s softer than you’d like, add more beeswax.

Pour the still-warm salve into containers (old jam jars or small metal tins work well). If adding essential oils, do so now (only a few drops are need) and stir with a chopstick or other clean implement.
Put the cap on the containers, and store in a dark, cool place. Salves will last up to a year.

Storing Herbs and Herbal Preparations for Freshness and Longevity

Dried leaves and flowers will typically last one to two years, and roots can last two to three years. If you store dried herbs correctly, you’ll find the following to be a useful guideline:
Dried leaves and flowers have a shelf life of 1-2 years
Roots, seeds, and barks can last 2-3 years
Use your senses—smell, sight, and taste—to determine the vitality of stored herbs. If an herb looks vibrant and has retained most of its flavor and/or aroma, it’s still good medicine!

Storing Herbal Tinctures
Properly stored tinctures—prepared with high-percentage alcohol (50% or higher)—can last for years, even decades. We store our tinctures (and syrups, vinegars, oxymels, infused oils, and simple syrups) in amber glass dispensing bottles with polyseal caps. These bottles have several helpful attributes:
The brown glass excludes light, which can degrade medicine over time.
The inside of the polyseal cap is resistant to solvents, as it is manufactured for chemical storage. While I don’t like that the inside of the cap is plastic, I haven’t yet found a better system.
The bottles are a small investment, but they are washable and reusable—I have dozens that have been with me for over a decade.
As an alternative, people often store their medicine in glass canning jars. If you go this route, be aware that alcohol and vinegar will corrode canning lids over time, contaminating the medicine with plastic compounds. To prevent this, use natural waxed paper as a barrier on the inside of the lid.
Finally, make sure to store your alcohol-based tinctures some distance from the stove and potential kitchen fires as they are very flammable.
Storing Herbal-Infused Oils and Salves
Herbal-infused oils and salves will typically last two to three years when refrigerated and one year unrefrigerated, depending on the stability of the oil used. Using dried herbs will greatly increase the shelf life of your herbal-infused oils.

Storing Powdered Herbs and Capsules
Herbal powders have a shorter shelf life than cut and sifted herbs (loose teas and bulk herbs) because the plant material is ground to such a fine consistency. Use powdered herbs within 6-12 months, storing them in the refrigerator or freezer for maximum freshness.

Healing Herbal Lip Balm

This nourishing lip salve is infused with healing herbs for chapped, hurting lips. Great for all ages and guys too!
Yield: 4 ounces Author: Katie Wells
Equipment
Small tins (or lip balm tubes)
Double boiler OR glass bowl and pot
Materials
½ cup olive oil (or sweet almond oil)
½ tsp echinacea
½ tsp comfrey leaf
1 tsp plantain leaf (herb-not the fruit!)
1 tsp calendula flowers
½ tsp yarrow flowers
½ tsp rosemary leaf
¼ cup beeswax pastilles
10 drops vitamin E oil (optional)
5-10 drops essential oil (optional)
Instructions
Infuse the herbs into the liquid oil. See above for more details.
Heat 1/4 cup of the infused oil in a double boiler with the beeswax until melted and mixed. Save the extra oil for use on wounds/cuts or another batch of lip salve.
Remove from heat and stir in the essential oil and vitamin E oil (if using).
Pour into small tins, glass jars, or lip balm tubes and use on dry or chapped lips.
Notes
Store in a cool, dry place and use clean hands to apply.
This will last for about 6 months if stored properly (a little longer if you use the vitamin E oil).

Homemade Lip Balm

Easily make and customize your own homemade chapstick with all natural ingredients.
Yield:  lip balm tubes
Author: Katie Wells

Materials

Instructions

  • Add a few inches of water to the bottom of a small pan and heat over medium heat.
  • Place a small heat-safe jar (pint size or smaller) in the water, being careful not to get any water inside the jar. You can also use a double boiler or a glass bowl perched on top of a small pot of water.
  • Add the cocoa butter, coconut oil, and one tablespoon beeswax to the jar and slowly melt, stirring occasionally. Make sure not to get any water in the jar.
  • When all the ingredients are melted, stir well and turn off the heat. Leave jar in the water to keep warm.
  • Stir in the essential oils.
  • Use a glass dropper to quickly fill the lip balm containers, like tubes or lip balm tins.
  • The mixture will settle slightly as it cools, so I top off the containers after about 2 minutes as they start to harden.
  • Let sit without touching for several hours or until completely hardened.

Notes

  • Shelf life and Storage: Keep in a cool, dry place for up about 2 years. The optional vitamin E oil helps extend the shelf life even further.
  • This will make a medium firm lip balm. If you prefer a firmer version, you can add more beeswax, up to double the recommended amount. If you prefer a smoother and more oily lip balm, you can reduce the amount of beeswax.

Chia Seeds

Chia seeds are a good source of fiber and omega-3 fatty acids. They may help improve digestion and reduce irritable bowel syndrome (IBS) symptoms, such as constipation.

Chia Seed Nutrition Facts:The following nutrition information is provided by the USDA for 1 ounce (28g) of dry chia seeds. There are 2 tablespoons in 1 dry ounce of seeds.
chia seeds, dried: Calories: 138  Fat: 8.7g odium: 5mg  Carbohydrates: 12g  Fiber: 9.8g  Sugars: 0g  Protein: 4.7g

Improve gut health:
A healthy gut has a balance of “good” and “bad” bacteria. An imbalance of gut bacteria, can lead to inflammation and other problems. Chia seeds are good for gut health because they contain fiber and omega-3 fatty acids. These nutrients can increase the number of good bacteria, reduce the number of bad bacteria, and improve the gut lining. This prevents harmful bacteria from entering the body.

Prevents constipation
Chia seeds are a great source of dietary fiber, which can help regulate bowel movements and prevent constipation in people with IBS-C.

According to the United States Department of Agriculture (USDA) Nutrient Database, a 28 gram (g) [1 ounce (oz)] or 2 1/2 tablespoon (tbsp) serving of chia seeds contains 11.2 g of fiber. The USDA recommends a dietary fiber intake of 14 g per 1,000 calories of food. Since chia seeds have such a high fiber content, they likely speed up intestinal transit and help people manage constipation. There are 2 tablespoons in 1 dry ounce. 

How to use chia seeds
Sprinkling: Sprinkle chia seeds onto cereals, yogurt, salads, or smoothies for added texture and nutrition.
Mixing: Mix chia seeds with water or liquids to create a thickener for jams, sauces, and dressings.
Baking: Add chia seeds to muffin or bread mixtures for an extra fiber boost.
Egg substitute: Combine 1 tbsp of ground chia seeds with 4 tbsp of warm water as a quick egg substitute.
Chia pudding: Mix 2 tbsp of chia seeds with 1/2 cup of milk or a plant-based alternative and let it sit overnight in the fridge.

Raw: Chia seeds in raw form have a mild flavor often described as earthy, and they offer a delicious crunch, adding a delightful texture to meals. Its subtle raw taste allows it to be easily infused into different recipes without overwhelming other flavors. Their neutral flavor profile also allows people to add them on top of yogurt and smoothies or use them as a topping for salads.
When Soaked: When soaked in water, chia seeds develop a gel-like consistency and texture with an almost flavorless taste. This neutrality in taste makes it easier to be incorporated into different dishes without altering their overall flavor. One of the benefits of chia seeds in water is that this process unlocks the high fiber and omega-3 content, which helps promote digestive health.
Thus, you can enjoy their versatile nature by infusing chia seeds into sweet and savory dishes.
When Cooked: When chia seeds are cooked, their taste profile changes into a toasted flavor. The reason is that cooking softens the seeds and promotes their nutty essence. Cooked chia seeds infuse a delightful depth to dishes, with a slight earthy and nutty taste that enhances the overall flavor profile. Depending on the ingredients they are combined with, chia seeds can absorb and complement other flavors in the dish. Their versatile nature makes them perfect for different recipes, whether baked goods or stovetop dishes. Overall, cooked chia seeds provide a satisfying taste experience compared to their soaked or raw form.
When Ground: Ground chia seeds have a nutty flavor that is intensified compared to their whole seeds form. The grinding process releases their natural oils, which improves their taste profile. Thus, grounded chia seeds contribute delicious richness to dishes, resembling the essence of seeds and nuts. With their robust taste, ground chia seeds provide a unique and satisfying culinary experience, allowing you to infuse their nutritional benefits into dishes while amplifying the overall flavor of your recipes.
Is it possible to have too many chia seeds?

While chia seeds are safe for most people, eating too many may cause side effects. Excessive fiber intake may lead to digestive issues, such as abdominal cramps or flatulence, particularly for people not used to eating fiber-rich foods. Excessive fiber intake may also impair how the body absorbs essential minerals from foods such as zinc, iron, and calcium.

Some people may be allergic to chia seeds, but this is rare.

Making Yarrow Herbal Remedies

Due to its styptic and antimicrobial properties, it is famously known for its ability to stop bleeding (when applied directly to a wound), prevent infection, and aid blood circulation when taken internally.

Women who are pregnant should not consume yarrow internally because it can cause bleeding. Consult a clinical herbalist or medical professional before ingesting.  Yarrow is a member of the Asteraceae (daisy) family so those with allergies to aster flowers should avoid ingesting and may also experience an allergic reaction to a topical application.

It is often used as a poultice, wash, soak, or salve to relieve pain, and help to heal wounds and injuries of various types.
It can be beneficial in alleviating digestive complaints and symptoms of colds and flu, and is also used to treat hemorrhoids, ease menstrual discomfort and postpartum bleeding, and reduce inflammation in the gums.
The next time you have a toothache, try chewing on a yarrow leaf. Its analgesic properties can help to numb the affected area.
Making Yarrow Herbal Remedies at Home
Harvest flower clusters when plants are in full bloom, cutting the top third of the plant just above a leaf node.
Leaves and flowers can be steeped in boiling water to make tea, and are best used fresh when applied as poultices for treating minor wounds.

You can dry foliage and flowers using a dehydrator, spread or hang them to air dry, or place them in the oven on the “warm” setting. Once they are thoroughly dried, it is easy to strip the leaves and flowers off the stems.
Both the dried leaves and the flowers can be consumed internally as a tea, preserved in tinctures, or infused into oils to make salves and creams.
Yarrow tea has a sweet and mildly bitter, aromatic flavor. It makes a wonderful addition to the herbal medicine cabinet to alleviate mild symptoms of colds and flu, as well as minor digestive complaints.
Infused Oil
Making an infused oil with yarrow is easy, and this serves as a useful treatment for wounds, inflamed muscles, and bruises. Its anti-inflammatory and astringent properties may help to reduce varicose vein swelling in some cases.
Just grind up some dried leaves and flowers, place them in a glass jar, and cover with a carrier oil in a 1:4 ratio, with one part dried plant matter and four parts oil.
I recommend using cold-pressed extra virgin olive oil as it is affordable and easy to find, but you can use any kind of high-quality neutral carrier oil that you prefer.
Seal the jar tightly with a lid and set it in a dark place for a few weeks, shaking daily to agitate the mixture.
You can also choose to leave the jar in the sun to heat infuse for the first few days. Be sure to move it to a cool, dark location for the remainder of the infusing time.
After 4-6 weeks, strain the oil and use it as is, or try melting in some beeswax and essential oils to make an herbal salve. This can be stored in tins or jars in a cool, dark place.
Tincture
You can also make a tincture from the dried leaves and flowers. As described above, grind them up, place them in a glass jar, and cover with 80 proof (or higher) alcohol.
Leave it to infuse for 6-8 weeks in a cool, dark place.
Strain, and place in a labeled dropper bottle. The tincture can be used as a mosquito repellent when applied to the skin, but always make sure you test it on a small area first, especially if you have sensitive skin.

First Aid Yarrow Salve:A natural remedy for stings, rashes, minor cuts, burns, and abrasions

Infusion Time: 48 hours or 4-6 weeks

Herbal Prep Time: 5 minutes

Cook Time: 5 minutes

Makes about 12 oz.

 *The quantity this recipe produces makes it a great product to keep in a jar for home first aid kits, and/or to give to friends and family.  Use within 6-8 months.

Ingredients:

1 1/2 to 2 cups fresh yarrow leaves and white flowers

1 1/4 to 1 1/2 cups jojoba oil (or any other neutral oil)

1 ounce beeswax (the more wax the more firm the salve)

Double boiler (or saucepan and heatproof bowl)

Salve tins (or small resealable jars)

FOLK INFUSION METHOD
  1. Gather yarrow from a clean area that hasn’t been sprayed with chemicals. Double-check that you have identified the yarrow properly before beginning this project.

  2. Roughly chop the yarrow, filling a pint mason jar almost to the top with leaves.

  3. Pour oil (jojoba, grape seed, or olive oil) over the yarrow leaves, then cover with the lid.

  4. Place the jar in a sunny window for 4-6 weeks. Every few days shake up the jar. If you are using the rapid infusion method, then skip this step and instead follow the set of instructions listed below before resuming with step 5 here.

  5. When the oil is completely infused, strain out the yarrow leaves. It should be a bright or deep green color.

  6. Pour the infused yarrow oil into a heatproof bowl, place the bowl over a pot of gently simmering water, creating a double boiler.

  7. Stir in the beeswax and let it slowly melt into the oil. Test the firmness of the salve by spooning out a small amount then placing the metal spoon in the freezer for 30 seconds. Then, take out the spoon and touch the salve. If you want it more firm, add more beeswax. Keep doing this until you reach your desired consistency.

  8. Remove from heat once the beeswax is completely incorporated.

  9. Carefully pour the oil and beeswax combination into the salve tins or a wide mouth jar. If you’d like to add 1-2 drops of essential oil into each tin, now is the time. It’s an optional step that can add fragrance.

  10. Cover the tins with their lids and let the salve set completely before using; around 30-45 minutes.

Rapid Infusion Method

This method allows an infusion to occur within 1-2 days as opposed to 6 weeks. This is a great option if you have the equipment and you’re short on time. Between step 3 and step 5 listed above, follow these instructions:

  • Fill a saucepan or slow cooker with 1 inch of water. Carefully place the yarrow-and oil-filled jar on a trivet in a double boiler or in the slow cooker.

  • Slowly heat the water until it reaches 110 to 120 degrees. Turn off the heat.

  • Keep the contents of the jar incubating in the warm water. Bring the water back up to temperature periodically over the next 24 to 48 hours, never leaving the heat on for any prolonged amount of time and never allowing the water line to evaporate to less than 1/2-1 inch.

A Note of Caution:
This plant is generally recognized as safe for use, though in rare cases yarrow may cause an allergic reaction. It should not be used if you are sensitive to plants in the aster (Asteraceae) family. It should also be used with caution during pregnancy or if you are taking any prescription medication. Always remember to consult your doctor or healthcare practitioner before using any herbal remedy.
According to the ASPCA, yarrow is toxic to dogs, cats, and horses.

Some gardeners also use yarrow instead of comfrey to make a tea fertilizer to apply as a soil conditioner. Because it is drought tolerant and can grow in poor, dry soils, it is also useful for combating erosion.

Monarch or Black Swallowtail Caterpillar

People often confuse the Black Swallowtail caterpillar with Monarch caterpillars, especially when they look the most similar. There are some main differences to look out for.

The Black Swallowtail caterpillars have thicker, green stripes and yellow, wavy “dots”. They also don’t have the long tentacles on their head and tail end like Monarch caterpillars do.

The most telltale sign is that Monarch will be eating on Milkweed while Eastern Swallowtails will be nibbling on plants of the Carrot family (dill, fennel, rue, Queen Anne’s lace, celery, parsley etc.)

Host Plants of the Eastern Black Swallowtail
Adult Eastern Black Swallowtails will lay eggs on plants in the Carrot family. You may find the caterpillars eating on these plants in great numbers but don’t be alarmed! There are several ways to keep the caterpillars happy while also saving some of the plant for yourself!

How to keep the caterpillars happy and not lose all of your plants or resort to using pesticides!
1. Plant extra dill or fennel so that there is enough for them and you to eat.
2. Pick the caterpillars off of the plant and put them into a butterfly enclosure with the host plant to watch them pupate and eclose into a beautiful butterfly.
3. Successional planting of dill/fennel/parsley etc. throughout the summer so there is always enough to go around.
Lifecycle of the Black Swallowtail
Similar to the Monarch butterfly: The female butterfly lays one yellow egg at a time on a host plant. After 4-9 days, a caterpillar (larva) hatches from the egg. Over 10-30 days, the caterpillar grows through 5 different stages (called instars) to a length of 2 inches.

Published
Categorized as Garden

Winter and Summer Herbs In Tucson AZ.

https://growinginthegarden.com/arizona-vegetable-planting-guide-a-visual-guide-for-low-desert-vegetables-2/

From roughly October through May in Tucson, herbs that don’t tolerate high temperatures grow well. These include things like cilantro, parsley, dill, and caraway. When temperatures creep up, these herbs bolt, which means that they flower and then die. To keep these plants going next season, remove the winter herbs in May and save their seeds. Replace them with herbs that can tolerate the Tucson summer heat. Herbs that grow well in the heat include basil, lemon balm, lemon verbena, oregano, mint, and garlic chives. Mexican mint marigold—also referred to as Texas tarragon and winter tarragon—is a heat-loving version of tarragon that is well suited to Tucson’s summer climate.

Landscaping Herbs

Herbs that can grow year-round in Tucson are easily integrated into landscaping. A popular example of this is rosemary, which many people in the region use for groundcover in their landscaping. Germander (Teucrium chamaedrys) is another popular choice for this purpose, as is lavender.

If you opt for lavender, stay away from English varieties and look for French (photo at left) or Spanish lavender (lavender pink), which will be better suited to the climate in Tucson. Some summer herbs, such as lemon verbena and lemon grass, can be used for landscaping as well, if they are planted in protected areas and covered in the case of frost.

Arizona has two planting seasons—a cool season (September through mid-November) and a warm season (mid-February through March).

Cool-season annuals include cilantro (coriander), dill, German chamomile and garlic and; while basil, epazote and summer savory are warm-season annuals. Sep 21, 2021

You can grow a respectable herbal apothecary in pots. In fact, some of the most beneficial medicinal herbs will positively thrive in containers placed right on your porch or patio.

      • Bee Balm:
        Grows best from seed or transplant.
    • Plant bee balm in Arizona: February – March
      Harvest leaves anytime.Good to know: Needs frequent water and afternoon shade. Attracts beneficial insects and pollinators. Considered a perennial flower, but often grown as an annual in the low desert of Arizona. Plant near tomatoes to improve flavor and growth.

      Anise:

      Grows best from seed
      Plant in  February – April and October – November
      Harvest seeds by clipping entire head and storing in paper bag until dry.
      Annual. Anise grows about 2 feet tall.

      Bay:

    • Grows best from cutting or transplant

Plant bay in Late February – April

Harvest dark leaves anytime. Use within 3-4 months for best flavor. Perennial. New plantings are frost-tender.

Borage:
grows best from seed

When to plant : October – January

Harvest young stems for best flavor. Pick flowers and use fresh, frozen, or dried.

Cool-season annual. Self-seeds readily. Attracts pollinators. Plant with squashstrawberries, and tomatoes.

Calendula:

Grows best from seed or transplant

When to plant calendula in Arizona: Late September – November

Harvest flowers regularly when young and fresh.

Good to know: Cool-season annual. Edible, and medicinal uses. Reseeds easily. Early bloomer. Often grown as a trap crop for aphids. Keep deadheaded to encourage blooms.

Chamomile:

Grows best from seed or transplant; reseeds readily

Plant chamomile in Arizona: October – March

Harvest chamomile when the petals are flat or beginning to fall back from bud. Air-dry or dry in a dehydrator.

Cool-season annual. Grows best in cooler weather. Improves the flavor of cabbage and onions.

Chives:

Grows best from seed or division

When to plant chives in Arizona: October – April

Harvest by cutting leaves at the base.

Low-growing perennial; beautiful when flowering. Divide plants in the fall or early spring. Improves the growth and flavor of carrots.

Dill:

Grows best from seed; handle transplants carefully; reseeds readily

When to plant dil in Arizona: October – January

Use leaves fresh or dried. Let seed ripen on plant before harvesting. Bouquet dill has large seed heads. Fern-leaf dill has large plants for using fresh leaves.

Cool-season annual. Attracts swallowtail caterpillars. Trap crop for aphids; can attract ladybugs.

Ginger:

Grows best from rhizomes

When to plant ginger in Arizona: March

Harvest ginger about 10 months after planting by carefully digging out rhizomes.

Ginger needs a long warm growing season to grow well. Provide shade to protect leaves from sunburn. Harvest when leaves turn yellow and die back.

Lemon Grass:

  • Grows best from division or transplant
  • When to plant lemon grass in Arizona: February – April
  • Harvest the fresh leaves and stems of single stalks as needed.
  • Perennial. Grows well year-round in the low desert of Arizona.
  • Nasturtium:

    Grows best from seedWhen to plant nasturtiums in Arizona: October – JanuaryHarvest leaves and flowers just before using. Harvest seed pods just before they turn from green to brown. Cool-season annual. Overly rich soil results in fewer blooms. Reseeds readily.

  • Rosemary:

    Grows best from cutting or transplant.

  • When to plant rosemary in Arizona: October – January
  • Harvest stems as needed anytime. Best flavor is just before flowers appear. Drought-tolerant perennial. Takes full sun but needs well-drained soil. Cutting back by more than 1/3 can shock plant. Grows up to 6 feet tall. Good companion plant to cabbage, beans, carrots, and sage. Deters cabbage moths, bean beetles, and carrot flies.

Turmeric:

Grows from rhizomes

  • When to plant turmeric in Arizona: March
  • Harvest turmeric about 10 months after planting by carefully digging out rhizomes.
  •  Prefers shade when grown in Arizona. Keep an eye on moisture levels. Can rot if too wet, but needs regular water and feeding to grow well.
Published
Categorized as Garden

Growing Herbs

What to Consider When Choosing the Best Soil for Herbs
Growing herbs, either in a garden patch or on a sunny windowsill, is a rewarding experience that’s even more gratifying when the fresh, tasty results jazz up a dinner recipe. Before planting and choosing the best soil for plants, consider where the garden will be located and the fertilizer, pH level, nutrients, and water needs of the desired herbs.
Location
Herbs that grow in an outdoor garden have different requirements than indoor or container plants. For outdoor success, opt for garden soil, which is formulated for in-ground plants. Garden soil, which is heavy and dense, can become too compacted in a container, reducing its ability to drain and negatively impacting roots.
For indoor and container gardens, potting soil or potting mix is preferable. Though these terms are often used interchangeably, they are technically different products. Potting soil, as the name implies, contains soil (either partially or completely). Potting mix, however, does not contain any actual soil and instead consists of a range of natural ingredients to create a light and well-draining texture. Potting mix tends to be the best choice for container herb gardening because, in addition to draining well, it is sterile and often includes added nutrients.
Fertilizer and Other Ingredients
Soils and potting mixes are scientifically formulated to include ingredients that can help plants thrive. Fertilizer can be chemical or organic material that adds nutrients, and while exact fertilizing needs depend on the particular plant and growing conditions, most herbs can benefit from a blend of nitrogen, phosphorus, and potassium. The rule of thumb is to only fertilize as much as needed; overdoing it can cause some herbs to grow too fast, which risks losing flavor.
For outdoor herbs, a soil test can determine what nutrients may be lacking so the gardener can fertilize accordingly. Container herbs may require more frequent fertilizing because pots hold small amounts of growing medium, and plants can use up nutrients as water leaches them away. Using a potting mix with fertilizing ingredients, then adding a fertilizer later (as needed), can help optimize plant health.
Potting mixes, which are soilless, contain various ingredients—such as coconut coir, peat moss, and perlite—to create and maintain their fluffy, well-draining texture. Garden soil and some potting soils often contain organic ingredients like compost and manure to boost soil health.

Herbs like mint and oregano are voracious growers and get down right aggressive (even invasion) in a garden. To keep the rest of your garden plot safe, consider growing these herbs in pots and burying them in the ground. The added measure of control a pot puts on the roots of these herbs can keep them from moving in to the rest of your garden and prompting taking over. Of course the surest way to protect your garden from this threat is to grow them in pots grown above ground.

Potting soil or topsoil, compost, and sand
A sandy-loam is the best soil for growing the largest range of herbs as it is rarely waterlogged in winter, is dry in summer and it is naturally high in nutrients. Sandy soils are light, dry, warm, low in nutrients and often acidic. This soil feels rough and gritty when handled and are easy to cultivate and work.
pH Level
While most herbs prefer slightly acidic to neutral soil with a pH between 6.0 and 7.0, some common species deviate slightly from this scale. Rosemary, for example, prefers a pH between 5.0 and 6.0. Use a soil pH-testing kit to determine if pH-adjusting amendments, like limestone or sulfur, should be added to the herb garden.
Nutrients
Necessary nutrients may be added to growing mediums to help nourish plants. High-quality potting mixes typically contain important nutrients, which can be organic or nonorganic (chemical) in origin, to help with plant health.
Many companies list nutrients on the product label, displaying the soil’s nitrogen, phosphorus, and potassium content as a ratio of percentages. These nutrients usually release slowly to last for a few weeks to a few months before additional fertilizer is necessary.
Water
While herbs should be watered often enough to keep the soil moist, overwatering will likely result in soggy roots, which can lead to rotting. To prevent overwatering, a well-draining soil is important for herb gardens, especially for container-grown plants.
Different herbs have different water needs. Mint and parsley, for example, do well in fairly moist soil, while rosemary and sage prefer dryer soil. Pro tip: Bunch herbs with similar watering needs close together to help ensure proper watering. Using a moisture meter is a good way to help ensure proper watering. These inexpensive tools are stuck into soil to measure the moisture level at the root level.
Drainage
Precise drainage is important to growing herbs successfully. Too little drainage and the roots can drown, while too much drainage will cause water to flow through too quickly for the roots to absorb. A soil with good drainage allows for adequate water and airflow so both water and oxygen can reach plant roots. Many of the most popular herbs (like basil, bay leaf, cilantro, and lavender) are native to the Mediterranean, so they grow best in soil with good drainage, similar to soils found in that region.

Published
Categorized as Garden

Yarrow Tea

Ingredients
  • 2 TB yarrow
  • 2 TB elderflower
  • 4 TB mint
  • 2 TB red clover
  • 1 TB maple syrup

Instructions

  • Steep herbs in a quart jar of hot water.
  • Cover and let sit for about 6 hours, to steep the full benefits. I will often do this overnight, but, fair warning, if it steeps too long it can taste bitter. Usually overnight is perfect.
  • To make the removal of the herbs super easy, I love my quart-size tea steeper, linked below.
  • Add sweetener and stir. (Read more above about choosing the right sweetener.)
  • Serve over ice, or you can warm it as well and enjoy a mug-full of this delicious hot tea.

Notes

I choose maple for both the taste and the added polyphenols and antioxidants. In fact, I substitute maple syrup for sugar in almost everything.

If you use maple syrup, always be sure you’re using 100% maple syrup. (It’s the second most faked food in the world, topped only by olive oil.)

Grow Aloe Vera

Planting Outdoors
Aloe vera is hardy in zones 10 through 12 and can be planted outdoors in warm climates. If growing outdoors, make sure that your soil is well-draining, says Ryan McEnaney, garden designer and author of Field Guide to Outside Style: Design and Plant Your Perfect Outdoor Space.

Dig a hole twice as wide and just as deep as the pot the plant is in.
Place the plant in the ground, making sure the crown is even with existing soil.
Backfill the hole with soil so the roots are covered.
Water the plant thoroughly, letting it drain completely before re-watering.

Planting in Containers
Aloe vera is a low-maintenance houseplant you can grow indoors year-round. If you’re planting aloe in a pot, I recommend a porous terracotta pot, which allows water to more easily evaporate. Choose a well-draining soil, preferably one marked for cactus or other arid plants.

Fill a container most of the way with soil.
Place the plant in the center of the pot.
Backfill with soil to cover the roots.
Water the plant, making sure it fully drains through and doesn’t leave any standing water.

How to Care for Aloe Vera

The key to growing healthy aloe vera in your garden is making sure it is in the right environment.

Soil: Mimic aloe vera’s native environment with well-draining sandy or rocky soil. “For indoor plants, a cactus or succulent soil is a great option,” says McEnaney. “If you’re planting outdoors, especially for year-round growing, make sure to have lots of great drainage so water doesn’t sit at the roots.”

Water: Overwatering your aloe vera can lead to root rot. Whether you’re growing the plant indoors or outdoors, it’s important to test for dryness by checking the soil moisture with your finger. “Water aloe vera when the soil is bone dry,” says Chris Satch, plant doctor at Horti.

Light: Aloe vera plants do best with a lot of sun. If your aloe vera is planted outside, six to eight hours of full sun is best. “Interestingly, while they prefer full sun outdoors, they just need bright indirect light indoors,” says McEnaney. “The amplification of the sun’s rays through windows can burn the leaves, so make sure they’re not sitting in full sun all day inside.”

Temperature: Aloe vera needs warmer temperatures and is not adaptable for frosts or ongoing cold temperatures. “Ideally, aloe vera should be kept between 55 degrees Fahrenheit and 85 degrees Fahrenheit,” says McEnaney. If growing it in a climate with cold seasons, you can keep the plant outdoors during summer then bring it inside when temperatures drop. If you move from indoors to outdoors for the summer, be sure to transition it slowly over the course of a week. “If nighttime temperatures dip below 50 degrees Fahrenheit, bring the aloe inside overnight,” says McEnaney.

Fertilizer: Aloe vera needs very little to no fertilizer. “If you’re growing the plant indoors, you could give it some succulent fertilizer in early spring,” says McEnaney. “But if your plant is outdoors, no fertilizer is needed.”


Published
Categorized as Garden

Making Aloe Vera Jell

Drain the yellow liquid: Before extracting the gel, cut the larger end and drain the yellow liquid (aloin) from the leaf by placing the leaf with the cut side down in a glass, or tilt leaf in a bowl, for 15 minutes. Rinse the leaf again, starting from the bottom, I do this for a few minutes just to give me peace of mind that all debris and impurities are completely removed.
This helps to get rid of the bitter taste.

Things You Should Know. Pure aloe vera gel can be stored in the fridge for up to 1 week. To prolong the shelf life of your aloe vera gel to 1 month in the fridge, blend it with a vitamin C tablet. You can also freeze Aloe Vera gel for up to 1 year.

Freezing the gel in an ice cube tray rather than one large block means that you can just take out individual pieces whenever you need them. freeze overnight and then place cubes in a sealable bag.

Feeding Fig Trees

Fertilize Fig Cuttings – water soluble – High nitrogen for cuttings

Feeding Fig Trees

I’ve had great results with 4 heavy feedings starting shortly after bud break at intervals of once per week. This year I’m trying 6. That was with a 9-45-15. I can’t say for sure exactly how much each tree has received. However, once my bag of 9-45-15 is gone, I’ll be switching to a 10-5-8. That by my estimation is the right fertilizer ratio for figs. Maybe even a 10-4-12. I’m still undecided. Additionally this year, I will be foliar spraying at one month intervals Dyna-Gro Protekt even into the fall. Which is a 0-0-3 with silica. Literature states some spectacular benefits from silica and anecdotally seems to be worth it in figs. Especially for those of us that have issues with rust. I’m hoping this product will aid in better lignification, cold hardiness and overall plant health. Ph should be around 7 and there’s an argument to be made for something between 7-7.5 for better uptake of magnesium. Lime for the micronutrients is highly recommended and of course make sure all of your bases are covered in terms of micros.
What you don’t want to do:
There’s very little reason to apply nitrogen feedings after you have your desired fruit set. Nitrogen is the main factor in annual shoot production. While necessary, too much will ruin proper lignification and lower fruit quality. You will without any doubt see more cracking in your fruits and I know some will think that’s beautiful, but your fruits will not taste more beautiful. Ideally you want your trees to completely cease growth after achieving your desired fruit set. This is accomplished with ceasing nitrogen and decreasing watering after fruit set. For some of us that’s nearly impossible. It’s certainly possible in containers, but getting that right is again the most ideal scenario.

Published
Categorized as Figs

Constipation

Chia or Flax Seed: 2 1/2 Tb. 1 time a day in food or drink. In extreme case try 3 Tb.  Drink plenty of water throughout the day.

Yields 2 ¼ cups loose leaf tea
Ingredients
• ½ C dried senna leaf
• ½ C dried spearmint leaf
• ½ C dried chamomile
• ½ C dried nettle leaf
• ¼ C dried anise seeds
Directions
1. In a large bowl, mix together ½ cup of dried senna leaf, ½ cup of dried spearmint leaf, ½ cup of dried chamomile, ½ cup of dried nettle leaf, and ¼ cup of dried anise seed.
2. Transfer to a glass jar for storage.
3. For best results: This tea should only be used OCCASIONALLY. This tea should be consumed an hour or so before bedtime. When the morning comes, batten down the hatches! Teas for helping to ease constipation are not safe for regular daily use. If you are suffering from regular constipation, please increase fiber in your diet with vegetables and whole grains. Consider increasing consumption of high-magnesium foods (pepitas, almonds, spinach, dark chocolate) and fluids as well as dried fruits like prunes and raisins to help balance your digestive system. Don’t ever forget the power of fresh fruits to facilitate regular bowel movements.
4. Steep 1-2 tablespoons of the dried herbal blend in 8-10 ounces of boiling water. Let steep for 10 minutes, then strain.

From: Upasana Shukla

Remedey 1 Ingredients:-
4 Dried Plums or ¼ cup Raisins
½ tsp. Castor Oil
¼ cup Hot Water

Method:-
In a bowl, mix dried plums, castor oil and soak in hot water for 10-15 minutes and then mash it.

Remedy 2  Ingredients:-
1 Ginger
Mint Leaves

Method:-
Grate the ginger in a vessel and mint leaves to it. Then pour 1 cup water. Heat all this for 10 minutes.


Growing Yarrow in Tucson

Yarrow can grow in Tucson, Arizona:

Western Yarrow: Achillea millefolium

Moonshine yarrow: Achillea x ‘Moonshine’

Hardiness: Yarrow is fully hardy in Tucson.

Sun tolerance: Yarrow can tolerate full morning sun to all-day light shade, but it does best in full sun.

Soil requirements: Yarrow can adapt to many soil types, but it does best in well-drained soil.

Watering: Yarrow should be watered regularly, but fertilizer can negatively impact its longevity and flowering.

Pruning: Yarrow should be divided every couple of years to maintain its vigor and keep it in bounds.

Staking: Yarrow may require staking.

Allergic reaction: Some people may have an allergic reaction to the foliage or sap of yarrow.

Yarrow is a strong-scented plant that’s common in the northern hemisphere, including Arizona’s high country. It’s not a desert species, but it can be found in high desert situations.

Yarrow (Achillea millefolium) is a plant that has many uses, including:

Healing wounds: Yarrow has been used to stop bleeding and promote healing of wounds and cuts. It can be applied directly to wounds or crushed into a paste with water.

Treating fevers and colds: Yarrow tea has been used to treat fevers and colds.

Relieving pain: Yarrow can help with toothaches, muscle spasms, and PMS spastic pain.

Reducing inflammation: Yarrow has been used to treat Crohn’s disease and ulcerative colitis.

Soothing stomach issues: Yarrow may help with indigestion, heartburn, and stomach cramps.

Gardening: Yarrow can be grown as a cut flower or dried flower, and its cultivars come in a variety of colors.

Yarrow has been used in many cultures for many health conditions, but there is little scientific evidence to support its benefits. Yarrow can also interact with certain medications, including blood thinners, medications for high blood pressure, and medications that reduce stomach acid.

Yarrow may be unsafe for people who are pregnant, breastfeeding, or have bleeding disorders. It may also cause an allergic reaction in people who are sensitive to the Asteraceae/Compositae family, which includes ragweed, chrysanthemums, marigolds, and daisies.

Turmeric Healing Paste

To make a healing paste with turmeric:

Mix 1-2 teaspoons of ground turmeric (depending on how large the wound is) with enough water to make a thick paste (generally about half the amount of turmeric you use). You can also mix turmeric with coconut oil instead of water for your paste for more healing and anti-bacterial benefits, or apply it as a face cream/mask to reduce acne, redness, or scars.

Be sure to wash your hands and then apply the paste gently on the wound. (It should be pasty, so don’t expect it to look like a cream.)

Once you’ve covered the infected area, place your bandage of choice over the wound.

Let it sit for at least 12 hours, or up to 24.

Do this for three days.

Why this works:

Turmeric not only relieves inflammation to help with pain but also aids in healing in many ways. First, it’s a natural anti-bacterial food, so it will help fight bacteria that are found on the skin when you have a wound and prevent bacteria from entering the body via the wound opening. Turmeric also helps clot the blood, so it will prevent the wound from bleeding further. Last, it helps the wound heal and treats the skin, so there will be little to no scarring and the skin will stay protected.

Dr. Earth Acid Lovers® fertilizer

It can be used during initial planting starting or direct transplanting, or to feed on a regular basis as plants grow.

TruBiotic® Inside. Living Fertilizer. TruBiotic® is alive with probiotic beneficial soil microbes and mycorrhizae. It is infused with a broad spectrum biological inoculant that results in greater adaptability and viability success. TruBiotic® renews and restarts tired soils. It starts new soils with life purely and naturally

DIRECTIONS FOR USE:
When potting plants, mix 1 tablespoon to each quart of potting medium.

For new plantings, add 2 cups per 5 gallons of mix that will be added to the planting hole.

After planting, add another 2 cups around the plant and mix into the soil. Apply every other month throughout the growing season.

For established plants, work 0.5-2 cups into the soil within the drip line. Can also be mixed with water for foliar feeding or deep root feeding. See product label for specific instructions.

Ingredients: Cottonseed meal, fish bone meal, alfalfa meal, feather meal, potassium sulfate, kelp meal, seaweed extract and seven strains of Pro-Biotic beneficial soil microbes, PLUS Ecto and Endo Mycorrhizae.

Published
Categorized as Garden

Changing the PH of your soil for barries

The soil pH value is a measure of soil acidity or alkalinity. Soil pH directly affects nutrient availability. The pH scale ranges from 0 to 14, with 7 as neutral. Numbers less than 7 indicate acidity while numbers greater than 7 indicate alkalinity.
The pH value of soil is one of a number of environmental conditions that affects the quality of plant growth. The soil pH value directly affects nutrient availability. Plants thrive best in different soil pH ranges.
Azaleas, rhododendrons, blueberries and conifers thrive best in acid soils (pH 5.0 to 5.5).
Figs prefer slightly acidic soil (pH 5.5-6.5
Vegetables, grasses and most ornamentals do best in slightly acidic soils (pH 5.8 to 6.5). Soil pH values above or below these ranges may result in less vigorous growth and nutrient deficiencies.
Nutrients for healthy plant growth are divided into three categories: primary, secondary and micronutrients. Nitrogen (N), phosphorus (P) and potassium (K) are primary nutrients which are needed in fairly large quantities compared to the other plant nutrients. Calcium (Ca), magnesium (Mg) and sulfur (S) are secondary nutrients which are required by the plant in lesser quantities but are no less essential for good plant growth than the primary nutrients. Zinc (Zn) and manganese (Mn) are micronutrients, which are required by the plant in very small amounts. Most secondary and micronutrient deficiencies are easily corrected by keeping the soil at the optimum pH value.
The major impact that extremes in pH have on plant growth is related to the availability of plant nutrients or the soil concentration of plant-toxic minerals.
In highly acid soils, aluminum and manganese can become https://www.artstation.com/marketplace/library
more available and more toxic to the plant. Also at low pH values, calcium, phosphorus and magnesium are less available to the plant. At pH values of 6.5 and above, phosphorus and most of the micronutrients become less available.
Factors Affecting Soil pH
The pH value of a soil is influenced by the kinds of parent materials from which the soil was formed. Soils developed from basic rocks generally have higher pH values than those formed from acid rocks.
Rainfall also affects soil pH. Water passing through the soil leaches basic nutrients such as calcium and magnesium from the soil. They are replaced by acidic elements such as aluminum and iron. For this reason, soils formed under high rainfall conditions are more acidic than those formed under arid (dry) conditions.
Application of fertilizers containing ammonium or urea speeds up the rate at which acidity develops. The decomposition of organic matter also adds to soil acidity.
Increasing the Soil pH
To make soils less acidic, the common practice is to apply a material that contains some form of lime. Ground agricultural limestone is most frequently used. The finer the limestone particles, the more rapidly it becomes effective. Different soils will require a different amount of lime to adjust the soil pH value. The texture of the soil, organic matter content and the plants to be grown are all factors to consider in adjusting the pH value. For example, soils low in clay require less lime than soils high in clay to make the same pH change.
Selecting a Liming Material: Homeowners can choose from four types of ground limestone products: pulverized, granular, pelletized and hydrated. Pulverized lime is finely ground. Granular and pelletized lime are less likely to clog when spread with a fertilizer spreader over turf areas. The finer the grind of the limestone the faster it will change the soil pH value. Hydrated lime should be used with caution since it has a greater ability to neutralize soil acidity than regular limestone.
Time of Application & Lime Placement: Lime needs should be determined by a soil test. For more information on soil testing, refer to HGIC 1652, Soil Testing. Soil samples should be taken in the fall for the succeeding year’s garden. If test results indicate a need for limestone, it can be applied in the fall or winter months. Generally, for best results, limestone should be applied two to three months prior to planting to allow time for it to neutralize the acidity.
The most important factor determining the effectiveness of lime is placement. Maximum contact of lime with the soil is essential. Most liming materials are only slightly soluble in water, so incorporation in the soil is a must for lime reaction. Even when properly mixed with the soil, lime will have little effect on pH if the soil is dry. Moisture is essential for the lime-soil reaction to occur. In the case of lawns, it can only be surface applied and watered into the soil.
Wood Ashes: Wood ashes can be used to raise the soil pH. They contain fairly high amounts of potassium & calcium, and small amounts of phosphate, boron and other elements. They are not as effective as limestone but with repeated use, they can drastically raise the pH value of a soil, especially if the soil is sandy in texture. Ashes should not come in contact with germinating seedlings or plant roots as they may cause damage. Spread a thin layer during the winter and incorporate into the soil in the spring. Check the soil pH annually especially if you use wood ashes. Avoid using large amounts of wood ashes because excessively high pH values and subsequent nutrient deficiencies may result. Coal ashes do not have any lime value and may actually be acidic dependent on the source.
Decreasing the Soil pH
Many ornamental plants and some fruit plants such as blueberries require slightly to strongly acid soil. These species develop iron chlorosis when grown in soils in the alkaline range. Iron chlorosis is often confused with nitrogen deficiency because the symptoms (a definite yellowing of the leaves) are similar. Iron chlorosis can be corrected by reducing the soil pH value.
Two materials commonly used for lowering the soil pH are aluminum sulfate and sulfur. These can be found at a garden supply center. Aluminum sulfate will change the soil pH instantly because the aluminum produces the acidity as soon as it dissolves in the soil. Sulfur, however, requires some time for the conversion to sulfuric acid with the aid of soil bacteria. The conversion rate of the sulfur is dependent on the fineness of the sulfur, the amount of soil moisture, soil temperature and the presence of the bacteria. Depending on these factors, the conversion rate of sulfur may be very slow and take several months if the conditions are not ideal. For this reason, most people use the aluminum sulfate.
Both materials should be worked into the soil after application to be most effective. If these materials are in contact with plant leaves as when applied to a lawn, they should be washed off the leaves immediately after application or a damaging leaf burn may result. Take extreme care not to over-apply the aluminum sulfate or the sulfur.
You can use the following tables to calculate the application rates for both the aluminum sulfate and the sulfur. The rates are in pounds per 10 square feet for a loamy soil. Reduce the rate by one-third for sandy soils and increase by one-half for clays.
Pounds of Aluminum Sulfate per 10 square feet to Lower the pH to the Recommended Level

Present pH Desired pH
6.5 6.0 5.5 5.0 4.5
8.0 1.8 2.4 3.3 4.2 4.8
7.5 1.2 2.1 2.7 3.6 4.2
7.0 0.6 1.2 2.1 3.0 3.6
6.5 0.6 1.5 2.4 2.7
6.0 0.6 1.5 2.1
Pounds of Sulfur per10 square feet to Lower the Soil pH to the Recommended Level

Present pH Desired pH
6.5 6.0 5.5 5.0 4.5
8.0 0.3 0.4 0.5 0.6 0.7
7.5 0.2 0.3 0.4 0.5 0.6
7.0 0.1 0.2 0.3 0.4 0.5
6.5 0.1 0.2 0.3 0.4
6.0 0.1 0.2 0.3

Published
Categorized as Garden

Growing Figs

Essential Fertilization

The importance of regularly fertilizing fig trees, specifically in containers, using a slow-release fertilizer.

Proper Watering

Overwatering and underwatering fig trees can be problematic, especially for trees in containers. If using plastic cups use 3 0z water when needed.

Canopy Management

Dense canopies can hinder fruit formation due to lack of sunlight.

Importance of Pruning

Excessive pruning can disrupt hormonal balance, leading to more growth rather than fruiting. Maintaining apical and lateral buds is crucial for fruit formation.

Preventing Late Frosts

Highlights the detrimental impact of late frosts on fig trees’ new growth.

Maintaining Dormancy

Skipping this process can lead to a weaker tree in the spring due to increased pest pressure and insufficient care.

Sunburn Protection

The issue of sunburn in fig trees when transitioning from low-light to high-light environments. Sunburn reduces photosynthesis and can set back the growth of fig trees.

Premature Harvesting

A cautionary discussion on the harvesting of figs too early, including the advice that the indicator of fig ripeness lies in the softness of the neck, not the color, honey drops, or cracking. An emphasis is made on the importance of allowing figs to fully ripen on the tree, as store-bought figs are often picked too early, resulting in a significant loss of flavor and quality.

Proper Pot Size

A mistake often seen is keeping figs in small pots, which restricts their growth and negatively impacts fruit production.

Improper Winter Storage

Improper winter storage or inadequate cold protection can cause the branches to die back, a mistake that can be easily avoided by following recommended guidelines.

Fig trees need to be kept above 15 degrees Fahrenheit in the winter and suggests avoiding warm, unheated basements as they can lead to premature wake-up of the tree.

Choosing the Wrong Variety

Different fig varieties have different tastes and growth characteristics, so choosing the right variety for your climate and conditions is crucial to successful cultivation.

Here’s a simple 3-step process to ensure you harvest your figs at the optimal time:

Step 1: Look for figs on the tree that exhibit the visual indicators of ripeness mentioned earlier.

Step 2: Gently squeeze the necks of these figs to assess their softness.

Step 3: Pick the figs with the softest necks.

Every fig grower must learn the feel of their fig varieties’ necks when they’re ripe. Once you have mastered this skill, you can enjoy the full flavor and nutritional benefits of homegrown figs, harvested at the peak of their ripeness.

Published
Categorized as Figs, Garden

Repotting a Fig Tree

Step-by-Step Guide to Repotting a Fig Tree
Prepare the New Pot: Before removing your fig tree from its current pot, fill the new pot with enough soil so that when the tree is placed in it, the top of the root ball will sit about an inch below the rim of the pot. This extra space will be saved for amendments and a mulch layer.

Remove the Fig Tree from its Current Pot: Make sure to tip the pot sideways or upside down and let gravity do the work. Do not yank or pull too hard as this can damage the root system.
Inspect and Tease the Roots: Check the root system for any signs of root-knot nematodes. If the roots are densely tangled or circling (a condition known as being root-bound), gently tease them apart with your fingers to encourage them to grow out into the new soil. Don’t touch them otherwise.
Place the Tree in the New Pot: Gently place the tree into the new pot. The top of the root ball should be about an inch below the rim of the pot.
Backfill With Soil: Add more soil around the root ball, filling the pot until the soil level is the same as it was in the previous pot.
Firm the Soil: Firm the soil around the root ball to ensure good contact and to remove air pockets. Don’t worry, the soil should still be loose enough to allow water and air movement.

Water Thoroughly: After repotting, water the tree thoroughly, allowing the water to drain through the holes in the bottom of the pot. This will help settle the soil around the roots.
Apply Fertilizer: Once the tree has been watered, apply a slow-release fertilizer around the tree’s base. Consider other micronutrients like Silica, Sulfur, Calcium, Magnesium & other trace minerals

Add Mulch: Finally, add a layer of mulch on top of the soil. This will help retain moisture, keep the roots cool, and encourage beneficial soil organisms.
Monitor the Tree: For the first few days after repotting, keep the tree in a shaded area and keep a close eye on it for signs of transplant shock, such as wilting or dropped leaves.
Repotting a fig tree does require some effort, but it is certainly worth it when you see your tree thriving in its new home. The larger space will give the roots room to grow, resulting in a healthier, more productive tree.

Pros & Cons of Larger Pots
Room for growth: Larger pots provide more space for the plant to spread its roots, which can lead to more vigorous growth and a larger, healthier plant overall.
Heavy and difficult to move: One of the most apparent downsides of larger pots is that they can be quite heavy, especially when filled with soil and a large plant. This can make them difficult to move, which could be a problem if you need to bring plants indoors during winter or want to rearrange your plants frequently.
More soil needed: Larger pots require more soil, which can be more expensive. Also, if you don’t have a good-quality soil source, filling a large pot can become challenging.
Risk of overwatering: Larger pots hold more water, which can increase the risk of overwatering if not managed properly. This is especially a concern for plants that prefer well-draining soil and do not like to sit in water.
Fig Tree Soil Requirements
When it comes to the optimal health and productivity of your fig tree, the importance of the right soil cannot be overstated. The soil acts as the primary influence on the health of your tree as it contains its nutrients, water, and microscopic life. A fig tree’s success is largely contingent on a well-draining soil mix that supports root health and facilitates adequate nutrient and water uptake.
Fig trees, in particular, have an extensive and fibrous root system, which means they require a soil structure that supports the roots while allowing for a good amount of air and water movement. This can be achieved with a well-draining mix with slightly larger particles than those typically found in regular potting soil.
A few popular soil choices for fig trees include compost, worm castings, peat moss, and coco coir. While these materials provide an excellent base, they are also quite dense and can sometimes retain too much moisture, leading to waterlogged conditions that can result in root rot. To counteract this and improve aeration, mix in other materials such as vermiculite, perlite, small pieces of bark, shredded bark, or rice hulls.
So, you may ask, how can we strike a balance? The goal is to create a soil mix that, when watered, retains just the right amount of moisture while still allowing the excess water to drain away and air to reach the roots. This balance helps prevent waterlogging and ensures the roots remain healthy and free from rot.
Pro-Mix is a well-liked commercial option that provides an excellent, well-draining environment for fig trees. However, feel free to experiment with creating your own mix using some of the materials mentioned above until you find what works best for you and your tree.
To summarize, the ideal soil for a fig tree in a pot is a well-draining mix that balances moisture retention with aeration. Ensuring you have the correct soil type will set your fig tree up for success and contribute to a bountiful harvest.
Up next, we’ll discuss the best fertilizers for your newly repotted fig tree, so keep reading!
Best Fertilizer for Fig Trees in Pots
After successfully repotting your fig tree, it’s essential to provide it with the necessary nutrients for optimum growth and fruit production. A balanced fertilizer can significantly aid in this regard.
Fig trees thrive when given a well-balanced NPK fertilizer. The acronym NPK stands for Nitrogen (N), Phosphorus (P), and Potassium (K), which are the primary nutrients required by plants. A 10-10-10 or a 10-20-10 fertilizer would be ideal as it covers all the necessary nutrients in balanced quantities.
To make things simple, I recommend slow-release fertilizers because they gradually provide nutrients to the plant over an extended period, rather than delivering them all at once. This ensures your fig tree will receive a steady supply of nutrients throughout the growing season.
In addition to a well-balanced NPK fertilizer, fig trees also benefit from specific micronutrients. Silica, found in vermiculite or diatomaceous earth, can be an excellent addition. Consider using green sand or rock dust, which provides a broad range of micronutrients in higher quantities.
Fig trees have a particular liking for magnesium, sulfur, and calcium. These nutrients can be added using gypsum, oyster shell, or lime. If you conduct an analysis of a fig tree’s leaf or the fruits, you will find that these nutrients are typically found in higher quantities in the leaves and fruits.
To read more about fertilizing fig trees, read this detailed article, here:
In the next section, we will look at the correct watering technique and frequency for your fig tree in a pot.
How Much Water Does a Fig Tree Need?
Watering is an essential aspect of caring for your fig tree, particularly when it’s grown in a pot. Getting the balance right can be a bit tricky – too little water and the tree may dry out and wilt, too much water and the tree might suffer from root rot. Let’s delve into the specifics of how much water your fig tree needs.
Fig trees prefer evenly moist soil, but it’s important not to overwater them. Overwatering can cause root rot and lead to the leaves turning yellow and dropping off. At the same time, allowing the soil to dry out completely between watering can stress the tree and stunt its growth. After all, water is the on or off switch of a fig tree’s growth.
During the warmer months of the growing season, I water my container fig trees twice a day for a total of about half of a gallon to a gallon of water every day per 5-gallon-sized pot. If rain is in the forecast, that may decrease my watering quantities and frequency significantly. During September temperatures cool down in the Philadelphia area and rain is more frequent. At this time, I may not water at all. Keeping an eye on the temperature and rainfall is critical for achieving consistently moist soil moisture.
When you do water your fig tree, make sure you water it thoroughly. This means watering until you see water draining out of the bottom of the pot. Thorough watering encourages deep root growth, which in turn will help the tree be more drought-tolerant.
It’s also essential to have a pot with good drainage to ensure excess water can escape. This helps to prevent the soil from becoming waterlogged and reduces the chances of root rot.
For more on watering fig trees, read this in-depth article, here:
The next section will explore transplant shock and how to prevent it. Being aware of this potential pitfall can save you from potential plant heartache down the line.
Transplant Shock – A Common Mistake to Avoid
Transplant shock can be one of the most significant risks your fig tree faces during the repotting process. It’s a term that refers to a variety of stress-related symptoms, such as wilting, yellowing, or dropped leaves, that your plant might exhibit after it’s been moved to a new environment. The good news is that transplant shock can be minimized, or even prevented, with careful repotting practices. Here’s how:
Be gentle with the roots: Fig trees have a fibrous, delicate root system. During the repotting process, try to maintain as much of the original soil around the roots as possible to prevent root damage. If the tree is root-bound, gently loosen the outer roots before planting it in the new pot.
Ensure proper root-to-soil contact: After placing the tree in its new pot, pack the soil firmly around the root ball to eliminate air pockets. This helps the roots make good contact with the soil, enhancing their ability to absorb water and nutrients and reducing the risk of transplant shock.
Water correctly: After repotting, water the tree thoroughly to settle the soil and hydrate the roots. However, be careful not to overwater, as fig trees are susceptible to root rot.

Use mulch: A layer of mulch on top of the soil can help regulate soil temperature, retain moisture, and improve the soil’s overall environment, reducing the chances of transplant shock.
Limit initial sun exposure: After repotting, place the fig tree in a location with filtered light or partial shade for the first week or so. Gradually acclimate the tree to more sunlight to avoid sun stress on top of transplant shock.
You’re Now Ready to Repot Your Fig Tree
Repotting your fig tree is an essential task to maintain its health and productivity. As a grower, you have the power to create the perfect environment for your fig tree to thrive. Through correct pot selection, the right soil mix, balanced fertilization, and careful watering practices, you can ensure your tree will grow vigorously, providing you with a bountiful harvest for years to come.
With the comprehensive guide provided in this article, you now have all the tools you need to confidently repot your fig tree, setting it up for successful growth.

Published
Categorized as Figs

Black Mission Fig

Black mission fig trees are ideal for the environment in Tucson. They are drought-tolerant and produce a significant amount of fruit after about three years of initial growth. If you’re considering a black mission fig tree for your home, talk to your landscaping company’s certified arborist to find out how if this kind of tree is right for your landscaping and how you can help it thrive.

Choosing a Season and Location

Typically, black mission fig trees should be planted in the fall or early spring. This will give them an opportunity to establish themselves before summer temperatures soar. These trees do best in an area of the yard in which they will get a lot of sunshine. Your landscaper can help you choose a location that is both healthy for your tree and that complements your existing landscape design.

Watering

Although black mission fig trees are drought-resistant, they will need to be watered to thrive. During the summer, they should be irrigated once per week. You may need to increase watering during extreme heat waves. During the other seasons of the year, watering every two weeks should be sufficient. However, if unusually warm weather occurs, consider increasing your watering schedule.

Maintenance

As with all types of trees, working with a certified arborist is the best way to keep your black mission fig tree healthy. The tree will benefit from light fertilization during its growing season, which is May, June, and July. About half a pound of nitrogen fertilizer used over that period of time and watered in should be sufficient. An arborist can also prune your tree as necessary to ensure it continues to thrive.

Published
Categorized as Figs

Root Fig Cuttings

Clean Tree Pot with boiling water rinse

Grow Medium:  Coconut core (use purified water)  and pearlite

Wash (and scrub) cutting

Wrap parafilm/grafting tape around the top half of the cutting that will be above the soil line. Ensure your cutting has at least 2 nodes above soil line and 2 below.

Make a fresh cut at the base of the cutting and score the bottom sides.

Dip the bottom of the cutting in rooting hormone like clonex.

75 to 77 degrees is great rooting tempter.

70 -80% humidity is best

Published
Categorized as Figs

Neem Oil

Neem oil is a natural remedy that can be used as a soil drench to control pests and diseases on plants. The plant absorbs the neem oil through its roots, which helps protect it from pests and fungus. Water plants with neem oil by adding it to your watering can or using it as a soil drench:

Neem oil can be used in aeroponics to control pests and prevent some bugs from evolving: 

Mix the solution: A common ratio for mixing neem oil with water is:
½ tsp Neem Oil per 16 oz  spray bottle & add 2-3 drops dish soap. Saturate leaves when lights are off. Be sure to apply under leaf.

  • ow to use: Mix neem oil concentrate with water in a spray bottle, and test it on a small area of the plant before spraying the entire crop. Turn off grow lights before applying neem oil, and leave them off for at least an hour after. Reapply neem oil weekly until there are no signs of pests. 
  • Benefits: Neem oil is a natural pesticide that can kill caterpillars, mites, aphids, thrips, whiteflies, grasshoppers, and scale insects. It can also prevent some bugs from evolving by causing them to molt when they eat the plant. 
    Precautions: Neem oil can damage plants by burning their foliage, so don’t use it on recent transplants or stressed plants. Wear gloves and a mask to protect your skin and lungs. 
  • Neem oil products
    Some recommend buying neem oil concentrate instead of a pre-mixed solution because it lasts longer. Look for a brand that uses a cold-pressed process to extract the oil and retain Azadirachtin. 

Soil drench: Here are some tips for using neem oil for soil drenching.1–2 tablespoons per gallon of water, or 1–2 teaspoons per quart of water. You can also add a small amount of dish soap to help distribute the oil in the water.
Test on a small area: Before treating the entire plant, apply the mixture to a small test area.
Use warm water: Warm water is less likely to solidify the soil, but it’s still important to avoid water that’s too hot, which plants may not like.
Shake the bottle: Shake the bottle often while applying to keep the oil distributed throughout the mixture.
Apply regularly: For prevention, apply every 3 weeks, or every week for infestations.
Refrigerate: Remaining undiluted neem oil can be refrigerated for up to a year to slow its degradation.
Neem oil can control many types of pests, including ants, beetles, caterpillars, crickets, earwigs, grasshoppers, lacebugs, mealybugs, mites, and more. sticide, killing insects that feed on the plant’s foliage.
Foliar spray
Mist the entire plant with neem oil, making sure to cover the tops and undersides of the leaves and stems. This method is effective against pests and diseases.
Here are some tips for using neem oil:
When to use
Use neem oil on a dry, windless day when temperatures are at least 40°F. Avoid spraying if a freeze is expected.
Apply neem oil in the evening to avoid potential leaf burn, says Bunting.
What type of neem oil to use
For young insects, use cold-pressed neem oil. For adult insects and eggs, use clarified hydrophobic extract of neem oil.
How often to use
Reapply the mixture as needed, following the label directions.
Safety
Wear gloves and a mask to protect your skin and lungs, as some people are sensitive to direct contact with neem oil.
Some sensitive plants that shouldn’t be treated with neem oil, for example, you should never use it on young or dehydrated plants.
Additionally, avoid using neem oil on peppers, beans, or peas, as well as on herbs, including basil, dill, cilantro, oregano, parsley, and thyme. “Also avoid leafy crops such as arugula, lettuce and spinach and avoid the cabbage family, including, broccoli, Brussels sprouts, and kale,” says Bunting.

Published
Categorized as Garden

Fig Cuttings-The Direct Potting method


The Direct Potting method is easy to follow, even for beginners, and does not require misting systems, humidity chambers, or domes. What separates this method from others is that you’re “directly potting” the cutting into a 1-gallon-sized container. Therefore, up-potting during the rooting process can be avoided.
Here’s a step-by-step guide to using the Direct Potting method:
Prepare your cutting: Select cuttings that have at least a couple of nodes. Make a cut approximately 1/4 inch below a bud, and create a long cut or a “score” along one edge of the cutting, where more roots are likely to form.
Wrap the cutting: To prevent the cutting from drying out, wrap the portion that will be exposed above the soil with a material like Parafilm, stretching it as you apply it. This will allow the buds to easily push through the material.
Prepare the soil: Use a well-draining potting mix, which can simply be a mix of 60% peat and 40% perlite. The soil should be damp but not overly wet.
Plant the cutting: Insert the cutting into the soil, making sure that at least one node is below the soil level. Avoid planting the cutting too deep into the pot, as the bottom portion of the pot can become too wet and cause the cutting to rot.
Water
Water the cutting thoroughly, and add a layer of mulch to help retain moisture.
Keep in the shade
Keep the pot in the shade until the cutting is rooted.
Fertilize
Fertilize the fig tree to provide any missing nutrients.

Published
Categorized as Figs

Elecampane root & Marshmallow root Cough Tonic

This lung tonic is a strong decoction of marshmallow & elecampane roots. The shelf life is relatively short, so drink this honeyed decoction often as needed.

I’ve had syrups like this last in my fridge for months, though I give the syrup I sell a 4 week expiration date to be on the safe side.

Dosage:
Shake Well! Separation is natural.
Add 1 to 3 tablespoons to still or sparkling water, tea, or whatever you are sipping.
3 tablespoons or so in a quart of warm lemon water, first thing in the morning.

Ingredients:
1/2 ounce fresh or dried marshmallow root
1 ounce fresh or dried elecampane root
2.5 ounces fresh baby ginger
1 oz herbs = 1 quart of water so, 4 quarts of water = 1 gallon of water
2 cups honey
optional: licorice and fennel seeds

Instructions:

Toss coarsely chopped roots into water and bring to a boil. Let simmer at least 20 minutes, lid off, allowing water to evaporate, ideally until water volume is reduced by half. Strain the decoction and pour into a jar to cool and measure volume; add equal volume of raw honey and stir to combine. Store in fridge up to one month.

Comfrey Salve

Comfrey salve can help with painful muscle and joint conditions as well as bruises and fractures. It also smell great!

Ingredients

2 tbsp. comfrey leaf, dried
2 tbsp. olive oil 2 tbsp. coconut oil
1/8 tsp vitamin E oil
5 to 10 drops peppermint essential oil
1 tbsp. beeswax

Instructions

Create a double boiler by placing a glass measuring cup in a saucepan, on top of a canning jar ring. Place the herbs in a cloth tea bag. Pour the oils over the tea bag. Simmer on medium heat for 30 to 45 minutes. Press out the herbs to release their herbal goodness into the oil.
Add 1/8 tsp vitamin E oil and the peppermint essential oil to the comfrey mixture.
Place back into the pot and place the beeswax into the oils. Once the wax has melted, stir with a clean popsicle stick or toothpick. Pour the liquid into a jar or tin to harden.

Comfrey Poultice

A Comfrey Poultice for Pain Relief

One of the easiest herbal remedies you can make with fresh or dried herbs is a poultice. This topical remedy is an effective remedy for bug bites, pain, muscle cramps, and more.  You could crush the leaves and blend with flour and place in a jar to use as needed. I would freeze this.
Yield: 3–4 poultice packs

Ingredients:

About a dozen fresh comfrey leaves (stem included)

  • 1 cup water
  • 2 handfuls flour or French green clay
  • A few old dish cloths (or another small piece of cloth you’re no longer using)

Directions:

Use a knife to coarsely chop your comfrey leaves.
Place leaves in a blender. Add water.
Blend for about 30 seconds, until the water and leaves have combined. The consistency should be a somewhat chunky paste.
Put this freshly-blended paste in a bowl. Add a handful of flour or clay to the paste and stir it in with your hands.

Place a cup of comfrey poultice in the middle of your cloth and flatten it down with a spatula.
Now fold in the sides of your cloth and wrap it around the comfrey. Repeat this process until you’ve wrapped up all of your comfrey paste in cloth. You can now either use these poultices fresh or store them in your freezer.

When storing them in the freezer, place a piece of wax paper between each poultice (so it’s easier to separate them later). Now place your poultices in a plastic gallon freezer bag for storage.
Note: once you’ve used a poultice once, you can compost the herbs. The cloth can be washed and then re-used.

Calendula oil infusion for sunburn and bug bites

Herb-to-Oil Ratio
You can prepare the Calendula oil infusion using two different approaches: folk and weight-to-volume.
With the folk method, loosely pack your herbs into a jar, leaving an inch of space at the top.

Pour oil ( like sesame, grapeseed, or jojoba ) over the plants until they are completely submerged under oil. Fill oil nearly to the jar brim to reduce oxidation of the oil and molding of the plant matter.

In the weight-to-volume method, herbs and oil are typically combined in a 1:5 ratio, but I find that 1:10 allows for easier handling. To get these proportions, use ten times the amount of oil (measured by volume) for every one part of herb (measured by weight). For example: 25 grams of herbal material to 250 milliliters of oil.

Choosing an Extraction Method
Oil infusions can be prepared with or without heat. The heatless process, or maceration, is slower but doesn’t damage the delicate constituents in the plants or carrier oils. You can use heat to speed up the infusion process, reducing the extraction time from weeks to only a few hours. However, heated methods require more mindfulness to ensure the oil doesn’t get ruined. Resinous herbs like Calendula are best extracted using heat and longer processing time.
Maceration Method
Place the sealed jar in a sunny window. Cover with a paper bag in order to protect from damaging UV light. Shake daily for four to six weeks.

Diarrhea Relief Infusion

Ingredients:

  • ½ teaspoon dried chamomile flowers,
  • ½ teaspoon dried wild strawberry leaves,
  • ½ teaspoon dried raspberry leaves,
  • 1 cup of boiling water

Preparation:

  • Mix chamomile flowers, wild strawberry, and raspberry leaves in a mug.
  • Add 1 cup of boiling water and steep for 15 minutes.

Consume this infusion 2-3 times a day for effective relief from moderate diarrhea symptoms.

Herb Use & Dosage Guide

Each herb has a broad range of applications…
Dosage Guide Note
1 dropperful = 30 drops = 0.75ml (approx)
(Note: a dropperful doesn’t actually fill the whole dropper, it’s one pump of the bulb!).

Aloe vera is a medicinal plant that grows in hot climates such as California, New Mexico, and the Caribbean. It contains more than 75 active ingredients, including enzymes, amino acids, vitamins, and minerals, some of which could make it useful for treating diseases.

This plant-based remedy contains chemicals that reduce swelling in the skin, relieve redness and scaling, soothe itchy skin, and promote the growth of new skin cells. These properties make aloe vera useful for treating skin conditions such as: Acne, Cold sores (herpes), Cuts and scrapes, Insect bites and stings, Minor burns and sunburn and Psoriasis. . Aloe juice is also promoted as a natural remedy for diabetes, heartburn, and inflammatory bowel syndrome (IBS). When taken by mouth, aloe vera may help lower cholesterol and blood sugar and ease heartburn.

Alfalfa (Medicago sativa)
Alfalfa is rich in minerals and healthy compounds, and contains a high amount of protein. It has been used to treat morning sickness, nausea, kidney issues and urinary tract discomfort. It also acts as a diuretic and a light stimulant.
1-3 ml, 3 times daily

Ashwagandhan Nurtures your nervous system and increases your vitality. Consumption with alcohol, other drugs or natural health products with sedative properties is not recommended. 1-4 ml, 3 times daily

Basil (Ocimum basilicum)
This staple spaghetti topper actually has a range of medicinal uses and can help with a lack of appetite, excess gas and cuts.

Burdock Root For detox and pain associated with rheumatism. May cause allergic reactions in people sensitive to plants in the asteraceae family.
1-4 ml, 3 times daily 

Calendula Anti-inflammatory and immune-modulating. Do not use if you are allergic to plants of the Asteraceae/Compositae/Daisy family. 
1-4 ml, 3 times daily 

Chamomile Reduce gastrointestinal complaints and ease restlessness and nervous irritability.  Do not use if you are allergic to plants of the Asteraceae/Compositae/Daisy family. Can relieve skin inflammation and irritations.
1-4 ml, 3 times daily

Dandelion Root Stimulates bile flow (helps with constipation) and improves digestion.
2.5 – 5ml, 3 times daily

Echinacea The perennial Echinacea plant is said to be a powerful immune booster and is used to combat symptoms of colds, flu, and infections. Antimicrobial infection fighter. Consult a health care practitioner before use if you are taking
immunosuppressants or if you have a progressive systemic disease such as tuberculosis, leukosis, collagenosis or multiple sclerosis. Do not use if you are allergic to plants of the Asteraceae/Compositae/Daisy family.
1-4 ml, 3 times daily

Elecampane root  is used for asthmabronchitis, intestinal worms, and many other conditions, but there is no good scientific evidence to support its use. It is also used to prevent coughing, especially coughing caused by tuberculosis; and as an expectorant to help loosen phlegm, so it can be coughed up more easily.

Feverfew (Tanacetum parthenium)
The leaves of the feverfew can be used in teas and chewed to relieve headaches. As a natural anti-inflammatory, it is said to help with arthritis and a variety of skin conditions.

Lavender
Simply the smell of lavender has been shown to help people relax. It can be used as an antiseptic and is useful for skin inflammation, insomnia and anxiety.

Lemon Balm Mild sedative and calming agent. Lemon Balm may interfere with the action of thyroid hormones. Caution
advised for those with hypothyroid.
2 – 6 ml, 3 times daily

Licorice Root For respiratory and gastrointestinal conditions. Not suggested for everyday long-term use. Prolonged use in conjunction with thiazide
and loop diuretics and cardiac glycosides is contraindicated and liquorice should not be administered in combination with spironolactone or amiloride. This herb is not recommended
for those taking cardiac glycosides, hypotensive agents, corticoids, diuretic drugs, or monoamine oxidase inhibitors. Discontinue use at least 2 weeks before surgery.
1-3 ml, 3 times daily

Marigold (Tagetes)
Marigold has a wide range of uses, including treating acne, sunburn, ulcers, digestive problems, insect bites and more.

Marshmallow root is a perennial herb. Marshmallow root contains mucilage, a gummy substance that forms a gel when mixed with water. This gel can be used to: Soothe irritated mucous membranes, Reduce irritation in the throat and stomach, and Soothe chapped skin. Some potential benefits of marshmallow root include: Relieving coughs, Improving dry mouth, Protecting against ulcers, Soothing skin irritation, and Healing wounds. Marshmallow root is generally well tolerated in adults, but some people may experience rare allergic reactions. Anecdotal reports also suggest that taking marshmallow root may cause upset stomach and dizziness. 

Marshmallow root can be used in a variety of ways, including: Herbal syrups, Infusion blends, Body care products, Gargling, and Throat soothing. 

Milky Oat A sedative tonic to strengthen your nervous system, especially after periods of prolonged stress
1 – 5 ml, 3 times daily

Motherwort A sedative for the relief of nervousness and restlessness. Consult a health care practitioner before use if you have a heart condition or are taking heart medications. Consumption with alcohol or other medications with sedative
properties is not recommended.
1-4 ml, 3 times daily

Mullein Cough remedy and anti-inflammatory
2.5 – 5 ml, 3 times daily

Nettle Leaf Helps relieve seasonal allergy symptoms. Excessive doses may keep you awake at night, nettle seeds are stimulants.
1.5 to 4 ml, 3 times daily

Nettle Seed Restore balance to the adrenals.
2 ml, 3 times daily

Oatstraw Regular consumption of oatstraw tea or supplements can help alleviate symptoms of PMS, improve mood, and enhance overall energy levels. By nourishing the adrenal glands, oatstraw can also help in managing stress and reducing cortisol levels, making it an excellent natural remedy for hormonal imbalances.

Pansy Wild (Viola tricolor)

Another anti-inflammatory herb, the wild tansy can be used to ease eczema and skin blemishes and help loosen phlegm. It was also believed to help the heart, which is
why it is sometimes called heartsease.

Parsley (Petroselinum crispum)
Useful for so much more than plate decoration, parsley can treat bad breath, gas, inflammation, and even has anti-cancer properties.
Peppermint (Mentha × Piperita)
Peppermint should be a go-to for any stomach issues. It has also been shown to help with alertness and headaches.

Red Clover Relief to inflammatory skin conditions. Consult a healthcare practitioner if you currently have or have previously had hormonal sensitive conditions such as breast cancer, uterine cancer, ovarian cancer, endometriosis or uterine fibroids
2 – 4 ml, 3 times daily

Rosemary (Rosmarinus officinalis)
Rosemary is one of the best herbs to improve concentration, memory and mood. It is also great for wound healing, hair growth, and bad breath.

St Johns Wort
Relief of restlessness and nervousness. Consult a health care practitioner: if you experience sleep disturbances; if you are taking conventional medicine such as contraceptives, HIV-1 protease inhibitors, nonnucleoside reverse transcriptase inhibitors, immunosuppresants, anticoagulants, digoxin, theophylline, serotonergic antidepressants, migraine therapies, SSRIs and/or anti-epilepsy drugs; Do not use if pregnant or breastfeeding. Discontinue use at least 2 weeks before surgery.
2 – 4 ml, 3 times daily.

Sage (Salvia officinalis)
The name Sage is derived from a word that means “to heal” or “to save”, reflecting its historical use as a medicinal herb. It is useful for a variety of ailments, including mouth and throat inflammations, bloating, heartburn and depression.

Thyme (Thymus vulgaris)
The active phenol in thyme is thymol, known to be a potent antiseptic. It is useful for coughs, sore throat, tooth decay, congestion and indigestion.

Willow Bark Relieves headaches and back pain. Do not use: if you are taking blood thinners or herbs or medications containing acetylsalicylic acid (ASA) or other salicylates; if you are allergic to acetylsalicylic acid (ASA) or other salicylates; if you are pregnant or breastfeeding.
3 – 6 ml, 3 times daily

Wild Tansy can be used to ease eczema and skin blemishes and help loosen phlegm. It was also believed to help the heart.

Yarrow (Achillea millefolium) has many medicinal uses, including:

Bleeding: Yarrow can stop bleeding from wounds and cuts. The plant’s leaves can be mashed with water and applied to wounds.

Burns and sores: Yarrow can be used as a poultice for burns and open sores.

Fevers and colds: Yarrow tea can help with fevers and colds.

Toothaches: Yarrow can help with toothaches.

Anxiety and insomnia: Yarrow can act as a mild sedative to help with anxiety or insomnia.

Inflammation: Yarrow can help with inflammation.

Multiple sclerosis: A randomized controlled trial found that people with multiple sclerosis who took 250 or 500 mg of yarrow daily for a year had fewer yearly relapses.

Chest congestion and sinus issues: Yarrow tea can help with chest congestion and sinus issues.

Yarrow can interact with some medications, including blood thinners, stomach acid reducers, high blood pressure medications, and sleepiness-inducing drugs. Yarrow is also likely unsafe to take during pregnancy because it can affect the menstrual cycle and may cause miscarriage.

6 Mushroom Proactive immunity defense
2 – 4 ml, 3 times daily

Dosage By Age & Weight

1 | AGE

Children should use a reduced

dosage (see next page) and

some seniors may also find a

smaller amount effective.

3 | WEIGHT

Standard dosages are based on

a 150lb adult. If you weigh more

or less, you might need to

adjust the dosage accordingly

up or down.

5 | GOALS

Someone working through

deeper physical conditions may

use more tincture than

someone seeking subtle effects

on the mind, emotions, or spirit.

2 | SENSITIVITY

Someone who tends to be

sensitive to herbs or medicines

in general will often need less of

an herb to have an effect.

4 | YOUR HEALTH

We always suggest working with

a herbalist or your health

practitioner if you have

underlying health conditions.

6 | CONDITION

Acute conditions like the flu or a

headache often require a more

frequent dosage (i.e. every

hour) but for a short-term

period (i.e. 1-2 days)

www.yourwebsite.com

CHILDRENS DOSAGES

There are two formulas that are widely used to calculate

children’s dosages: Clark’s Rule and Young’s Rule.

(We prefer Clark’s Rule, as body weight is more specific)

Clarks’ Rule:

Adult Dose X (Weight ÷ 150) = Childs Dose

Example: 11 year old girl  who is 70 Lbs, and the adult dose is 30 drops

30 Drops X (70 ÷ 150) = Child’s Dose

30 Drops X (.47) = Child’s Dose

Child’s dose = 14.1 Drops (Round to 14 Drops),

Young’s Rule

[Age / (Age + 12)] x Recommended Adult Dose = Child’s Dose

Example: 11-year-old girl and you’re working with that same 30 drops, 3

times a day adult dose:

30 drops x (11 ÷ (11+12)) = child’s dose

30 drops x (11 ÷ 23) = child’s dose

30 drops x .48 = child’s dose

Child’s dose = 15 drops, 3 times a day

Making Herbal Tinctures

How to make herbal tinctures (“folk method”): 1 to 5 maceration (vodka) ratio. This makes a 1:5 ratio.

  1. Gather your herb.
  2. Fill it loosely into a jar with a screw top (i.e. mason jar).
  3. Pour alcohol over your herb until it covers the herb about 1/2” or so. You will notice air bubbles forming.  These need to be removed.

For dry herbs use 40-50% alcohol (80-100 proof),
for fresh herbs use 60-95% alcohol (120-190 proof).

Plants with a high water content (i.e. fresh roots) should use the higher alcohol percent (i.e. 95%). Vodka or grain alcohol are good choices because of their neutral flavor.

3.5. Optional step – blend the alcohol and herb together to increase surface area exposure for the herb.

  1. Place the jar away from light (i.e. in a cupboard), in a cool, dry location for 6 weeks.
  2. Shake or stir the tincture every day if possible.
  3. If after a day or two the plant material expanded and is no longer submerged in the alcohol you may need to add more alcohol. Especially look for this with dry roots and fruits (may need to cover them with 1-2” or more alcohol from the beginning).
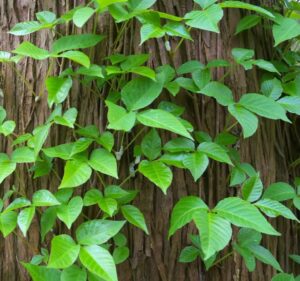
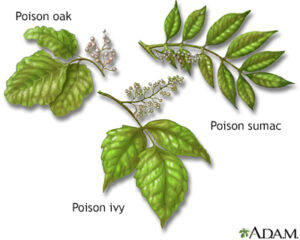
  4. After 4-6 weeks strain out the herbal material and store your tincture for use!

It’s possible to get much more detailed with your tincture-making, but the above method will work pretty well for most herbs. If you want to be more precise, you can measure the weight of the herbs and the volume of the “menstrum” (alcohol). You can also look up a recipe to find an “herb:menstrum” ratio for the plant you’re working with. For example, an recipe might say to tincture a fresh plant at “1:2, 80%,” which means for every 1 part of plant material by weight (grams or ounces), use 2 parts of menstrum by volume (milliliters or fluid ounces), using 80% alcohol.

With more potent herbs it’s best to be precise and follow a specific recipe in order to take a more precise dose of the final product. For most mild herbs, there is a great deal of room for experimentation and error – herbs like peppermint or chamomile have a wide therapeutic dose range, so it doesn’t matter so much what the relative concentration of the tincture is.

The most important thing in terms of safety is to prevent fermentation, mold or harmful bacteria growth by using a high enough alcohol percent. To be on the safe side, the final alcohol percent should be above 30%. When you use fresh herbs that contain water, the final alcohol percent will be lower than the alcohol you add in, as the water in the herb will dilute the alcohol. That’s why you need to start with a higher percent of alcohol with fresh herbs. If you want to be very precise, set aside some of the fresh herb, weigh it, let it dry, and then weigh it again to find out how much water was in the herb.

How to an Make Herbal Oil Infusion

How to an Make Herbal Oil Infusion

Supplies needed
Herbs. Dried herbs are best for a slow cold infusion. Fresh herbs, wilted herbs, or dry herbs can be used with the quick heat method.

A carrier oil of choice, such as jojoba oil, olive oil, sweet almond oil, or other.

A glass container with a tight-fitting lid. Use something as small as a half-pint mason jar, or as large as a half-gallon jar! The size simply depends on how much herb infused oil you intend to make.

Fine-mesh colander, reusable nut milk bag and/or cheesecloth for straining.

Storage containers for finished oil, such as glass jars or amber dropper bottles.

Optional: a slow-cooker or double boiler and probe thermometer (only if you intend to use the quick heat method)

Should I wash herbs before drying them?

It depends. Some gardeners and herbalists avoid washing herbs before drying because the added moisture may prevent them from drying properly and potentially lead to mold. This is especially a concern when air-drying herbs, but shouldn’t be an issue when using a food dehydrator. If herbs are particularly dirty, the extra step of washing them may be preferred. Shake them out well (or even toss them in a salad spinner) to remove excess water after washing. I personally only wash herbs that I plan to use in cooking.

Option 1: Slow Cold Infusion

The first option is the easiest, but does require a little patience: simply allow dry herbs to soak in oil at room temperature for several weeks. Known as slow or cold infusion, this method relies on a passive process to gently extract beneficial compounds from the herbs. Since it’s not exposed to heat, the maximum therapeutic properties of both the oil and herbs are retained. The herbs should soak in oil for a minimum of 2 or 3 weeks, up to 4 to 6 weeks for the most medicinal oil possible.

Directions

Start by filling a clean glass container at least two-thirds full with dry herbs. Feel free to fill the container even more to create a stronger infusion. Yes, you can mix several different types of herbs together if you’d like!

Pour oil over the dry herbs until they’re completely covered by at least an inch or two of oil (though they may float, that’s okay). If you wish to get more technical and measure, aim for an herb to oil ratio of about 1 part dry plant material by weight to 5 parts oil by volume. For example, 1 ounce of herbs to 5 fluid ounces of oil.

Add a lid and set the jar in a dark place to infuse for several weeks. Some herbalists like to use the “solar infusion” method, steeping the herbs and oil in a sunny window to garner luminary warmth and energy. Yet others say that sunlight can reduce the potency of herbs or make oil go rancid more quickly. So, it’s a bit of a controversial topic! We’ve done both methods and never had oil spoil on us.

Though not necessary, you can give the jar of oil a gentle shake or tilt from time to time. This is especially helpful during the first few days to rotate/submerge any “floaters” on top.

Occasionally, condensation may develop near the top portion of the jar. If you notice this, simply open the jar and wipe it away with a clean paper towel.

When the time is up, strain the herbs from the oil. I place a nut milk bag or layer of cheesecloth inside of a fine colander perched on top of a bowl, and then pour the oil through both. After it sits to drain a bit, I wring out any leftover oil from the herbs by squeezing the nut milk bag or cloth. Compost the leftover herbs.

Transfer the finished herb infused oil into a clean storage container with a lid, and store it in a cool dark place. I like to use amber dropper bottles for face and body oil, storing the excess in a larger jar in the fridge for refills. The dark glass protects the medicinal herb oil from light degradation, so I can safely keep it out on my bathroom counter too. (See shelf life information below.)

Option 2: Quick Heat Method

The quick heat method is a simple, fast way to create herb infused oils without waiting for them to passively steep. Though we’ll be lightly heating the herbs and oil, it’s important to keep everything at 110°F or below to avoid degrading the quality of the oil and herbs. It’s okay to use fresh, wilted, or dry herbs with this method.

Directions

Start by chopping up the herbs you wish to infuse. Smaller pieces = more surface area = stronger infusion.

Add the herbs to a slow cooker (crock pot) or the top portion of a double boiler on the stove. If you don’t have a double boiler, create your own by nesting a glass bowl or smaller pot inside of a larger pot of water below. The top/inner pot should touch the water, but not rest all the way on the bottom of the lower pot.

Pour over enough oil to submerge and cover the herbs by at least an inch or two. It isn’t necessary to measure, but you can if you wish. For fresh herbs, aim for an herb-to-oil ratio of 1 part fresh herbs by weight to 3 parts oil by volume (e.g. 1 ounce fresh herbs to 3 fluid ounces oil). For dry herbs, use 1 part dry plant material to to 5 parts oil by volume (e.g. 1 ounce dried herbs to 5 fluid ounces oil). For wilted herbs, use a ratio of 1:4.

Gently heat the oil, but do not boil it. Between 95 and 110°F is ideal. Check the temperature with a probe thermometer and adjust the heat if needed. In a crockpot, use the lowest temperature or “keep warm” setting.

Allow the oil and herbs to simmer together for at least 30 minutes, up to several hours for a more potent infusion. (Some medicinal herb oil recipes call for 12 to 24 hours in a slow cooker). Important: To prevent spoilage, leave the lid off so moisture from the fresh herbs can evaporate and escape. The more fresh the herbs, the longer I suggest lightly heating to ensure water content is reduced.

Finally, strain and store the oil as explained in the “slow infusion method” section above.

One time we do use the quick heat method is to make hemp-infused oil, shown in our makeshift double boiler (a smaller pot nested inside a larger pot with water in the bottom).

A fine sieve metal strainer with a layer of cheesecloth over the mesh is positioned over a glass bowl.

We sometimes use organic cheesecloth to strain herb oils, but mostly use reusable/washable nut milk bags nowadays!

How long does herb infused oil last?

The shelf life of herbal oils varies depending on the type of carrier oil used, if the herbs were adequately dried before steeping, and how the oil is stored. Most herb infused oils should stay good for about a year when made with dry herbs and stored sealed in a cool, dark place.

Some oils have a naturally shorter shelf life than others (such as grape seed and sweet almond oil), while jojoba oil can stay good for 5 years or more! Furthermore, refrigeration may be recommended for some oils. Refer to the oil manufacturer’s instructions, and see the expected shelf life of various carrier oils here.

If the herbal oil is used to make salve, lip balm, lotion, soap, or other goodies, the shelf life is extended since other preservatives are often used in those items. Beeswax is an excellent natural preservative for example!

Visible mold and/or sour, putrid, or otherwise “off” odors are signs that oil has gone bad or rancid and should be discarded. However, cloudiness is not usually a sign of spoilage (unless accompanied by a bad smell) and can be common in herb infused oils.

Ways to use herb infused oil

Here are some general ideas and ways to use medicinal herbal oils, but use your noggin’! Be sure the use is appropriate and safe for the type of carrier oil and herbs you used.
As body oil or massage oil
Facial moisturizer – just a few drops will do!
Work a few drops through damp hair to soften hair and smooth split ends.

As an ingredient in other homemade body care products like salve, soap, cream, lotion, lip balm, ointment, or other natural skincare products. Check out our lip balm and salve recipes here! For more ideas, I highly recommend this organic body care recipe book. It’s loaded with awesome recipes!

If you used an edible carrier oil, you can use your herbal oil as a tasty marinade, salad dressing or in other culinary creations.

As part of your oil cleansing method

As spot treatment directly on scars, stretch marks, varicose veins, or other areas of concern.

To soothe rashes, bug bites eczema, psoriasis, scrapes, burns, or other skin irritations

On cracked heels, cuticles, feet, dry elbows, or other rough patches of skin.

On chapped or cracked lips, or around your nose when it’s chaffed.

To treat cradle cap on babies (check your carrier oil safety first).

To remove makeup (but avoid contact with sensitive areas around your eyes)

Calendula-infused oil turned into homemade calendula salve. This stuff does WONDERS for the skin!

Easy Herb-Infused Olive Oil

Yield: 2 cups 

Want to take your favorite fresh herbs and create something with truly spectacular flavor? Make easy herb-infused olive oil at home with these easy to follow instructions.

Ingredients

For Soft Herbs like Basil, Cilantro, and Parsley:

2 cups pure olive oil

1 cup fresh herb leaves, stems removed

For Woody Herbs like Rosemary, Winter Savory, and Thyme:

2 cups pure olive oil

4 cups fresh herb leaves, stems removed

Instructions

  1. Add herb leaves and oil to a blender and blend until completely smooth.
  2. Add mixture to a medium saucepan and bring to a simmer over medium heat. Simmer for 45 seconds.
  3. Strain into a bowl through a fine mesh strainer or chinois without pushing down on the mixture.
  4. Strain again through a paper coffee filter into a medium-sized bowl. Let the filtered oil settle for a few hours, then pour it off the dark liquid in the bottom of the bowl, if there is any.
  5. Store in an airtight container in the refrigerator, and use within 1 week.