
How to store & prepare your fruiting block kit
If you need to store your blocks, most can be kept in the refrigerator for up to six months. However, pink oyster blocks should always be stored at room temperature.
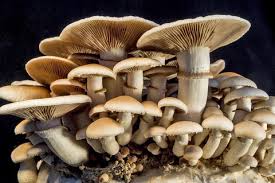
1. Side-fruiting is ideal for mushrooms that form dense clusters and prefer smaller openings, such as oyster mushrooms (including blue, pink, golden, and Italian), lion’s mane, and chestnut mushrooms. Despite the name, side-fruiting doesn’t refer to the direction of growth but to the cuts made on the sides of the bag where mushrooms emerge.
Side-fruiting golden oyster mushrooms.
2. Top-fruiting is best suited for species that thrive in humid, CO2-rich environments with a broad surface area for growth. This includes king trumpet, black king, nameko, pioppino, and reishi mushrooms. In top-fruiting, mushrooms grow from the substrate’s surface at the top of the block.
To prepare your kit
• Use a sharp, clean cutting tool and a stable surface.
• Keep tape and rubber bands handy if needed.
• Set up your fruiting space, such as a Boomr Bin monotub or BoomRoom II grow tent, before opening your block.
How to side-fruit your fruiting block kit
1. Prepare the Block: Unfasten the taped top of the bag. Fold the top flap tightly over the block, keeping the filter patch facing up. Press out any excess air to minimize side-pinning. You can place rubber bands around your block to help with this.
2. Secure the Flap: Either tape it down or flip the block so the flap stays in place.
3. Orient the Block: Choose a position that fits your growing space, usually with the cut side facing up for stability.
4. Cut the Bag: Make an ‘X’ cut on the bag, starting an inch or two from the corner. Slice diagonally across the plastic. Cutting into the block is fine.
5. Set Up for Fruiting: Place the block in a suitable environment and mist it 2-4 times daily, adjusting for humidity levels. You can place rubber bands on fruiting blocks
You can option to place rubber bands on your block to prevent side-pinning.
levels.
You can option to place rubber bands on your block to prevent side-pinning.
Cut an ‘X’ in the bag.
Special steps for shiitake
1. Identify Readiness: Shiitake blocks form a thick white wrinkled layer called ‘popcorning’ as they colonize. If you order a block from us, it may arrive this way. After a few weeks, the block should turn mostly brown, indicating that it is ready for fruiting. If pins are visible, you can begin fruiting regardless of block color.
2. Cold Shock: Place the block in the refrigerator for 24-48 hours.
3. Physical Stimulation: Give the block a firm slap to encourage growth.
4. Remove the Bag: Eliminate the bag completely or leave a bit on the underside to reduce bottom fruiting.
5. Soak the Block: For extra hydration, submerge the block in cold water for 4-12 hours.
6. Maintain High Humidity: Ensure humidity around 90% until pins form, preferably in a grow chamber for moisture retention.
‘Popcorning’ vs. early pinning.
A shiitake block ready to be cold-shocked.
Soak your shiitake block in cold water for 4-12 hours.