This recipe for Mozzarella involves adding cream to Non Fat Dry
Milk Powder. We’ve had great success using “Carnation” brand
milk so if you’re having problems with other brands give this one
a try. We’ve used many other brands along the way that also
work well.
Yield: 2 Pounds
Ingredients
Non Fat Dry Milk Powder for 7 Pints of Milk
1 Pint of Cream
Salt (optional)
1.5 tsp Citric Acid
1/4 rennet tablet or 1/4 tsp Single Strength Liquid Rennet
Instructions
Selecting Powdered Milk and Cream
This recipe for Mozzarella involves adding cream to Non Fat Dry Milk Powder. We’ve
had great luck using “Carnation” brand milk here so if you’re having problems with other
brands give this one a try. We’ve used many other brands along the way that also work
well.
Note: UltraPasteurized cream is fine to use since the calcium and proteins for the
cheese are already in the milk. To make the milk, mix 1 pint of cream with 7 pints of Dry
Milk Powder for one gallon of milk.
Below are is a list of the final fat % in 1 gallon of milk for varying types of cream:
Cream Type (1 Pint) Cream % Fat % for 1 Gal Milk
Double (rich) Cream 48% 6%
Heavy Whipping Cream 36-40% 4.5-5%
Light Whipping Cream 30-36% 3.7-4.5%
Light or Coffee Cream 18-30% 2.2-3.7%
Single Cream 20% 2.5%
Half and Half 10.5% 1.3%
The higher the fat content, the more difficult it is to retain the fat in the final cheese but
the better the flavor. When using a higher fat % the whey will be somewhat milky
looking. You can minimize this by treating the curd very gently at all stages.
Since your mix for this cheese is 7 pints of milk to 1 pint of cream you can either follow
the package mix directions for 1 gallon and drink the 1 pint of Non Fat Milk you remove
to make room for the cream addition or simply multiply the total dry milk powder
needed by .875 (7/8ths of a gallon) to make just the 7 pints. This will leave room for your
pint of cream. The easiest thing for us is to add 2 quarts of cool water with the dry milk
powder in a clean container and stir until the powder dissolves, then add this to an
empty sanitized gallon jug. The 1-pint of cream can now be added and then the jug
topped up to 1 gallon with cool water. Refrigerate this overnight and you have one
gallon of great milk to make your mozzarella.
1 Prepare Ingredients
Collect and sanitize all of your equipment and gather the ingredients.
A 2 gallon pot for the milk, a long knife, a colander, a couple of bowls, measuring cup,
and slotted spoon plus the ingredients and thermometer that came in your 30 minute
mozzarella kit are what should be in front of you now.
Next add 1/4 rennet tablet or measure 1/4 tsp. of liquid rennet into 1/4 cup of cool water
and set aside. Try to cut the tablet as carefully as possible into quarters but it does not
always work out that way. No worries- just do the best you can. You may notice that this
does not dissolve totally but it is OK. Simply add the entire mix when adding rennet.
Then measure out 1.5 tsp. of citric acid into a 1 cup measure of cool water. Make sure
that this is stirred until it all dissolves.
2 Acidify & Heat Milk
Your next step will be to add the citric acid to the milk. This will increase the acid and is
responsible for the final stretch of the mozzarella. It will also assist the rennet in forming
the curd.
Pour the citric acid solution you prepared above into the cold pot and then quickly pour
the milk on top of this. It is very important to stir well as you do this to prevent any
localized coagulation which will appear as curds floating to the surface. There should
be little to no curds forming at this stage.
Next, begin to heat the milk slowly at medium heat to 90-92°F. Stir well enough to keep
the milk from sticking/scorching. We usually turn the burner off a degree or two before
we reach our final temp to keep from overheating. The milk always seems to coast up
that last few degrees.
3 Coagulate with Rennet
At 90-92°F add the 1/4 tsp rennet or 1/4 rennet tablet dissolved in 1/4 cup water and stir
for 20-30 seconds. Then allow the milk to rest at this temp totally still for coagulation.
Initial firming of the milk will take place at about 2-2.5 minutes but allow the milk to firm
a full 7-10 min. before cutting.
4 Cut Curds to Release Whey
Once the curds form cut them into a checkerboard pattern of 3/4 -1 squares (larger for
moister mozzarella). Wait 1-2 min. then very gently (curd is very soft at this point still) cut
horizontal layers with ladle or spoon. Result should be as equal in size as you can
manage.
NOTE: The longer the curd is stirred at this point and the higher the temp (95-105°F),
the drier the final cheese will be because the heat causes more whey to be released.
The curd at this stage will hold a good shape but these are very fragile (see what
happens if you drop one on the floor). Stirring should be very gentle until they have
been cooked for a while.
5 Remove Whey
Once the curd forms well and seems to be releasing whey it is time to separate the
curds from whey. Allowing the curds to settle and consolidate for a minute or two will
initially separate the whey.
Then the excess whey that rises can be poured off while holding the curds back with
your hand. The curds should now be carefully transferred to a bowl with a spoon or
perforated ladle (best). Further whey separation can now be done by pulling the curd
back to the center of the bowl. You will see more whey running off at this point and this
should be removed. Once the curd begins to consolidate well it is time to heat the
curds to develop the stretching character of mozzarella.
6 Heat the Curd
Choose one of the following methods to heat the curds:
A) Our 30 minute system is quicker because we simply use 3 cycles in the microwave to
heat the curds to the point of stretching.
1. The first stage of 60 seconds on High will cause more whey to be released as the
curds heat. The cheese is removed and folded back on itself several times releasing
more whey which is removed.
2. The next step is back into the microwave for 30 seconds on High. This will now
cause the curds to consolidate more and begin to stretch. Folding and removing
whey now have your cheese looking more like mozzarella. At this point the cheese
may simply stretch of its own weight.
3. The final cycle is again 30 seconds and your cheese should now be stretching well.
Following this cycle it may be too hot to handle so using gloves or a pair of sanitized
wooden spoons will help.
B) Traditional hot whey or water for stretching.
This is more in line with the traditional process but takes a bit more time. 2 quarts of
water or whey are heated to 175F. This will be too hot for your hands so use heavy
rubber gloves or a couple of sanitized wooden spoons to manipulate the curds. The
curd you have made is now placed in the water and folded back and forth on itself to
distribute the heat. This may take 3-5 minutes and you should note that the curd is
ready to stretch on its own when it is ready.
Click HERE for a detailed description of this process without using a microwave.
As the curds are heated note the whey that has been released as the curds are heated.
Quickly as in the previous step, press/knead the curds while pouring off the whey. Do
this several times.
NOTE: the more you press the curds during this phase the more whey will be removed
and the drier the cheese will become. This is a matter of personal preference and with
experience you will be making the perfect cheese to your own taste.
7 Stretch the Curd
The Mozzarella should now be ready to stretch. Begin by allowing the cheese to stretch
under its own weight as in the photo to the left. Once your mozzarella begins to stretch
you can now give it the characteristic smooth texture of mozzarella by stretching and
folding the curds like taffy. If the cheese begins to stiffen up and resist the stretch,
reheat it in the microwave or in the hot water.
The more times you do this the smoother it will become. This is also the point where
you add the quantity of salt you like (1/4-1/2 tsp. should be good to start with) to the
cheese as you stretch it. In Italy this is the point where they become creative and shape
little pigs and cows from the fresh cheese.
Here is also where you need to exercise restraint to keep from playing with your food.
Once you are happy with your cheese you can form it into a nice round ball to chill and
store.
8 Chill & Salt
It is now time to cool the cheese to retain its shape. While warm the cheese will simply
slump into a flat disk. Once you have formed the cheese as you wish, it should be
dropped into a pan of ice-cold water. You can also drop it into a cheese form or small
plastic container to hold its shape. An hour or so here should cool it through. Then
move it to the fridge for further cooling. If it sits in the cold water too long the surface of
the cheese will soften too much and salt will be pulled from the cheese.
Category: Sides
Cheese – Paneer
Yield 1lb
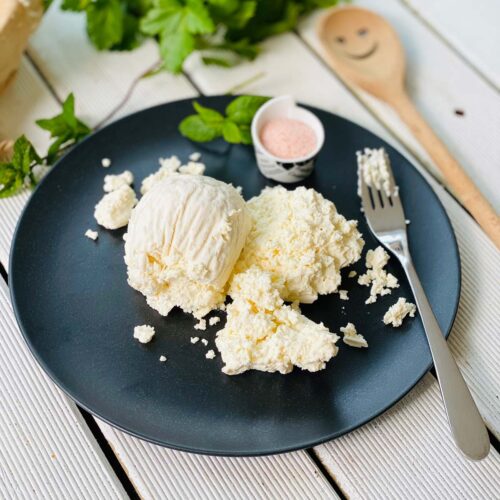
This is an easy cheese to make, so much so that it is usually
made fresh daily in India. Paneer is the most common cheese
used in south Asian cooking and can appear in several formats,
from crumbly and open textured, to a firm, well consolidated
cheese for cutting. It is a perfect cheese for vegetarians to use in
cooking because it has no rennet used in the production. Paneer
can be diced and pan-fried, then added to veggie dishes. Buffalo milk was most traditionally used for this with its butterfat content of about 6%,
but whole milk in the 3 – 4.5% range is commonly used today and much more readily
available.
A low fat version using skim milk has been produced but has developed a reputation
for being chewy and rubbery.
The milk used should be as fresh as possible; even cold stored milk has enzymes
working at the cold temperatures to break down the proteins and compromise the milks
flavor and ability to form a good cheese.
Ingredients
1 Gallon of Milk (not ultra-pasteurized)
Salt (optional)
1 tsp Citric Acid
Instructions
1 Heat Milk
Begin by heating 1 gallon of fresh milk to 185-194F (85-90C). You can best do this by placing the pot with milk into a sink of very warm water. If you do this in a pot on the
stove make sure you heat the milk slowly and stir it well as it heats.
Once the milk has reached the correct temperature, continue to hold the milk at this
temperature for about 20-30 minutes. This will prepare the milk proteins to respond
well to the acid addition in the next step.
2 Add Citric Acid
Spoon or ladle to Stir Curds
Add 1tsp of citric acid to 16oz of 170F water. This is a very diluted acid of about 2%. This
will be about the same temperature that we will be cooling the milk to.
Before adding the diluted citric acid, allow the milk to cool to 170F. This is a more
protein friendly temperature and allows the acid to easily mix into the milk before the
proteins begin to coagulate. The result will be a more even curd development.
Once cooled to 170F, slowly add the diluted citric acid to the milk while gently stirring.
This will begin separating the milk solids from liquid. Continue the slow stir until you see
a separation of white curd and a yellow green whey, milk with a high fat content may have a cloudy whey.
When you see a nice separation stop stirring. The pot can now sit quiet for 20 minutes.
While waiting, line a sterilized colander with butter muslin in preparation for draining
the curds.
Note: You can place the colander inside a large bowl to collect the whey for other uses, even if it’s just for the garden or compost pile.
3 Drain Curds
The curds can now be transferred to the colander lined with butter muslin. Begin by
ladling the whey from the surface into the lined colander. Once the whey has been
partially removed, the remaining curd can be poured into the drain cloth.
The curd should be allowed to drain for 30 minutes, a gentle stir half way through will
help the to whey drain.
4 Press Curds
Once the curd has drained for 30 minutes, the cloth can be pulled up and tied into a
ball. Make sure the cloth is pulled tightly around the curd mass. Then place a plate or lid
over the curd. Place about 1-2 gallons of warm water into a pot and set it on top of the
plate, this is a quick and easy “cheese press.” Press the curd for 10 to 15 minutes. The amount of weight and time for pressing will depend on how dry and compact you want your final Paneer to be.
If you saved the whey, it contains a lot of flavor and nutrients and is great to use in
stocks and soups, some folks have found it to be very tasty when cooled for just
drinking. Taste it and see. If nothing else take it to the garden or compost pile.
5 Finished Cheese
Fresh Paneer won’t last long in the fridge and should be used within a few days. Many
people think that because the milk has been heated to such a high temperature, that it’s
stable for long term storage, this is not true.
The problems with storing this cheese are two fold:
It contains a high level of lactose that will fuel any bacteria that it is exposed to
during the post process.
Tests have found that the ambient bacteria that it is exposed to (not traditional dairy
bacteria, so not good) will multiply several thousand times within a week.
It can be stored at fridge temperature for 4-7 days with no salting and for 10 days to 2
weeks if lightly salted (2%) and packed in an air tight container.
When pressed the cheese will be firm and compact and once chilled it can be easily cut
and cooked or fried. Traditionally, Paneer is made fresh and used within a day.
In making your own Paneer, you have control over how you want to use the cheese.
The curd can be drained for a soft, crumbly cheese or lightly pressed for a firm slicing
and grilling cheese.
By changing the cream content of the milk, the type of acid and the draining method,
you can make a wide variety of cheeses.
Fresh Paneer that hasn’t been pressed very long tends to be more crumbly and is best
for sauces.
Firm Paneer can be sautéed, seared, or grilled, and still retain both it’s shape and
texture.
How To Make Sauerkraut
Easy Fermented Sweet Sauerkraut
Author: Emillie minutes Yield: 1.5-quart jar
Ingredients
1 medium-sized head of cabbage (approx. 2 lbs.)
1–2 tablespoon pickling salt (to taste – I like 4 tsp)
Sweet: Add 1 cup of grated apple, fennel, beets, or carrots to the kraut and only let it ferment for 3 to 5 days.
Instructions
Grate or finely chop the cabbage and any other vegetables or fruit additions. Mix the prepared cabbage with the salt and any additional flavors.
Leave the cabbage to rest for about 5 minutes while you prepare your jars. The salt will start softening it and drawing the moisture out. This will make it easier to pack the kraut into the jars.
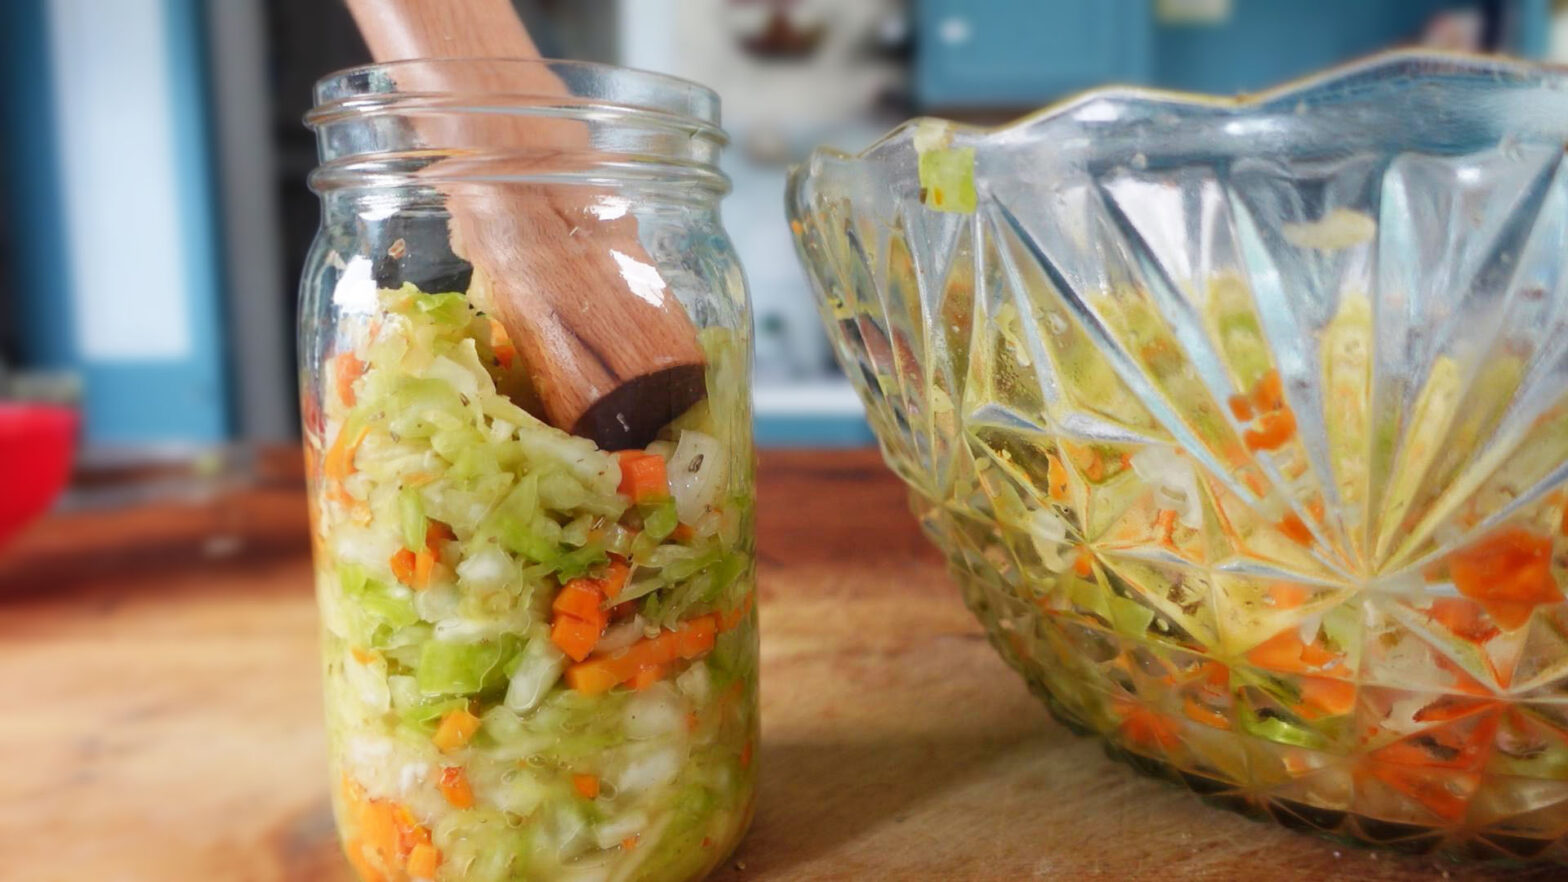
Pack the cabbage into a 1.5-quart container for fermenting. (Two quart-size mason jars work well. Leave at least 1 inch of headroom at the top because the cabbage will bubble up during the first week of fermenting. Use the back of a spoon to pound all the cabbage into the jar. Pack it down firmly enough for the liquid to be pressed out of the cabbage. You want enough liquid to fully submerge the cabbage. It’s also important to pack the cabbage into the jar because air bubbles increase the risk of contamination. Don’t worry if you don’t have enough liquid right away, it should produce enough within 24 hours. So you can leave your cabbage to sweat a bit then pack it down again. Alternatively, feel free to add a bit of filtered water (2 to 4 Tbsp).
Top the kraut with a weight (a small jam jar or the cabbage core will both work as well). For the first three days, the cabbage will bubble a lot. The weight helps to keep the cabbage under the liquid (brine) while it bubbles.
Cap the jar with a lid that will allow gas to escape as it bubbles. A Fido jar is my favorite option because it prevents any chance of contamination and doesn’t require burping. But you can also use a loosely-tightened lid or a tea towel held in place with a rubber band. Place the jar in a dark location to ferment. A closet or a kitchen cupboard is perfect.
The sauerkraut is ready when you decide it is done! After 3 days you will have sweet-tasting kraut that is packed with probiotics. However, sauerkraut will continue to ferment and sour for up to 7 weeks. I often permanently leave my kraut in my pantry since I’m short on space in my fridge.
Store the jar in the fridge after opening it.
Notes
There’s a whole science around how the bacterial culture in sauerkraut changes with the fermentation process. However, it should never be moldy, yeasty, or smelly. Keeping everything clean is necessary for a good ferment.
Wondering how to serve a batch of sauerkraut? It’s not just a hot dog topping! Here are 15 different ways to serve sauerkraut.
Nutrition
Serving Size: ¼ cup Calories: 5Sugar: 0.3gSodium: 90mgFat: 0gSaturated Fat: 0gCarbohydrates: 0.8gFiber: 0.3gProtein: 0.3gCholesterol: 0mg
OR
-
Ingredients
- 4-4.5 lb. Cabbage Sliced
- 2 c Carrots Chopped
- ⅓ c Ginger Root Peeled and chopped
- 2 tbsp Whole Fennel Seeds Freshly ground. Sub with dill seeds or caraway seeds.
- 2 tbsp Salt Pure salt without anticaking agents.
Instructions
The Cabbage
-
Unless the cabbage has dirt on it, there is no need to wash the cabbage because the outer leaves are being removed. Inspect the cabbage and remove any imperfect leaves. The inner leaves are typically pristine after a few of the outer leaves are removed.
-
After the scrubby outer leaves are removed, next remove 2 to 3 of the newly exposed good condition leaves. Keep these leaves in tact the best you can and set aside for later use.
-
Quarter the cabbage and cut out the stem portion.
-
Slice the cabbage with a sharp knife or in a food processor. A medium to thick slice is best.
-
Add all the shredded cabbage to a large mixing bowl.
The Other Ingredients
-
Peel and chop the carrot and add to the mixing bowl.
-
Peel and chop the fresh ginger root and add to the mixing bowl.
-
Grind the spice seeds in a spice/seed grinder or a coffee bean grinder (completely cleaned out of course!) Then sprinkle over the ingredients in the mixing bowl.
-
With your clean hands, give the vegetable mixture a light mixing as to incorporate everything.
The Salt
-
Sprinkle the salt over the vegetable mixture a little at a time. In between each sprinkle, move the ingredients around as to fully incorporate the salt from top to bottom.
-
Allow the cabbage/vegetable mixture to rest for 30 to 60 minutes. During this time the salt will begin working on the cabbage by drawing out natural juices as well as softening the cabbage.
Tenderize the Cabbage
-
After the first rest period is complete, use your freshly washed hand to firmly massage the cabbage. Additionally, you may use a wooden dowel to pound the cabbage. Or, switch back and forth using hands and dowel. Work the cabbage for 15-20 minutes.
If you would like visual understanding of how to massage & pound the cabbage, watch the video where I provide a demonstration.
-
After working the cabbage by massaging and/or pounding, it should be very tender and juicy. An accumulation of natural juices will be at the bottom of the bowl and when you pick up & squeeze a handful of the mixture, ample juice will release.
Allow the cabbage to rest a second time for 15 to 30 minutes. After this second rest period, the cabbage will be loaded into the jars. Optionally, a large fermenting crock may be used in place of jars.
-
If little to no juice has released from the cabbage, then you have a “dry cabbage” meaning it does not have sufficient hydration for the salt to draw from. See the alternate “Dry Cabbage” instructions below to know what to do.
Alternate Instructions For A Dry Cabbage
-
Skip these alternate instructions if your cabbage became nice & juicy after the 1st resting period accompanied by massaging and pounding.
However if you’re cabbage is lacking natural juice formation, follow these alternate instructions to create a handmade brine.
First, you won’t know you have a dry cabbage until after the 1st rest period when it’s become obvious that little to no juice has formed. Additionally, the cabbage will still feel stiff and will resist softening when massaged or pounded.
Since the needed amount of salt is already added, simply pour 3 cups (700 ml) water over the cabbage mixture in the bowl. Lightly toss the mixture around as have everything coated by the water.
-
Allow the cabbage to rest in the salty water for 15 to 30 minutes.
-
When you feel the cabbage after the second rest period, you will notice that it still has firmness to it. This is normal for a dry cabbage.
-
Load the jars in the exact same manner as given in the next group of instructions.
Be aware that due to the firmness of the ‘dry cabbage’, it will not pack down as tightly as the natural-brine cabbage. Therefore an extra jar will most likely be needed.
Load the Jars
-
Prepare the jars and fermenting weight by washing them with hot soapy water. Sterilization is not required, hot & soapy water is sufficient.
-
Take 2 large handfuls of the cabbage mixture and drop it into the jar. A canning funnel is very helpful with this step because it prevents the cabbage mixture from spilling out during the loading process. However, it is not required.
-
With either your fist or a dowel, firmly press the mixture down as to push out any air pockets.
-
With each handful of cabbage mixture, make sure it is nice & juicy by grabbing the wet stuff toward the bottom of the mixing bowl.
If you are working with a ‘dry cabbage’, add a small scoop or two of the handmade brine and add to the jar.
-
Repeat this process of loading and packing until the jar is 75-80% full.
Cabbage Leaf Topper
-
It is time to make the cabbage leaf topper. With the cabbage leaves set aside from earlier, tear off pieces of the leaves to fit into the jar overtop the sauerkraut.
Use the friction of the leaf piece against the glass to create a secure hold. The cabbage leaf topper will help hold the sauerkraut beneath the brine during the fermentation period. It also helps protect the finished sauerkraut during long term storage.
Use several pieces of the leaves to completely cover the top of the sauerkraut. It doesn’t have to be perfect since a glass fermenting weight will be used next.
If you would like to see a demonstration of how to create the cabbage leaf topper, watch the video at the 9min,15sec time stamp where I provide a visual example.
-
Load the 2nd jar exactly in the same way including the cabbage leaf topper.
-
Evenly distribute any remaining juice/brine from the bottom of the mixing bowl by pouring it over the sauerkraut in both jars.
-
Add the fermenting weight to each jar and press it down. The brine should either cover the weight completely or by at least 80%.
-
If you find yourself significantly short on natural brine do this: Add 1½ teaspoon of fine salt to 1 cup of water or 10g salt to 250ml water. Mix thoroughly then pour the additional handmade brine into the jars that need it.
-
Place a loose, regular lid on the jar. So long as the lid is loose and not tight, the fermentation gasses will be able to escape and you will not need to burp the jar during the fermentation period.
Alternatively, you can use a specialty fermenting lid but it is not required.
The Fermentation Period
-
Place the jars of sauerkraut on a dish towel and leave on the counter for 21 to 30 days. The dish towel under the jars will catch any possible brine overflow that may occur during the 1st week of the the fermentation period.
-
The ideal environmental temperature between 70-85°F (21-29°C). This is an optimal range that will allow the sauerkraut to ferment at a nice pace, not too fast and not too slow.
Note: The cooler the environmental temperature is, the slower the fermentation will take place. The warmer the environmental temperature is, the faster the fermentation will take place.
What To Expect
-
Colors will change from vibrant to muted.
Carbon dioxide bubbles will form during the 1st week of fermentation, then die off during week 2 and 3.
A healthy fermentation should have a light soury-sweet smell with hints of sulfur due to cabbage being high in sulfur compounds. If the fermentation smells offensive or rotten, throw it away.
Ending The Fermentation
-
By the third week, the sauerkraut will have reached its desired level of fermentation. The flavors will have intensified, the probiotics will be maximumly developed and the nutrients of the ferment will be increased such as B-vitamins and enzymes.
At this stage, you can choose to end the fermentation or continue fermenting for another week if you prefer a stronger sour flavor.
-
With clean hands, remove the fermenting weight.
-
With a clean utensil, pull back the cabbage leaf topper. Then take out a bite to taste test! Be sure not to double dip if you eat from the utensil.
-
To store the sauerkraut long term, do not return the weight to the jar. Place a tight lid on the jar and store in the refrigerator.
If everything was done correctly, the sauerkraut can last 1 to 2 years properly stored in the refrigerator.
-
If you plan on eating the sauerkraut starting now, you don’t have to keep the cabbage leaf topper on. You can take it out and eat it!
If you plan on storing the sauerkraut for some time before getting to it, keep the topper on because it will help preserve and protect the sauerkraut below until the jar is opened later.
Roasting Garlic
You’ll laugh when you hear how easy it is to roast garlic. The result is smooth, spreadable garlic that has mellowed in flavor. It’s tasty as a spread, but you can toss the roasted cloves into sandwiches or mashed potatoes to add a zippy flavor.
You don’t even have to peel the cloves.
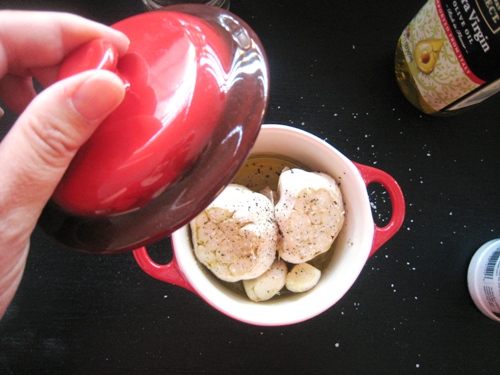
Just chop off the top of the head of garlic. I used two and crammed them into a small lidded baking dish I have. You can use any small dish. I had to separate a few cloves from the mother just to fit them, but it works fine.
Drizzle over the oil and season to taste with freshly ground pepper and kosher salt.
Cover and bake for an hour at 350°.
Glazed Carrots
Servings 4
Ingredients
1 pound fresh, frozen or canned whole baby carrots
1-2 tablespoon orange juice
2 tablespoons butter
1 teaspoon grated orange peel
½ teaspoon salt
¼ cup brown sugar (I like less) or 2 Tb. Honey
1/4 cup chopped flat-leaf parsley or 1 tsp. Dried parsley
Directions
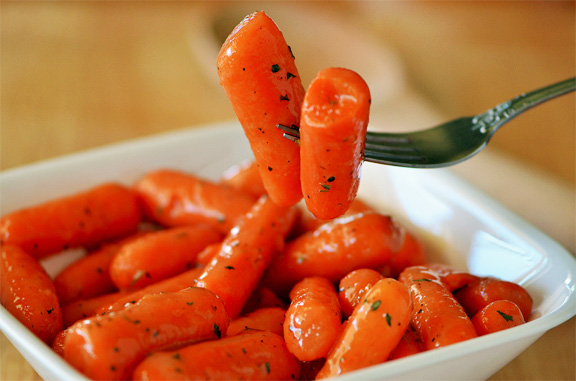
- Cook carrots in a small amount of water with salt until tender. Drain. In a saucepan, combine orange juice, orange peel, butter and brown sugar; heat until sugar dissolves. Add carrots and other ingredients, toss to coat. Heat through. Yield: 4 servings.
Nutritional Facts
1 serving (3/4 cup) equals 150 calories, 6 g fat (4 g saturated fat), 15 mg cholesterol, 152 mg sodium, 23 g carbohydrate, 2 g fiber, 1 g protein.
Farmer Cheese
Farmer Cheese
Servings:16 servings
Ingredients:
1 gallon whole milk
1/2 cup vinegar or lemon
2 teaspoons kosher salt
6 tablespoons finely chopped fresh dill, chives or ground herbs of your choice
Directions:
1 gallon milk in large pan and slowly heat until 190 degrees. The top will be a fine foam of bubbles. Stir occasionally while heating. Remove from heat
Slowly add 1/2 Cup vinegar or lemon juice, and stir the milk. Curds will immediately begin to form.
Let the milk sit for 15 minutes without stirring.
After 15 minutes, add the herbs, if using.
6tablespoons finely chopped fresh dill, chives or ground herbs of your choice
Optional:
1 -1/2 teaspoon Citric acid can replace vinegar or lemon
Place a colander over a large bowl or pot. Drape either a dampened cheesecloth or thin dampened clean dish towel over the colander. Pour the curds into the cheesecloth. The whey, all the liquid in the mixture, will drain and be collected in the bowl below, while the solid curds will be caught in the cheesecloth.
Lift the cheesecloth and wrap it around the curds, twisting and squeezing to remove as much moisture as possible.
After squeezing out the moisture, the curds for farmer cheese will be dry and crumbly. If you want a creamier texture, mix a little of the reserved whey back into the curds.
Add 2 teaspoon kosher salt and stir it together.
To shape the cheese, keep it wrapped in cheesecloth and form it into a mound on a plate. Set another plate on top and press the curds into a flat disc that is 1 to 2 inches tall. Cover and refrigerate for 1 hour or so before removing the cheesecloth.
To make a ball, tie the cheesecloth with a length of butcher’s twine, attach it to a shelf in the refrigerator or a wooden spoon, and suspend it over a bowl. Gravity will help shape the cheese into a ball and remove any excess moisture.
How to Store
Farmer cheese will keep for up to a week in the refrigerator when stored in an airtight container.
You can freeze farmer cheese; wrap in plastic wrap and place in a zip-top freezer bag. Upon thawing it, however, the texture will be a bit crumblier.
If saving the whey, store it in a sealed container in the refrigerator for up to one week.
Corn Casserole – Preppy Kitchen
Notes
Use room temperature ingredients. Let the eggs and sour cream come to room temperature before you start this dish. Eggs will take 30 minutes to 1 hour to reach room temperature, and sour cream takes about an hour. Cold ingredients are harder to incorporate and might not yield a creamy batter.
Jazz up the flavor. Sauté 1 diced yellow onion, 2 minced garlic cloves, and 2 tablespoons of chopped fresh thyme leaves in the butter. Whisk together the sour cream and eggs, then stir in the onion mixture and corn along with the remaining ingredients.
Add sugar. While I prefer this easy casserole on the more savory side, you can add 2 tablespoons of granulated sugar to the sour cream and egg mixture for more sweetness. (Add it along with the corn.)
Add cheese. For extra creaminess and comfort, add 1 cup of shredded cheese like gruyere, Swiss, or cheddar cheese into the batter before pouring it into the pan. Buy a block of cheese and shred it at home. Pre-shredded cheese has additives to prevent clumping, and it therefore doesn’t melt very well.
Servings8 servings
AuthorJohn Kanell
Equipment
8×8” casserole dish
Ingredients
1 (8-ounce) box cornbread mix (like Jiffy Corn Muffin Mix)
1 (15-ounce) can whole kernel corn drained
1 (15-ounce) can creamed corn
2 large eggs
1 cup sour cream (120g)
½ cup unsalted butter melted
Salt and pepper to taste
Instructions
Preheat the oven to 350°F. Lightly grease an 8×8-inch baking dish.
In a large mixing bowl, combine the sour cream, egg, and melted butter, and whisk until well combined. Add the corn, creamed corn, cornbread mix, ¼ teaspoon of salt, and black pepper to taste. (Use more or less salt to taste depending on the salt levels in your canned corn.) Stir together until well combined and pour into the prepared casserole dish.
Bake for 40 to 45 minutes or until the top and edges are golden brown, and the center is only slightly jiggly when gently shaken. Let cool for a few minutes before serving warm.
Nutrition
Calories: 373kcal | Carbohydrates: 38g | Protein: 6g | Fat: 23g | Saturated Fat: 12g | Polyunsaturated Fat: 2g | Monounsaturated Fat: 7g | Trans Fat: 0.5g | Cholesterol: 95mg | Sodium: 485mg | Potassium: 222mg | Fiber: 2g | Sugar: 9g | Vitamin A: 673IU | Vitamin C: 3mg | Calcium: 58mg | Iron: 1mg
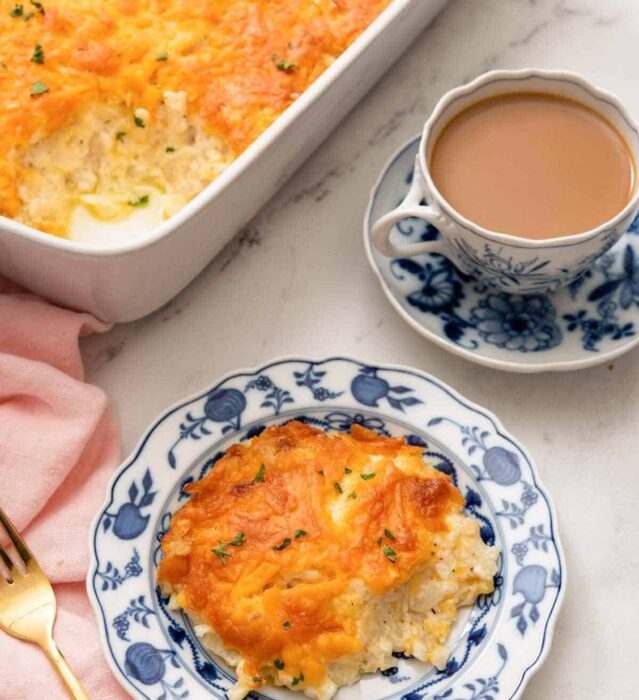
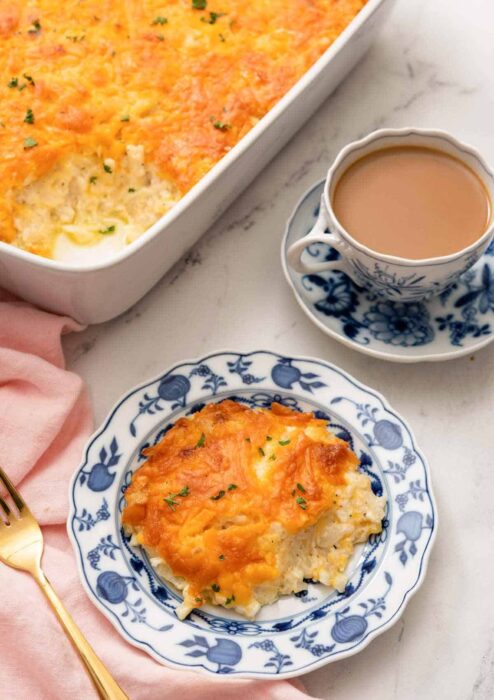
Hashbrown Casserole
Servings12 servings
Author: John Kanell – Preppy Kitchen
Notes
For an extra crunchy texture, you can add some panko breadcrumbs, cornflakes, or crushed Ritz crackers tossed in melted butter over the cheese. However, you’ll have to cover the baking dish with foil until the last 5 to 10 minutes to ensure the crunchy toppings don’t burn.
You can use frozen cubed hashbrowns if you can’t find shredded hashbrowns.
If you’re not a fan of cheddar cheese, you can use any type of melty cheese in its place, such as mozzarella, Monterey Jack, pepper jack, Gruyere, and provolone.
You can add some meat to this hashbrown casserole, such as shredded chicken, cubed ham, or crumbled bacon bits.Add some heat to this old-fashioned hashbrown casserole by adding some diced jalapeños.
Equipment
9×13″ casserole dish
Ingredients
½ cup unsalted butter melted (113g)
2 cups sour cream (480g)
1 (10.5-ounce/298g) can cream of chicken soup
3 cups shredded cheddar cheese divided (12 ounces/338g)
1 small onion finely chopped
1 teaspoon kosher salt
1 teaspoon ground black pepper
1 (30-ounce/850g) bag frozen shredded hash brown potatoes
Instructions
Preheat the oven to 350°F. Pour the melted butter into a 9×13-inch baking dish and swirl to coat.
In a large mixing bowl, stir together the sour cream, cream of chicken soup, 2 cups of shredded cheddar, onion, salt, and pepper. Fold in potatoes until well coated.
Spoon the mixture into the prepared baking dish and sprinkle with the remaining cup of cheddar cheese.
Bake for 45 to 50 minutes or until the casserole is bubbling and beginning to brown at the corners. Let cool for 15 minutes before serving.
Nutrition
Calories: 342kcal | Carbohydrates: 17g | Protein: 10g | Fat: 27g | Saturated Fat: 15g | Polyunsaturated Fat: 1g | Monounsaturated Fat: 6g | Trans Fat: 0.3g | Cholesterol: 73mg | Sodium: 581mg | Potassium: 297mg | Fiber: 1g | Sugar: 2g | Vitamin A: 804IU | Vitamin C: 7mg | Calcium: 253mg | Iron: 1mg
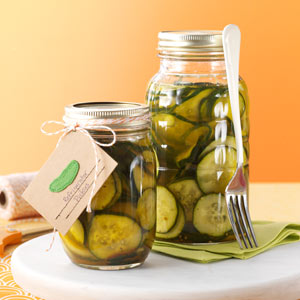
Easy Refrigerator Pickles Recipe
YELD:24 servings
Ingredients
6 cups thinly sliced cucumbers
2 cups thinly sliced onions
1-1/2 cups sugar
1-1/2 cups cider vinegar
1/2 teaspoon salt
1/2 teaspoon mustard seed
1/2 teaspoon celery seed
1/2 teaspoon ground turmeric
1/2 teaspoon ground cloves
Directions
1. Place cucumbers and onions in a large bowl; set aside. Combine remaining ingredients in a saucepan; bring to a boil. Cook and stir just until the sugar is dissolved. Pour over cucumber mixture; cool. Cover tightly and refrigerate for at least 24 hours before serving. Yield: 6 cups.
Nutritional Facts
1/4 cup equals 58 calories, trace fat (trace saturated fat), 0 cholesterol, 50 mg sodium, 15 g carbohydrate, trace fiber, trace protein.
© 2016 RDA Enthusiast Brands, LLC
Turkish yogurt and mayo sauce
Ingredients
1 garlic clove pressed or minced
⅛ teaspoon salt
½ cup mayonnaise see note for substitutes
¼ cup Greek yogurt see note for substitutes
¼ teaspoon ground black pepper
Optional:
2 medium cucumbers, peeled and grated
1 tablespoon finely chopped fresh mint or dill
Instructions
Place minced or pressed garlic with the salt in a shallow bowl. Mash it together to combine.
1 garlic clove,⅛ teaspoon salt
Add mayonnaise and Greek yogurt and mix well.
½ cup mayonnaise,¼ cup Greek yogurt
Taste test and season with ground black pepper.
¼ teaspoon ground black pepper
Cover and refrigerate for 30 minutes before serving.
Notes
Greek yogurt can be swapped for another neutral, unsweetened, yogurt, like Turkish yogurt, or sour cream
Greek yogurt and mayonnaise can be swapped for just crème fraîche
Let it sit for at least 30 minutes before serving, for the flavors to deepen
If you’re making it in advance keep in mind that it will taste more and more of garlic the longer you let it sit
Make ahead: you can make this sauce up to 48 hours in advance
Store leftovers in the fridge in an air tight container for up to 4 days
Nutrition
Calories: 199kcal | Carbohydrates: 1g | Protein: 2g | Fat: 21g | Saturated Fat: 3g | Polyunsaturated Fat:
Everyday Tahini Sauce
Tahini: I like to make sure to buy toasted tahini. Regular, untoasted tahini can be pretty bitter, so definitely go with one that’s toasted for a more robust, smooth flavor.
This simple tahini sauce is something you can use with everything. It’s quick to make, it delicious and it’s oil-free and sugar-free too.
Course: CondimentCuisine: AmericanKeyword: sauce, tahini Servings: 8 Author: Alyssa
Ingredients
½ cup tahini
Juice of 1 lemon
½ teaspoon garlic powder
½ teaspoon red pepper flakes
¼ teaspoon salt & pepper
¼ – ½ cup of water
Instructions
Add all the ingredients into a blender or bowl, starting with 1/4 cup of water. Stir or blend it together until smooth. If the sauce is too thick, add additional water, 1 tablespoon at a time until it reaches your desired consistency (I like mine the consistency of ranch dressing).
Pour into a sealed glass container and keep in the fridge for up to 7 days.
Nutrition
Serving: 2tablespoons | Calories: 90kcal | Carbohydrates: 3g | Protein: 3g | Fat: 8g | Saturated Fat: 1g | Sodium: 80mg | Potassium: 69mg | Fiber: 1g | Sugar: 1g | Vitamin A: 47IU | Vitamin C: 1mg | Calcium: 21mg | Iron: 1mg
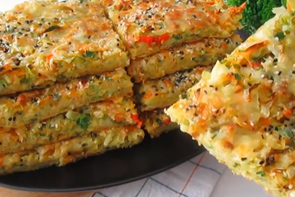
Vegetable kofta
Ingredients:
4 eggs.
1 teaspoon black pepper.
2 teaspoons baking powder
4 tablespoons olive oil
4 tablespoons milk
4 tablespoons of all-purpose flour.
2 potatoes
2 carrots
1 leek
2-3 cups of cabbage finely chopped
3/4 cup cheddar cheese
Optional:
2 peppers
parsley
Nigella and Sesame Seeds
Directions:
Pre-heat oven 350 degrees
Grate and finely chop all vegetables
Blend in seasonings, baking powder and flour mixing well.
Add Milk and mix then the oil and mix.
Place on parchment covered baking sheet and even out.
Bake for 25 minutes
Sprinkle cheese, Nigella and Sesame seeds over while still hot.
Bake for another 10 minutes.
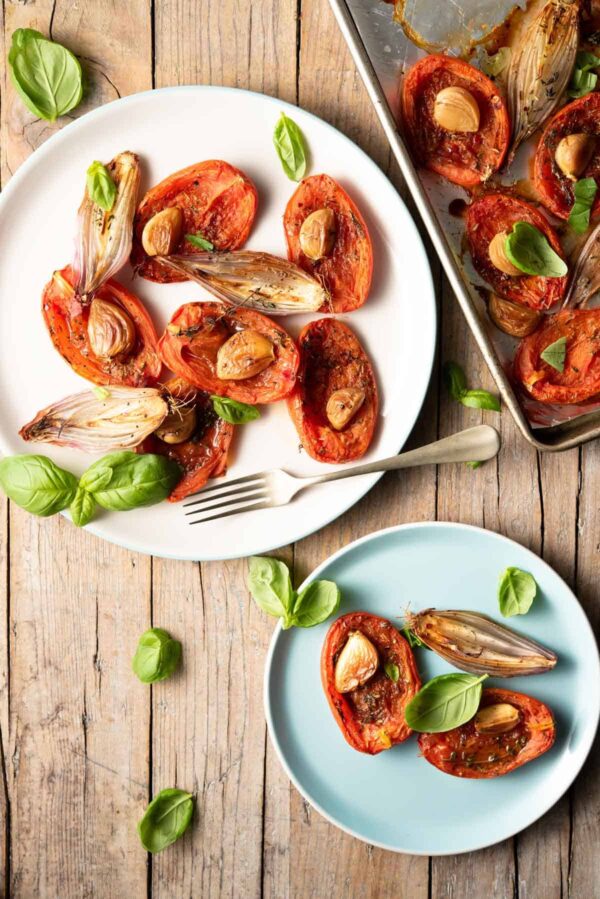
Roasted Tomatoes
Servings4 -6 servings
AuthorJohn Kanell
Ingredients
2 ½ lb roma tomatoes 10 large roma tomatoes, halved
5 to 6 shallots halved and peeled
2 heads garlic cloves separated and peeled
2 tbsp balsamic or red wine vinegar 30mL
3 tbsp olive oil 45mL
2 tsp Herbes de Provence 1g
¾ tsp. kosher salt 4g
1/2 tsp ground black pepper 3g
¼ tsp chile flakes 500mg
3 springs fresh thyme
Garnish: fresh basil
Instructions
Preheat the oven to 375F. If desired, cover a large rimmed baking sheet with aluminum foil to make clean up easy.
Using your thumbs, remove excess seeds and juice from halved tomatoes.
Place halved tomatoes and shallots on pan, cut side up; place garlic cloves in tomato halves; drizzle with vinegar and olive oil.
Sprinkle evenly with Herbes de Provence, salt, pepper, and chile flakes. Scatter thyme over tomatoes.
Bake for 45 to 55 minutes, rotating pan once to encourage even cooking.
Garnish with basil, if desired. Refrigerate up to 1 week, or freeze in a resealable plastic bag up to 6 months.
Notes
You can follow this recipe for any tomatoes you have although if the tomatoes you use are small (such as cherry tomatoes) you need to just coat the garlic in oil and toss them alongside the tomatoes.
Fresh thyme is extra delicious with roasted tomatoes but you could also use rosemary, tarragon or oregano which would also work really well.
Feel free to add different spices such as fresh or dried chili, paprika or fennel seeds for different flavor combinations.
Red or white onion can be used instead of shallots, you’ll probably only need about 2 large onions cut into wedges.
Line your baking sheet with foil or baking parchment for easy clean up.
Don’t be tempted to turn up the heat to speed up the cooking time as the tomatoes will likely burn and won’t have a slow roasted and caramelized flavor.
The tomatoes can be stored in the fridge for up to 1 week or frozen for up to 6 months.
Nutrition
Serving: 1batch | Calories: 632kcal | Carbohydrates: 52g | Protein: 11g | Fat: 47g | Saturated Fat: 6g | Sodium: 1516mg | Potassium: 2767mg | Fiber: 18g | Sugar: 30g | Vitamin A: 10185IU | Vitamin C: 160.3mg | Calcium: 311mg | Iron: 15.9mg
Thank You! https://preppykitchen.com/roasted-tomatoes/
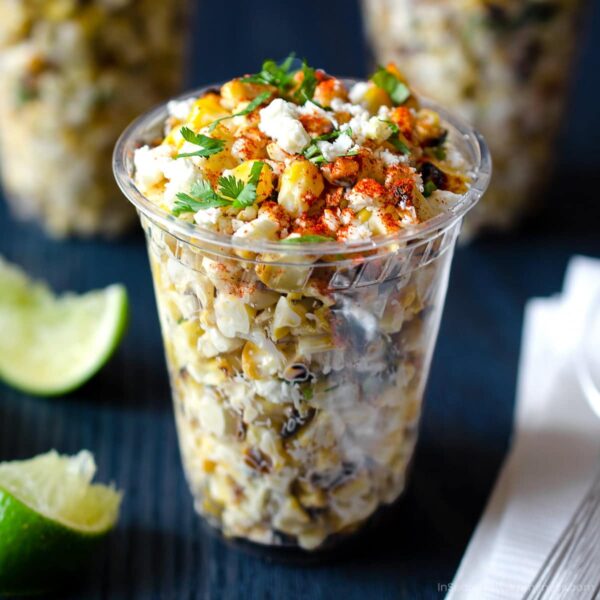
Mexican Corn Cups (Esquites)
By: Shareba Abdul
YIELD: 4 servings
Mexican corn cups (a.k.a. esquites) are so easy to make! This healthy snack is loaded with flavour from grilled corn, lime, mayo, cheese and more.
Ingredients:
3 cups of frozen corn (4 ears of corn on the grill adds a wonderful taste to this recipe)
¼ cup mayonnaise, or Mexican crema
2 teaspoons lime juice, plus extra lime wedges for serving, if desired
1 teaspoon chili powder, plus extra for sprinkling (ancho, chipotle, your favourite mix)
salt, to taste (omit if using Feta cheese)
½ cup Cotija cheese, crumbled (substitute with Feta)
1 tablespoon cilantro, finely chopped (for garnish, if desired)
Instructions:
To Make Recipe with Frozen Corn:
Rinse 3 cups of frozen corn under warm water to quickly defrost it. Drain thoroughly.
Melt 1 tablespoon of butter in a medium skillet over medium-high heat.
Add the drained corn to the pan. Cook for 5-10 minutes. The corn will be juicier when cooked for less time, but will take on tasty browned bits if you leave it in the pan longer.
Remove from heat and allow to cool.
Combine the corn in a medium bowl, combine the mayonnaise, lime juice and chili powder and season with salt as desired.
Spoon a layer of the corn mayo mixture into small cups. Sprinkle a layer of cheese, cilantro (optional), and more chili powder (if desired), then add another layer of corn and continue layering ingredients until the cups are full.
Serve immediately with lime wedges, and refrigerate unused portions promptly. Leftovers will last about 1-2 days in the fridge.
Make Ahead: If you want to make this dish ahead of time, grill the corn, cut off the kernels and store them in the fridge for later. You can make the mayonnaise mixture ahead of time too – just leave everything unassembled until the last minute.
NUTRITION
Calories: 157kcal | Carbohydrates: 2g | Protein: 3g | Fat: 16g | Saturated Fat: 5g | Cholesterol: 23mg | Sodium:
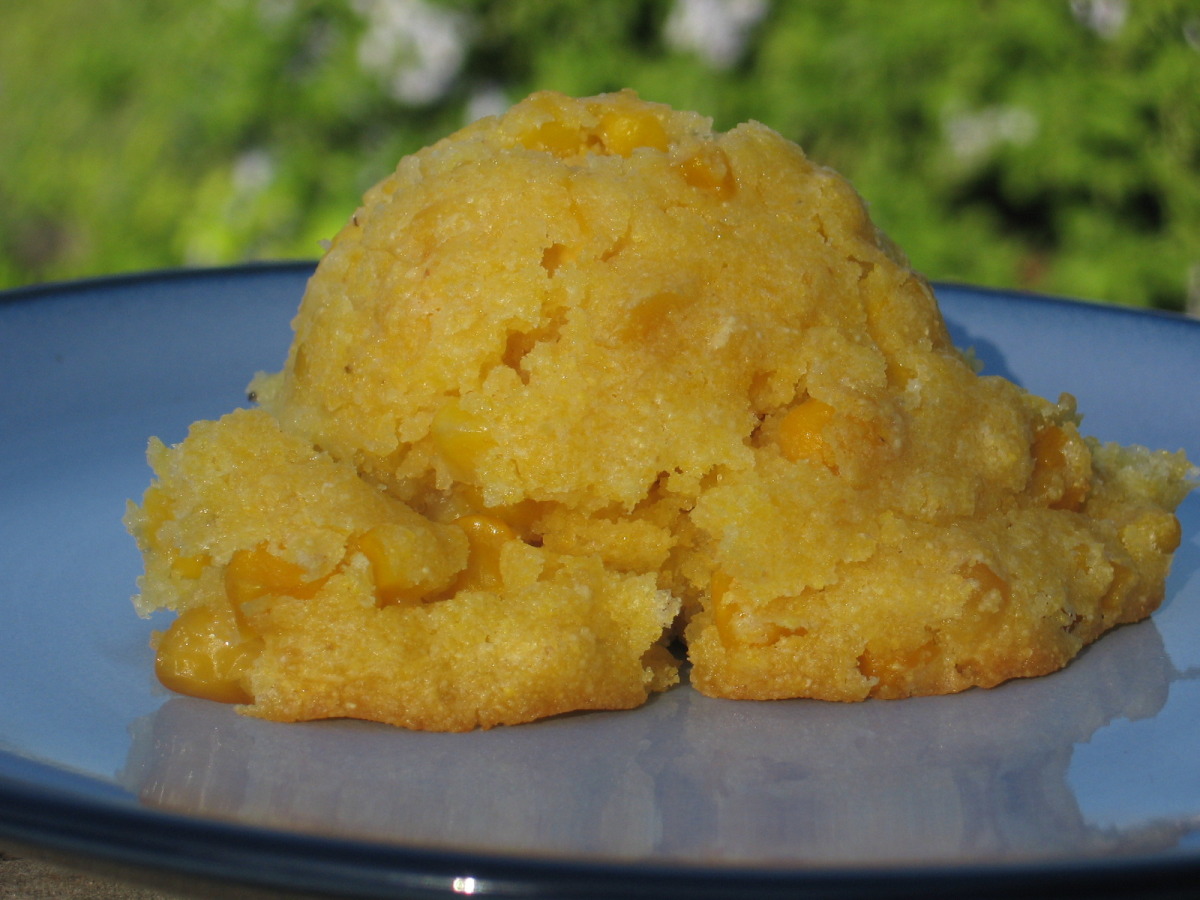
El Torito’s Sweet Corn Cake
Yield: 10 Servings
1/4 C. butter, unsalted
2 T. shortening
1/2 C. masa harina
3 T. cold water
1 10 oz. package frozen corn kernels
3 T. cornmeal
1/4 C. sugar
2 T. whipping cream
1/4 t. baking powder
1/4 t. salt
Whip butter and shortening in mixing bowl until fluffy and creamy. Add masa harina
gradually and mix thoroughly. Add water gradually, mixing thoroughly.
Blend corn kernels until coarsely chopped. Stir into masa mixture.
Mix cornmeal, sugar, whipping cream, baking powder and salt in large bowl. Add butter
masa mixture; mix until blended. Pour masa mixture into 8″ greased baking pan.
Cover with foil and bake at 350°F. until corn cake is firm, 40 to 50 minutes. Allow to stand at
room temperature 15 minutes before cutting into squares. Or use ice cream scoop to serve.
Chi−Chi’s Sweet Corn Cake
1/2 cup (1 stick butter), softened
1/3 cup masa harina
1/4 cup water
1 1/2 cups frozen corn, thawed
1/4 cup cornmeal
1/3 cup sugar
2 tablespoons heavy cream
1/4 teaspoon salt
1/2 teaspoons baking powder
Preheat oven to 350 degrees.
Blend butter in a medium bowl with an electric mixer until creamy.
Add the masa harina and water to the butter and beat until well combined.
Put defrosted corn into a blender or food processor and with short pulses, coarsely chop the corn on low speed. You want to leave several whole pieces of corn.
Stir the chopped corn into the butter and masa harina mixture.
Add cornmeal to mixture and combine.
In another medium bowl, mix together the sugar, cream, salt, and baking powder. When the ingredients are well blended, pour the mixture into the other bowl and stir everything together by hand.
Pour corn batter into an ungreased 8″x8″ baking pan.
Cover the pan with aluminum foil. Place this pan into a 13″x9″ pan filled 1/3 of the way up with hot water. Bake for 50−60 minutes or until the corn cake is cooked through. When the corn cake is done, remove the small pan from the larger pan and let sit for at least 10 minutes.
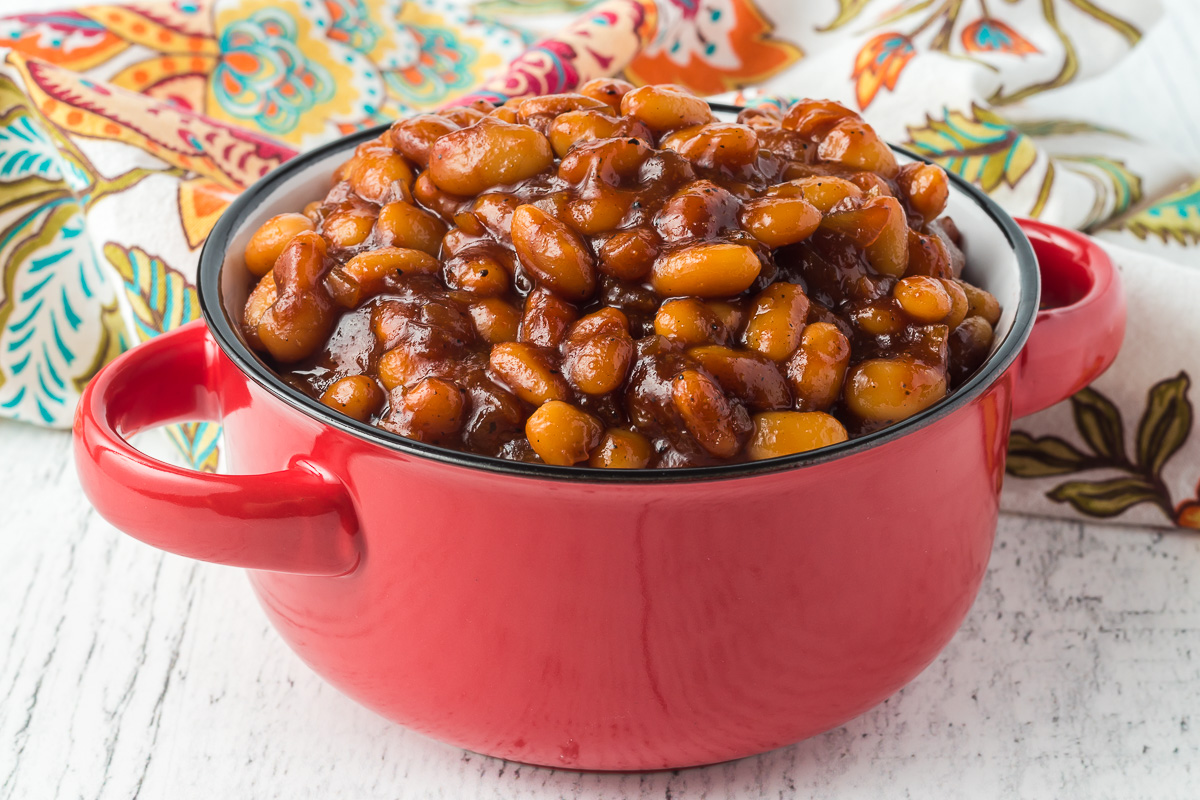
Baked Beans
4 Servings
NOTES : Not grandmas, but quick and still good. Some like this dish English style on toast.
1/2 C Chopped Onion
1-2 Tsp Oil
1 Large Pork & Beans
1/4 C Ketchup
1/4 C Brown Sugar
1 Tsp Worcestershire Sauce
1 Tb Mustard
Cook and stir onion in oil until tend. Remove excess oil. (Just tilt pan, oil will pool, move onions up the pan away from the oil with a spatula, and soak up oil with paper towel). Stir in the beans and remaining ingredients. Simmer uncovered about 10 minutes or until desired consistency.
Cabbage Salsa
This salsa is served in Washington state instead of a table salsa we are used to in the southwest. I find it a great salsa for fish tacos.
Ingredients:
1/2 head cabbage, shredded with knife
3 Roma tomatoes, diced
1/2 red onion, diced or 1 bunch green onions
1/2-1 bunch fresh cilantro, chopped
1/2-1 jalapeno, seeded and diced
1-2 Tb lemon or lime juice
½ tsp salt
2 tsp garlic power
2 tsp red wine vinegar
1tsp olive or canola oil
½ tsp salt, taste test this before adding more
1 tsp Pico De Gallo Con Limon by Fiesta brand (soo good with this)
Optional:
½ teaspoon sugar
½ tsp cumin, ground
1 avocado, diced
Directions:
Shred cabbage into a large bowl and toss with the oil.
Mix in the onion, cilantro, jalapeno and tomato.
In a separate bowl mix all the other ingredients together and pour over the cabbage.
Toss well, cover and refrigerate for at least 1 hour before serving.
If you intend to serve the next day, (which is even better for the cabbage blend), hold back the tomatoes and avocado, and mix in before serving.
Recipe 2:
Ingredients
1 large head of cabbage
1 bunch green onions
3-4 radishes, chopped fine
1 bunch cilantro, fresh
6 jalapenos, fresh
1/4 c lemon juice
1 1/2 Tbsp garlic power
1 tsp Pico De Gallo Con Limon by fiesta brand
1 tsp salt
1 tsp white pepper
1 Tbsp red wine vinegar
2 tsp olive or canola oil
6 roma tomatoes
Optional:
1 tsp cumin, ground
2 avocados
Directions
- Chop the cabbage to the desired size (I like mine a little chunky). Finely cilantro by hand and add to the cabbage (Make sure to rinse the cilantro under water really good). I use a chopper to chop the green onions and jalapenos. The jalapenos need to be cleaned and sliced in half and all the seeds and membranes removed. Do not add any of the seeds or membranes until after you sample and see how hot the salsa is naturally. If the salsa is not too hot go ahead and add the seeds and membranes as needed.
- Add all the spices, lemon juice, and red wine vinegar. Mix together really well.
- Dice the tomatoes and avocados and fold them in last. If I make this recipe the night before I do not add the tomatoes and avocados until about one(1) hour before I serve the salsa. Do not mix to much as the tomatoes and avocados will become mushy. Serve with white corn chips. Enjoy!
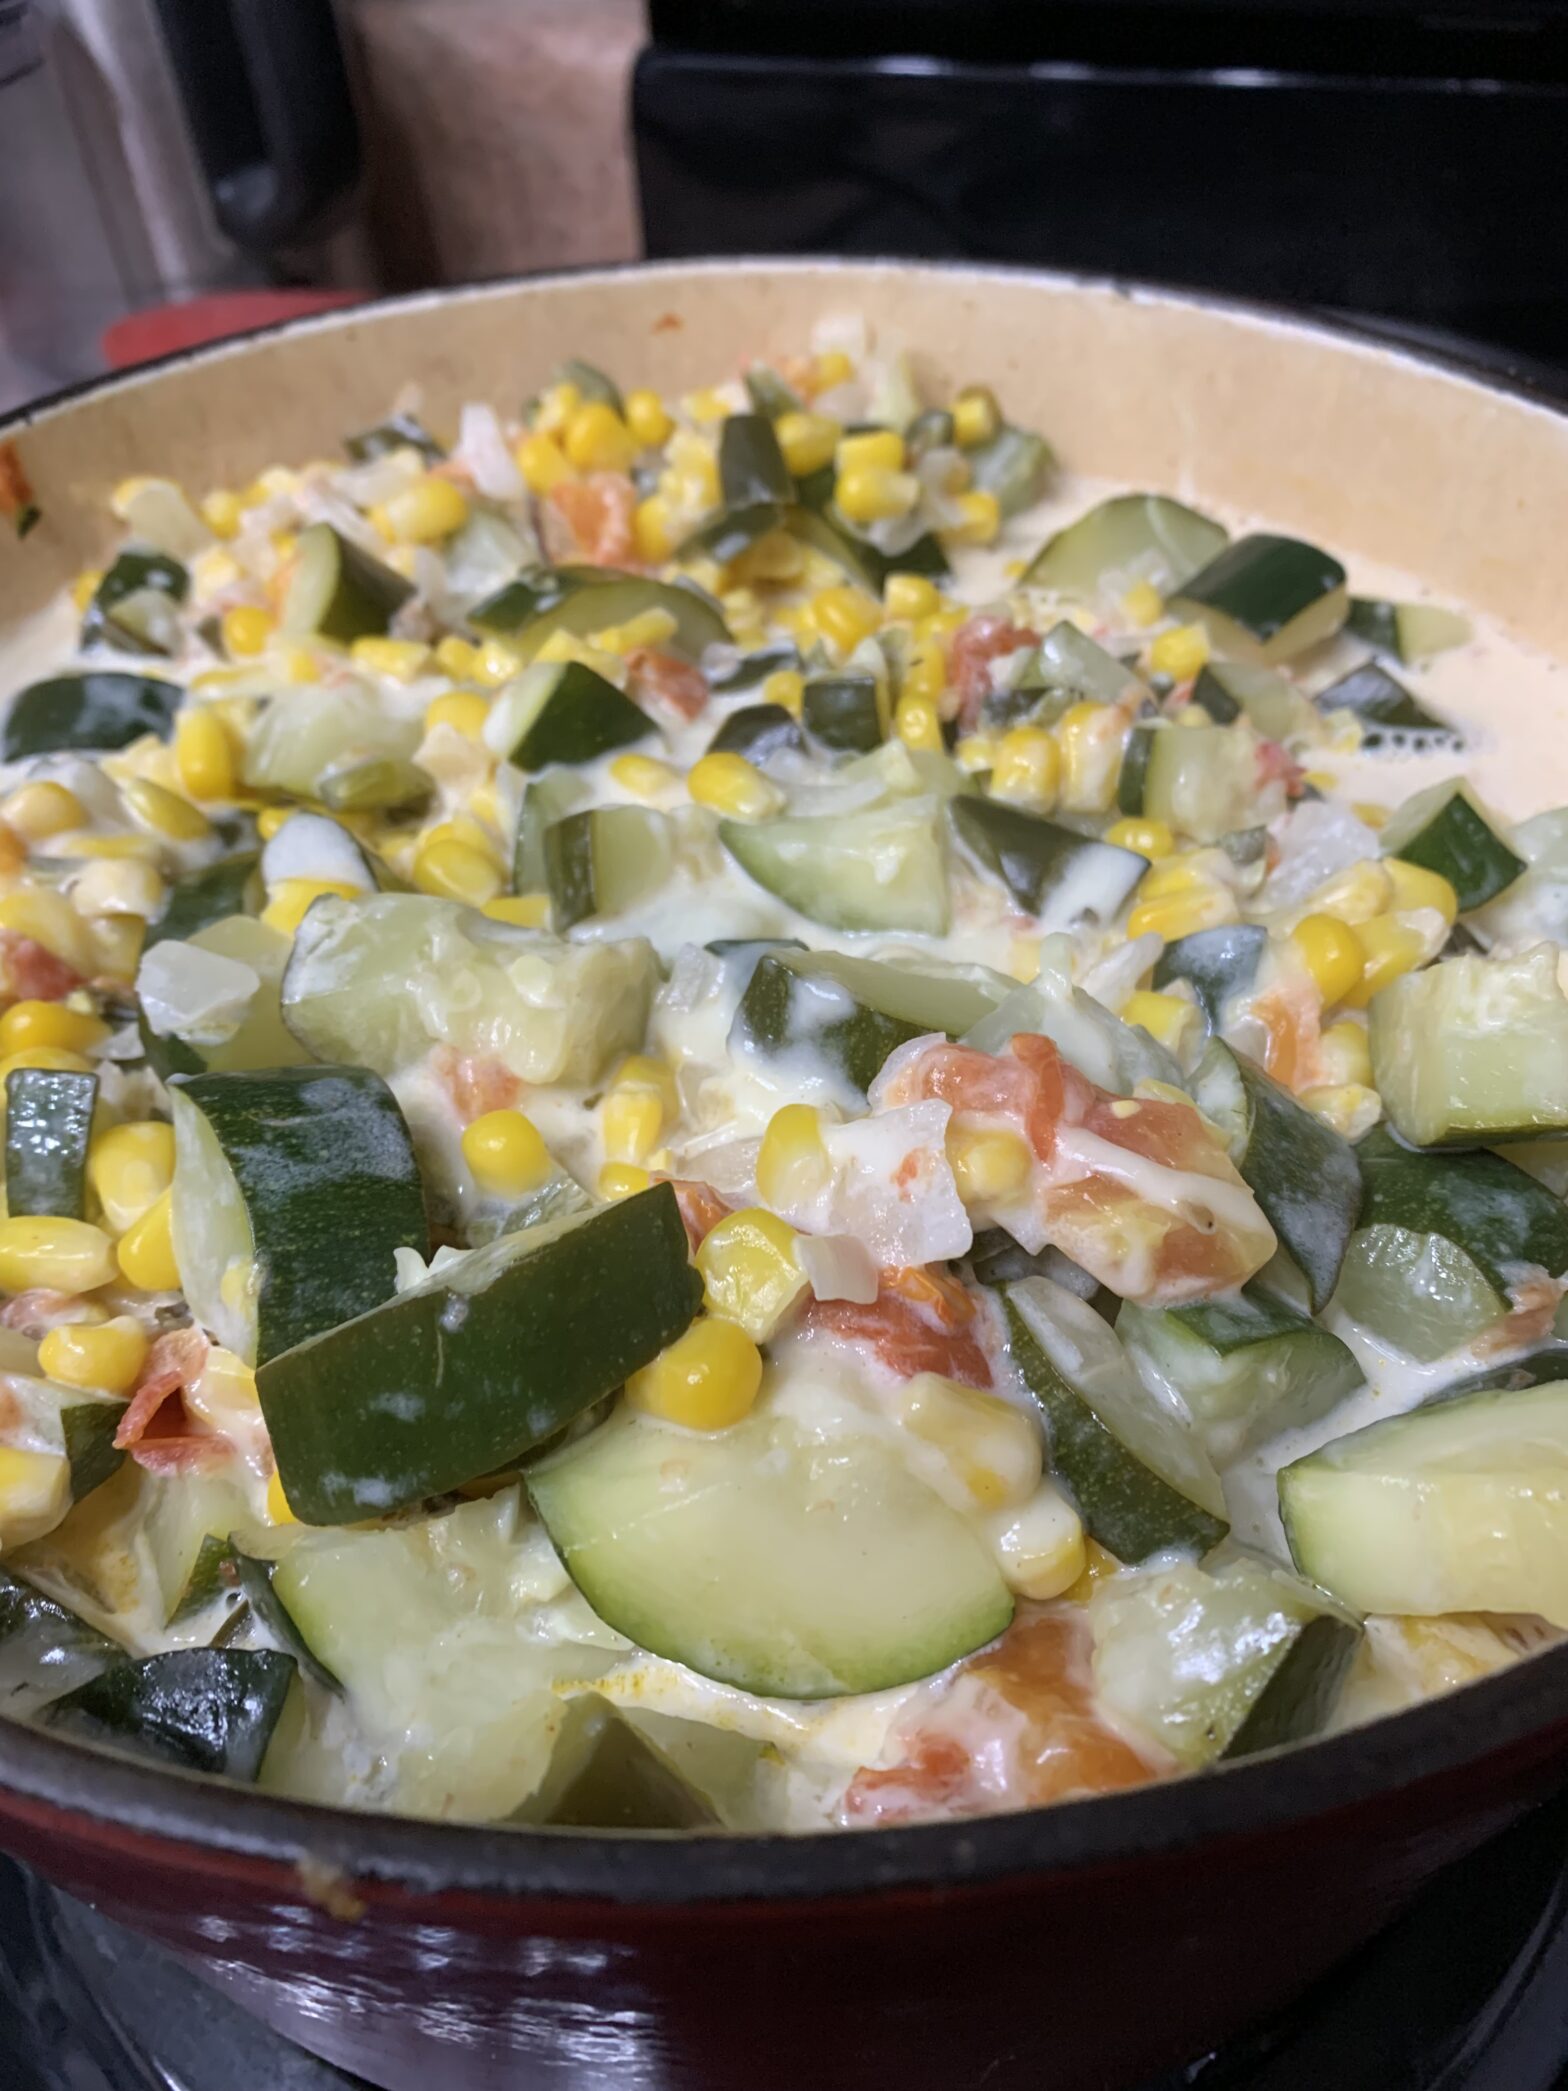
Calabacitas (Mexican Squash, Corn & Cheese)
serves four
From Socorro Segundo, El Centro California. Socorro spoke very little English and I spoke no Spanish, but we managed to share recipes. Shopping together was a real adventure, with lots of pointing and enunciating things in two languages. Somewhere along the way we became friends. This recipe is one of my favorites that she passed down to me. Socorro was heavy on the garlic and cheese, and it was delicious. This dish is called calabacitas, Mexican succotash, little squash and probably a few more names I haven’t run across. No matter what name it goes by, it is very versatile in its ingredients and easy to make. This makes a nice side dish or make a vegetable taco out of it, any way you choose to use it I think you will like it.
1 Roma tomato, seeds removed
1/8 C chicken broth or (I use 1 Tb Better than Bouillon & 2 Tb Water)
2-3 medium zucchini or Mexican squash (about 9”) or make a mixture of yellow and green squash.
1 cup frozen sweet corn
½ – ¾ C sweet yellow onion chopped
1/2 C grated Monterey Jack Cheese or Asadero cheese
2 cloves of garlic or ½ tsp powdered garlic (a little more if you love garlic)
1 lg green chili (Anaheim), roasted, peeled, and chopped
2 tbs canola or olive oil (Socorro used lard)
1/8 tsp salt and pinch of pepper to taste, if using Queso Fresco you may not need salt
Optional:
1/8 tsp Mexican oregano
Queso Fresco cheese to sprinkle over dish
If you want less cheese omit the Monterey jack cheese and sprinkle ¼ C or less, of Queso Fresco cheese into the mix and a little spread on the top of dish before serving.
Note:
When choosing a Mexican cheese remember Panela, Queso Fresca or Queso Blanco will not melt when heated but add a nice of flavor crumbled into dishes. I love Queso Fresca, but be careful with adding extra salt when using this cheese at it is a bit salty in itself.
Chop squash into 1/4 to 3/8″ chunk and set aside.
Sauté chopped onion, diced tomato and chili in oil until onions are sweated.
Add corn and garlic sautéing a couple more minutes.
Stir in squash adding chicken broth, oregano if using, and 1/8 tsp salt.
Cover and simmer for 5 minutes.
Check to see if any liquid is needed.
You may find there is too much liquid as the squash cooks, if so remove lid.
When squash is almost tender, drain off any excess liquid leaving about 1/3 -1/4 C so mixture doesn’t scorch, add pepper to taste and carefully mix in the cheese so the squash doesn’t break up.
Taste test for salt and pepper, (garlic powder?) and simmer until squash is fork tender. Try not to overcook, the squash should still be well formed.
At this point you can either serve or place in oven broiler, sprinkle on a little more cheese and toast the cheese.
Cucumber And Onion Slices
My momused to make this every once in awhile. I think she and I were the only ones in the family that liked it when I was young. Of course, mom used a pinch of salt, a splash or 2 of vinegar, a glug or so of oil, and filled the jar up the rest of the way with water. I have tried to give measurement to the splash and glug, but the pinch has to stay.
2 cucumbers, sliced in ¼ inch slices
1 med. onion, sliced in ¼ inch slices and separated
½ cup vinegar
¼ cup water
¼ cup oil
a pinch of sugar
a pinch of salt and pepper
I have been known to add tomato wedges, but mom never did. I’m not too sure she used sugar either.
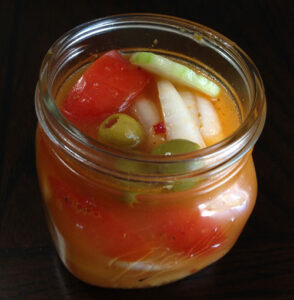
Slice cucumbers and onion. Separate the onion slices into separate rings. Layer cucumbers and onion slices in a wide mouth, quart, canning jar. Mix sugar and water together until dissolved and pour into jar. Add all the rest of the ingredients. If you need to, add more water so that cucumbers and onions are covered with liquid. Screw lid and ring onto jar and shake it to mix up the liquid. Let stand at least an hour before eating the vegetables. Mix the vegetables and liquid up again before serving. You can of course, pour the liquid over the cucumbers and onions in a bowl with the same results. Use a slotted spoon to dip out the vegetables for serving.
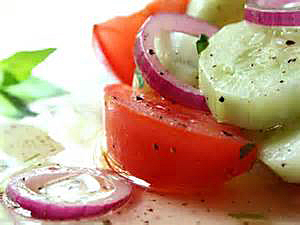
Marinated Tomato & Cucumber Salad
This is absolutely one of my favorite summer dishes
4 lg. tomatoes, cut into wedges
2 cucumbers, peeled & cubed
1 lg. Vidalia onion, peeled & sliced (Red onion is also great with this salad)
½ C olive or salad oil
¼ C cider vinegar
1 Tb sugar or splenda
½ tsp salt
1/8 tsp oregano
Pinch of dill or 1 Tb of chopped fresh dill
Pinch of basil or 1 Tb of chopped fresh basil
Optional:
1/8 tsp Garlic powder or finely chopped clove of garlic
Crumbled feta cheese
Whole drained black olives
Put prepared vegetables in large salad bowl. In smaller bowl combine remaining ingredients with wire whip until salt and sugar dissolve. Pour dressing over vegetables and let stand in refrigerator about 1 hour before serving for best flavor.
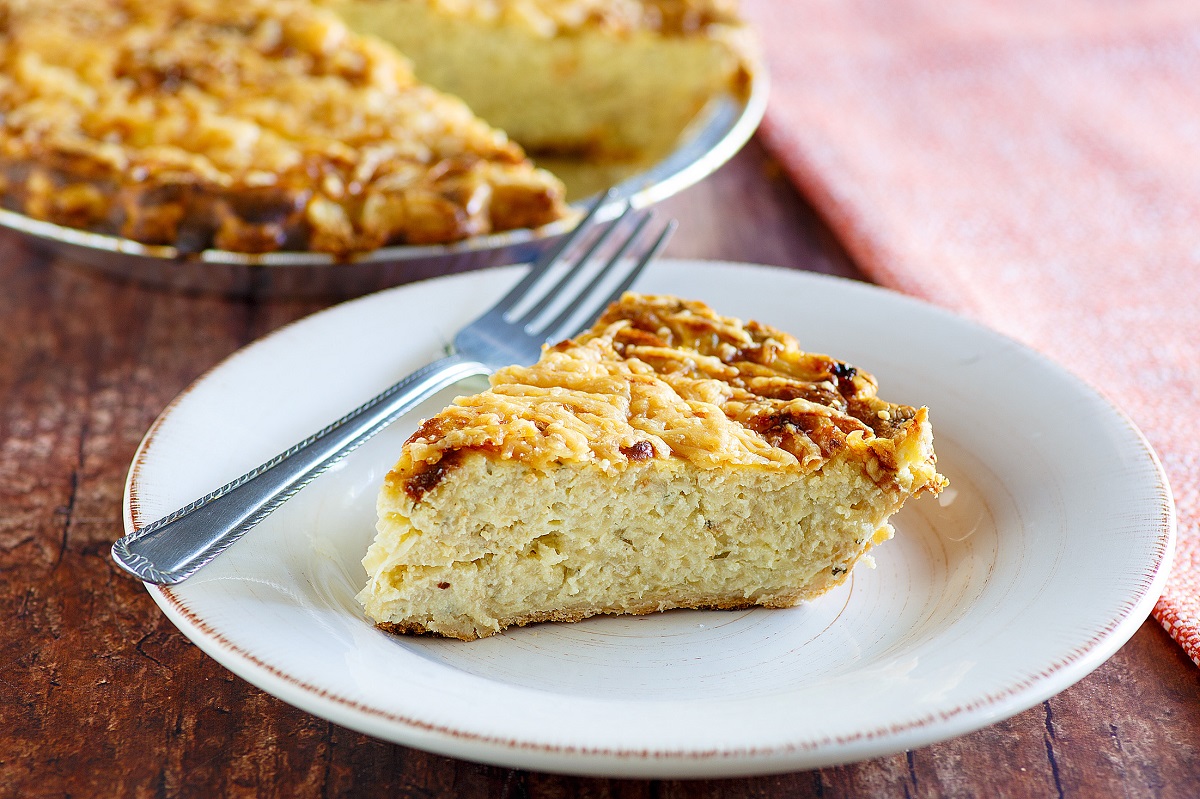
Vidalia Onion Pie
16 servings 279 cals
I have made this without crust of any kind with success.
3-4 C Vidalia onions, thinly sliced
½ C unsalted butter or bacon grease
4 eggs, beaten
½ C cream
2 Tb flour
½ C sour cream
salt and pepper to taste
1 pinch ground nutmeg
¼ C grated Parmesan cheese
(Optional)2 (9 inch) pie shells, baked or make the Ritz cracker shell; recipe below.
(Optional) 2 tablespoons hot sauce
1 pinch paprika
½ C grated Parmesan cheese for topping ( or try mixing with sharp cheddar cheese)
Preheat oven to 375 degrees and make sure oven is ready before placing pie inside.Bake in preheated oven for 20 minutes if using crust. Lower temperature to 350 degrees F (175 degrees C) and bake for an additional 30 to 40 minutes, or until lightly browned on top.
In a medium skillet, cook onions in butter or bacon grease for about 10 minutes, or until clear and soft; stir often. Reserve juices.
In a large bowl, mix onions with eggs, cream and sour cream.
Stir in onion juices, butter and cheese.
Sprinkle in flour
Add salt and pepper and hot sauce to taste.
Make sure all ingredients are well blended and then pour into the 2 pie shells.
Sprinkle grated cheese and paprika on top of pies.
Follow baking instructions at top
Let cool for a few minutes to settle before slicing.
Ritz Cracker shell
1 cup ritz cracker crumb
4 tablespoons butter, melted
Mix Ritz cracker crumbs and melted butter. Press mixture into an 8-inch pie plate.
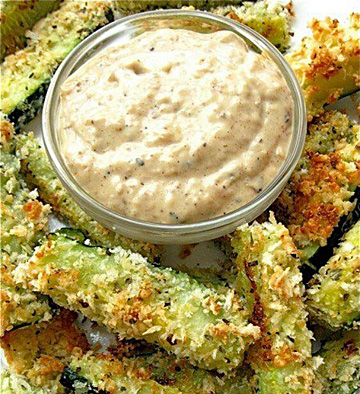
Zucchini Sticks Baked and Sweet Onion Dip
Makes 3 Servings Yield: about 3 dozen sticks
Here’s a guilt-free way to enjoy the crunchy outside (and juicy inside) of a restaurant-style zucchini stick.
Note: For a little heat you could mix into the panko 1/4
teaspoon smoked cayenne or crushed up red chili flakes. Enjoy these vegetables with or without the dip. Original recipe from king author flour.
ZUCCHINI STICKS
3 medium zucchini, unpeeled, cut into 3″-long stick
1 tbs salt
1 c coarse, dry bread crumbs (e.g., panko)*
1/2 c freshly grated parmesan cheese
(Optional)1 tbs herb seasoning or herbs de province
1/4 tsp pepper
olive oil spray
1/2 c egg substitute; or 2 large eggs; or 3 egg white, lightly beaten
DIP
1 tbs butter
1 medium sweet onion, about 1/2 pound, peeled and sliced
2 tbs cider vinegar
2 tbs honey
1 tbs prepared mustard
1 c mayonnaise
salt and pepper to taste
1) TO MAKE THE DIP: Melt the butter in a medium frying pan over moderate heat, and add the sliced onions. Cook, stirring occasionally, until the onions soften, then caramelize. This should take between 10 and 15 minutes. The lower the heat,
the longer it takes, but the less likely you are to burn the onions.
2) Once the onions are a medium brown, remove from the heat and add the vinegar.
3) Place the onions and vinegar into a small food processor. Add the honey and mustard, and process or blend until smooth.
4) Add the mayonnaise and salt and pepper to taste, stirring to combine. Refrigerate, covered, until ready to serve.
PREP before coating the zucchini: I peal some of the skin off and slice in thick strips or wedges as we like it best this way. If you are using fresh in-season zucchini peeling is probably not necessary as the skin is not tough. If you make slices thick it will take a longer cooking time.
I sprinkle my prepared zucchini with salt as stated below; as you can see by the liquid that is left after an hour, the zucchini has a lot of excess water in it.
1) TO MAKE THE ZUCCHINI STICKS: Place the zucchini sticks in a colander over a bowl and sprinkle with the salt. Let the zucchini drain for 1 hour or longer; rinse and pat dry.
2) Combine the Panko, Parmesan, and any seasoning used; set aside.
3) Preheat the oven to 425°F. Line a baking sheet with parchment, and spray the parchment with olive oil.
4) Dredge sticks a few at a time in the egg, then roll in the crumb mixture. Place the sticks on the prepared baking sheet.
5) Bake sticks for 12 minutes, turn over, and bake for an additional 8 minutes, until golden brown and crisp. If you have thick slices about 15 min. on one side and 10 on the other. Keep a close check on the zucchini for doneness.
6) Serve immediately, with sweet onion dip.
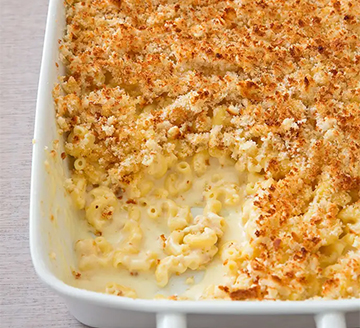
Classic Macaroni and Cheese
SERVES 6 to 8, or 10 to 12 as a side
TIME 1 hour
For a macaroni and cheese recipe that would appeal to adults and kids alike, we kept things simple, staying away from pungent cheeses and overly rich eggs and cream. Instead, we tossed al dente pasta with a béchamel-based cheese sauce, using a combination of sharp cheddar for flavor and Monterey Jack for creaminess. To give our macaroni and cheese recipe a crunchy topping, we tossed homemade bread crumbs with melted butter, sprinkled them over the casserole, and browned the dish quickly under the broiler.
Ingredients:
3 slices hearty white sandwich bread, torn into quarters
2 tablespoons unsalted butter, cut into 4 pieces and chilled, plus 5 tablespoons unsalted butter
1 pound elbow macaroni
Salt
6 tablespoons all-purpose flour
1 ½ teaspoons dry mustard
¼ teaspoon cayenne pepper
5 cups whole milk
8 ounces Monterey Jack cheese, shredded (2 cups)
8 ounces sharp cheddar cheese, shredded (2 cups)
Instructions
Adjust oven rack to lower-middle position and heat broiler. Pulse bread and chilled butter in food processor until coarsely ground, 7 to 10 pulses; set aside.
Bring 4 quarts water to boil in Dutch oven. Add macaroni and 1 tablespoon salt and cook, stirring often, until tender. Drain macaroni and set aside in colander.
Melt remaining 5 tablespoons butter in now-empty pot over medium-high heat. Whisk in flour, mustard, cayenne, and 1 teaspoon salt and cook for 1 minute. Slowly whisk in milk until smooth. Bring mixture to boil, reduce heat to medium, and cook, whisking occasionally, until thickened to consistency of heavy cream, about 5 minutes. Off heat, whisk in cheeses until fully melted. Add macaroni and cook over medium-low heat, stirring constantly, until steaming and heated through, about 6 minutes.
Pour mixture into 13 by 9-inch broiler-safe baking dish. Top with bread-crumb mixture and broil until crumbs are deep golden brown, 3 to 5 minutes, rotating dish if necessary for even browning. Let rest for 5 minutes. Serve.
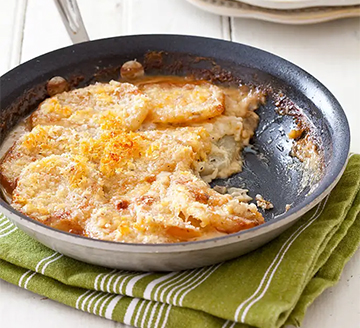
Cheesy Scalloped Potatoes for Two
SERVES 2
TIME 1 hour
Why This Recipe Works
Casserole-style scalloped potatoes can take as long as an hour to cook through. We not only wanted a version suitable for two, but we wanted it on the table as quickly as possible. We began by sautéing onion, garlic, and thyme in an 8-inch nonstick skillet before adding chicken broth, cream, and potatoes. To ensure quick cooking, we simmered the potatoes in the aromatic liquid until they were nearly tender (and well seasoned). Now it was time for the cheese. We knew we wanted assertive cheese flavor, but the more cheese we added, the greasier the dish became. Employing an old test kitchen trick, we tried tossing the cheese with cornstarch. Sure enough, the grease was held at bay even with a generous 1 cup of added cheese.
Ingredients:
2 ounces mild cheddar cheese, shredded (1/2 cup)
1 ½ teaspoons cornstarch
1 ounce Parmesan cheese, grated (1/2 cup)
1 teaspoon vegetable oil
½ cup finely chopped onion
1 garlic clove, minced
¼ teaspoon dried thyme
⅓ cup low-sodium chicken broth
⅓ cup heavy cream
12 ounces russet potatoes, peeled and sliced 1/4 inch thick
½ teaspoon salt
¼ teaspoon pepper
Before You Begin
Don’t use preshredded cheese, which contains added starch to prevent caking. By adding cornstarch yourself, you can control the dish’s texture. You’ll need 2 small or 1 extra-large potato.
Instructions:
Adjust oven rack to upper-middle position and heat oven to 425 degrees. Toss cheddar and 1 teaspoon cornstarch together in bowl until well combined. Toss Parmesan and remaining 1/2 teaspoon cornstarch together in second bowl until well combined.
Heat oil in 8-inch nonstick, ovensafe skillet over medium heat until shimmering. Add onion and cook until browned, about 5 minutes. Stir in garlic and thyme and cook until fragrant, about 30 seconds. Add broth, cream, potatoes, salt, and pepper and bring to boil. Reduce heat to medium-low, cover, and simmer until potatoes are nearly tender, 10 to 12 minutes.
Off heat, stir in cheddar mixture and press potatoes into even layer
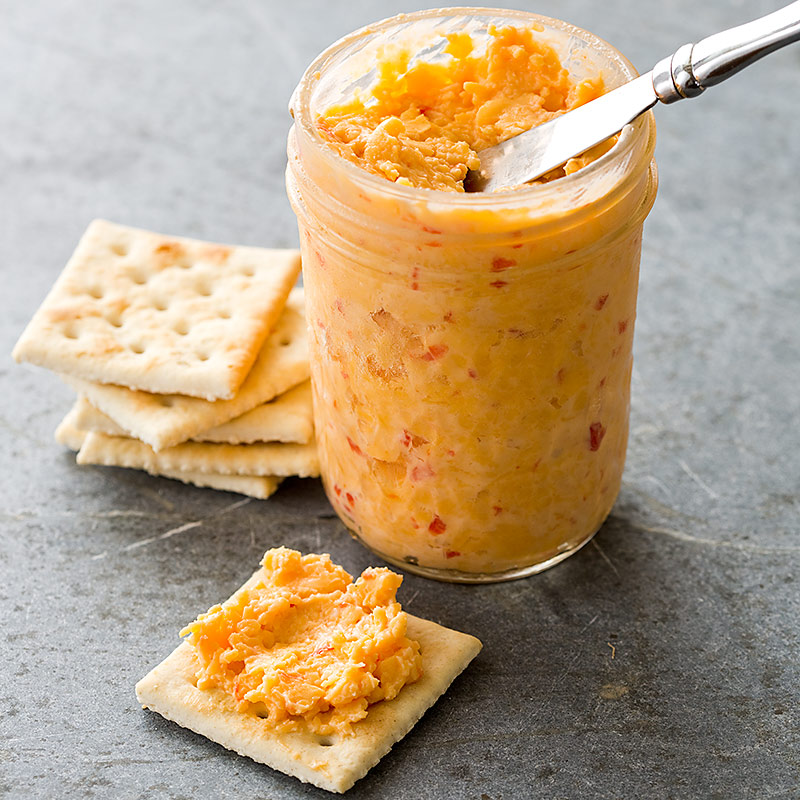
Pimiento Cheese Spread
If you are from the south, this little bit of heaven shows up as often as potato salad at picnic or party. I first tasted it in El Centro Ca. at a downtown drug store. They made me a pimento cheese and liverwurst sandwich, which hooked me for life on pimiento cheese spread. I showed up every Wednesday just to be able to watch them make the spread in a huge meat grinder looking thing, out by the soda fountain. The drug store had a very small kitchen and 12 seat counter set up, and yes they made malts too. I was trying to figure out the proportions as I really didn’t need a gallon of the stuff, and it gave me a good reason to have a sandwich with the cheese spread slathered on it once a week. I would have gone to work there if I thought I could squeeze the recipe out of the southern lady who made it. She was keeping her recipe a well-guarded secret, I think she used sandwich spread instead of mayo, but I’m not sure. I tried it once and found it very sweet, so maybe it was not sandwich spread after all. There are as many versions of this spread as there are grandmothers it seems. Here is mine
.
8 oz. grated extra-sharp cheese
8 oz. Colby or mild American cheese, grated
4 oz. Cream cheese or Nonfactual cheese
2-3 Tb Green onion use both green and white parts. You could use a white onion chopped into very small pieces as a substitute
½ tsp Garlic powder
¼ tsp onion powder
¼ tsp celery salt, or use ½ tsp celery flakes ground fine
¼ to 1 Tb Worcestershire sauce, taste test this as you go to suit your personal taste. I use ½ Tb.
4 oz. jar diced pimientos, undrained
½ tsp prepared mustard or ½ tsp vinegar, red wine vinegar is nice
½ – 1 C Dukes Mayonnaise to taste, this depends on how spreadable you want the cheese to be. If you like use Miracle Whip many people like it better, maybe it is less salty.
1-2 tsp sweet pickle relish
1/2 tsp. salt (you can omit this if using mayo, as it is salty in itself)
1/8 tsp ground pepper
Option:
Try one or more of these options for a little change
1-2 Tb Sugar
¼ tsp cracked red pepper
½ tsp paprika
1 tsp green olives chopped fine
½ cup diced Velveeta Cheese
Place everything but the cheese into a food processor, pulse until mixed.
Add all the grated cheese, and blend.
Taste Test and adjust to your taste if needed.
Chill. Flavor is even better if you make it a day ahead of serving. You can taste test and add more ingredients if you like before serving, but I find I rarely need to add anything.
I’ve been known to use Monterey Jack Cheese instead of Colby, cracked red pepper, or finely chopped jalapeño chili pepper.
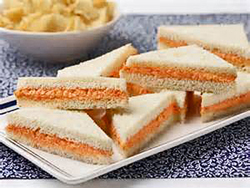
Spread on sandwiches or serve with crackers or celery sticks.