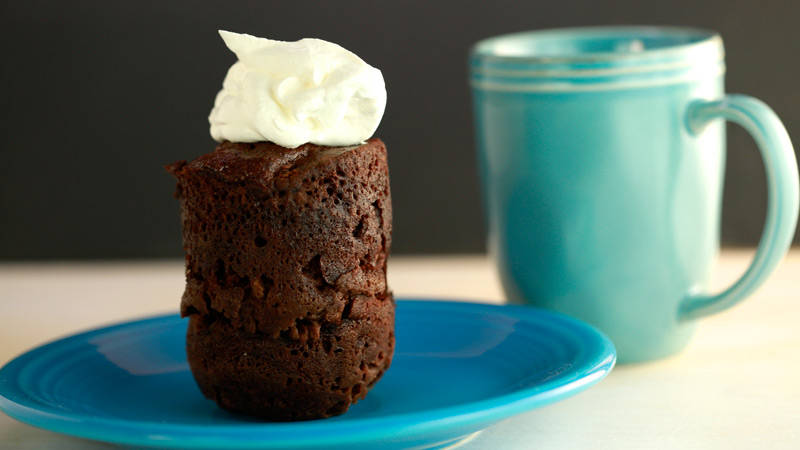
Ryan Scott’s Brownie in a Mug

INGREDIENTS

1/4 cup granulated sugar
1/4 cup all-purpose flour
2 tablespoons cocoa powder
1/4 teaspoon salt
2 tablespoon olive oil (one that’s not too strong is better)
1 1/2 tablespoons water, at room temp
1 egg

PREPARATION

Sift together the sugar, flour and cocoa powder. Add the salt.

Mix together the olive oil, water and egg. Fold the dry ingredients into the wet. Pour into a mug and microwave for 2 minutes (no peeking!!)

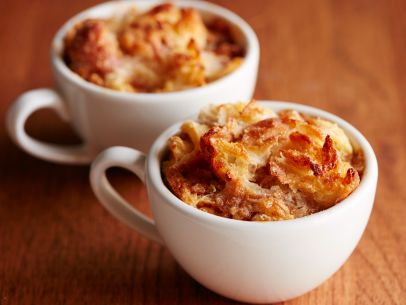
Caramel Bread Pudding for Two

Yield: 2 servings

2 tablespoons unsalted butter, melted, plus more butter for greasing the cups
2 croissants (about 2 ounces each), torn into 1-inch pieces
1 large egg
2 tablespoons plus 1/2 teaspoon sugar
3/4 cup half-and-half
1/2 teaspoon pure vanilla extract
4 soft caramel candies, chopped

Preheat the oven to 350 degrees F. Lightly butter 2 ovenproof 6-ounce tea or coffee cups. Tear a loosely packed 1/2 cup of the croissant pieces into slightly smaller pieces, and toss them with the melted butter in a small bowl; set aside.

Whisk the egg with 2 tablespoons of the sugar in a medium bowl until the sugar is dissolved. Whisk in the half-and-half and vanilla. Stir in the remaining 1-inch croissant pieces and the caramels, and let the mixture sit, folding occasionally, for about 15 minutes. Don’t worry if the mixture seems too wet; the excess moisture will be absorbed as the pudding bakes.

Divide the soaked bread mixture between the prepared cups. Top each with half the buttered croissant pieces, and sprinkle with 1/4 teaspoon of the remaining sugar. Bake until the bread pudding puffs above the rim of the cups and is set, about 30 minutes. Let cool a few minutes (the pudding will sink), and serve warm.


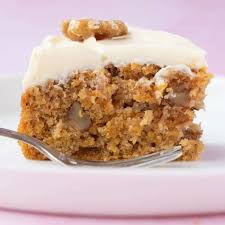
Carrot Cake for Two

Yield: 2 servings ‘

Cake:

Cooking spray
1/4 cup pecans
2/3 cup all-purpose flour
1 teaspoon baking powder
1/2 teaspoon ground cinnamon
1/4 teaspoon kosher salt
Pinch freshly grated nutmeg
1/2 cup granulated sugar
1 large egg, at room temperature
1/4 cup vegetable oil
1/2 teaspoon pure vanilla extract
5 ounces carrots (about 3 small), finely grated (about 1 cup)
 

Frosting:

8 ounces cream cheese, at room temperature

1 stick (8 tablespoons) unsalted butter, at room temperature

3/4 cup confectioners’ sugar

1/2 teaspoon pure vanilla extract

Add Checked Items To Grocery List

Directions

For the cake: Preheat the oven to 350 degrees F. Line a 9-by-2-inch round cake pan with parchment, and lightly coat with cooking spray. Toast the pecans on a small baking sheet until lightly browned and fragrant, about 8 minutes. Let cool, then coarsely chop.

Whisk together the flour, baking powder, cinnamon, salt and nutmeg in a medium bowl. Make a big well in the center so you can see the bottom of the bowl. Working within the well, add the sugar and egg and beat with a fork until well combined, then add the oil and vanilla and beat with the fork. Stir the dry and wet ingredients together with the fork until just combined. Fold in the carrots and pecans.

Transfer the batter to the prepared pan, and bake until a toothpick comes out clean, 20 to 25 minutes. Let the cake cool in the pan on a cooling rack for 20 minutes, then turn it out of the pan, remove the parchment and let cool completely, right-side up, on the rack, about 1 hour.

For the frosting: Process the cream cheese and butter in a food processor until completely combined and smooth, stopping once or twice to scrape the bottom and side of the bowl. Add the confectioners’ sugar and vanilla, and process until just combined. Transfer to a small bowl.

To assemble: Cut the cake into 4 even wedges, as if you were cutting up a pie. Frost the top of each wedge with about 3 tablespoons of frosting (an offset spatula helps spread the frosting evenly). Stack the frosted wedges directly on top of each other on a serving plate, resulting in a 4-layer slice of cake with frosting between the layers and on top. Completely cover the curved back side of the cake with the remaining frosting, and leave the 2 remaining sides open. Refrigerate for at least 30 minutes. Cut the wedge in half, and serve.

 

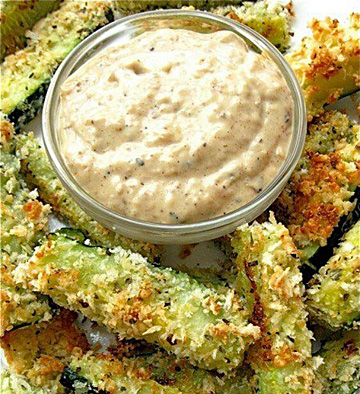
Zucchini Sticks Baked and Sweet Onion Dip

Makes 3 Servings Yield: about 3 dozen sticks
Here’s a guilt-free way to enjoy the crunchy outside (and juicy inside) of a restaurant-style zucchini stick.
Note: For a little heat you could mix into the panko 1/4
teaspoon smoked cayenne or crushed up red chili flakes. Enjoy these vegetables with or without the dip. Original recipe from king author flour.

ZUCCHINI STICKS
3 medium zucchini, unpeeled, cut into 3″-long stick
1 tbs salt
1 c coarse, dry bread crumbs (e.g., panko)*
1/2 c freshly grated parmesan cheese
(Optional)1 tbs herb seasoning or herbs de province
1/4 tsp pepper
olive oil spray
1/2 c egg substitute; or 2 large eggs; or 3 egg white, lightly beaten
DIP
1 tbs butter
1 medium sweet onion, about 1/2 pound, peeled and sliced
2 tbs cider vinegar
2 tbs honey
1 tbs prepared mustard
1 c mayonnaise
salt and pepper to taste

1) TO MAKE THE DIP: Melt the butter in a medium frying pan over moderate heat, and add the sliced onions. Cook, stirring occasionally, until the onions soften,  then caramelize. This should take between 10 and 15 minutes. The lower the heat,
the longer it takes, but the less likely you are to burn the onions.
2) Once the onions are a medium brown, remove from the heat and add the vinegar.
3) Place the onions and vinegar into a small food processor. Add the honey and mustard, and process or blend until smooth.
4) Add the mayonnaise and salt and pepper to taste, stirring to combine. Refrigerate, covered, until ready to serve.
PREP before coating the zucchini: I peal some of the skin off and slice in thick strips or wedges as we like it best this way. If you are using fresh in-season zucchini peeling is probably not necessary as the skin is not tough. If you make slices thick it will take a longer cooking time.
I sprinkle my prepared zucchini with salt as stated below; as you can see by the liquid that is left after an hour, the zucchini has a lot of excess water in it.
1) TO MAKE THE ZUCCHINI STICKS: Place the zucchini sticks in a colander over a bowl and sprinkle with the salt. Let the zucchini drain for 1 hour or longer; rinse and pat dry.
2) Combine the Panko, Parmesan, and any seasoning used; set aside.
3) Preheat the oven to 425°F. Line a baking sheet with parchment, and spray the parchment with olive oil.
4) Dredge sticks a few at a time in the egg, then roll in the crumb mixture. Place the sticks on the prepared baking sheet.
5) Bake sticks for 12 minutes, turn over, and bake for an additional 8 minutes, until golden brown and crisp. If you have thick slices about 15 min. on one side and 10 on the other. Keep a close check on the zucchini for doneness.
6) Serve immediately, with sweet onion dip.

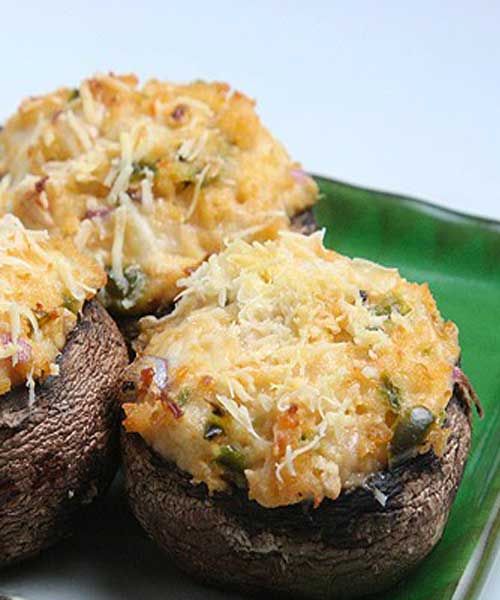
Olive Garden Stuffed Mushrooms

8 – 12 Fresh Mushrooms
1 (6 oz.) Can Clams
(drained and finely minced)
(save ¼ cup of clam juice for stuffing)
1 Green Onion (chopped finely, about 1 Tbs)
1 Egg (beaten)
1/2 tsp. Minced Garlic
1/8 tsp. Garlic Salt
1/2 C. Italian Style Bread Crumbs
1tsp. Oregano Leaves
1 Tbsp. Melted Butter (cool)
2 Tbsp. Finely Grated Parmesan Cheese
1 Tbsp. Finely Grated Romano Cheese
2 Tbsp. Finely Grated Mozzarella Cheese ( for stuffing )
1/4 C. Finely Grated Mozzarella Cheese (for garnish)
1/4 C. Melted Butter

Wash and remove stems from mushrooms, pat dry.
Save stems for another recipe or chop up fine and use in stuffing.
In mixing bowl place clams, onions, garlic salt, minced garlic, 1 Tb. butter and oregano. Mix well.
Add Italian bread crumbs, egg, clam juice and blend.
Stir cheeses in clam stuffing and mix well.
Place clam mixture inside mushroom cavity and slightly mound clam mixture. You should be able to stuff between 8 -12 mushrooms depending on the size of mushrooms.
Place mushrooms in slightly oiled baking dish. Pour butter over mushrooms. Cover and place in a preheated oven at 350 decrease for about 35 – 40 minutes. Remove cover and sprinkle freshly grated mozzarella cheese on top and pop back in oven just so the cheese melts slightly, garnish with freshly diced parsley.

Serves 4 – 6

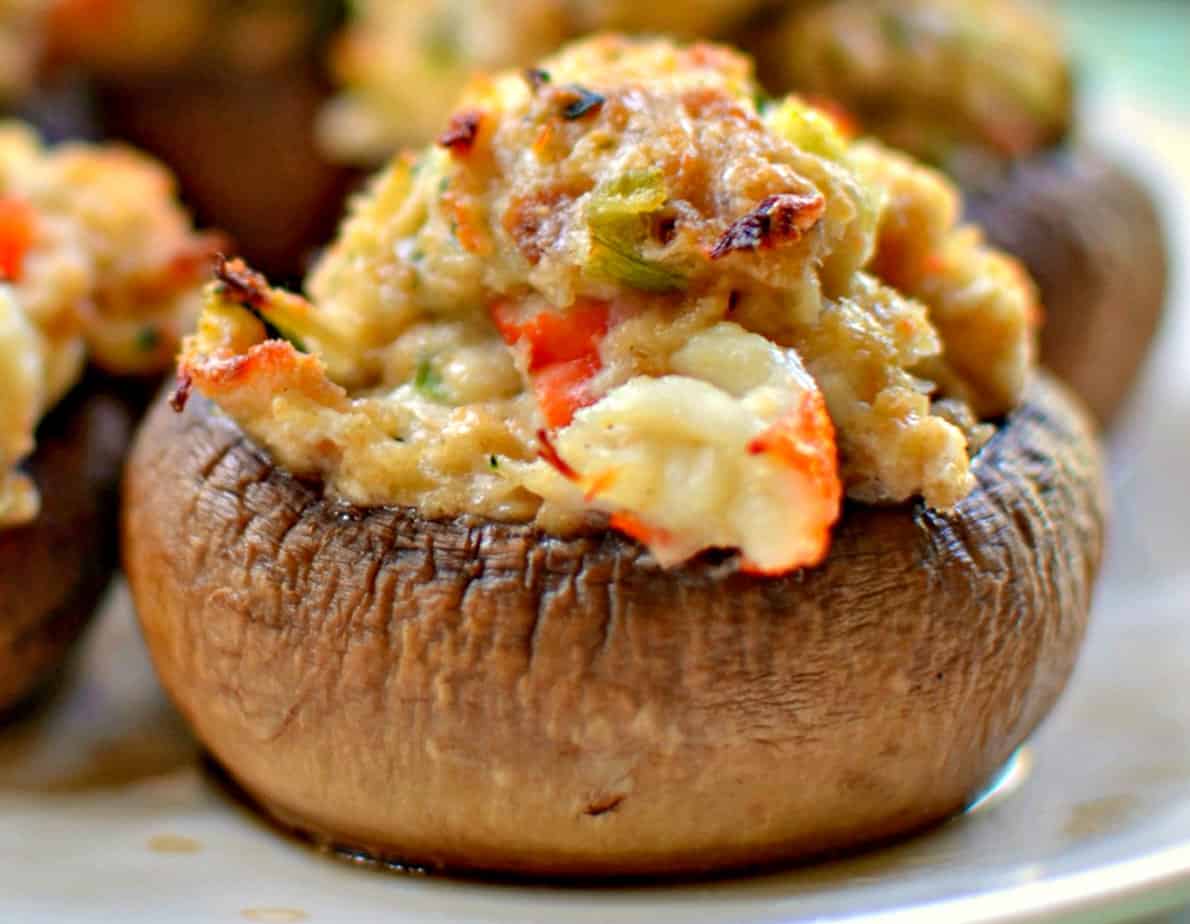
Make Ahead Crab Stuffed Mushrooms

Number of Servings: 8
Stuff a day ahead and reheat on day of party.

Ingredients
24 Mushrooms
1/2 lb. Crabmeat
1 cup Grated Mozzarella
1 Small onion, minced
2 tb. Mayo
Tabasco
1/3 cup Grated Parmesano
1/4 teaspoon Worchestershire sauce
1/4/ cup Celery, minced
1/3 cup Olive oil
Salt/Pepper to taste

Preparation
Pre-heat oven to 350 degrees.

Remove stems and caps and set aside. Rinse and wipe caps. Arrange in a single layer in a glass baking dish. Drizzle olive oil over mushrooms.

Rinse and finely chop mushroom stem. In a mixing bowl combine chopped stems with crab, 1/2 mozzarella, onion, mayo, tabasco, Parmesano, worchestshire and celery. Add salt and pepper to taste. Fill each mushroom cap with the mixture. Top with remaining mozzarella.

Bake for 15 to 20 minutes, or until mushrooms are heated through annd cheese has browned.

Serve hot.

Hearty Chicken & Noodle Casserole

serves:4 calories:361
Ingredients:
1 can (10.5 ounces) Campbell’s® Condensed Cream of Mushroom Soup or 98% Fat Free Cream of Mushroom
Soup
1/2 cup reduced fat (2%) milk
1 cup frozen mixed vegetables (carrots, green beans, corn, peas)
2 cups cubed boneless, skinless chicken breasts, cooked
1 1/2 cups medium egg noodles, cooked and drained
1/4 cup grated Parmesan cheese
1/4 teaspoon ground black pepper
1/2 cup shredded Cheddar cheese
Directions: Stir the soup, milk, vegetables, chicken, noodles, Parmesan cheese and black pepper in a 1 1/2-quart casserole.
Bake at 400°F. for 25 minutes or until the vegetables are tender. Stir the chicken mixture. Sprinkle with the Cheddar cheese.
Tips
Transforming leftovers is simple with easy casserole recipes like this one. Cooked chicken, turkey or ham
will all work in this recipe.

For Golden Onion Chicken & Noodle Casserole, substitute 1/2 cup crushed French fried onions for the
Cheddar cheese.
• For Hearty Chicken Casserole with a Twist, substitute 2 cups cooked rotini pasta for the egg noodles.
Make Ahead Freezer Meal: Assemble as directed (including topping with the cheese), wrap tightly (add a
layer of parchment on top under the foil so the cheese won’t stick) and freeze. From frozen, bake, covered,
at 400°F. for 55 minutes or until hot. Or, thaw in the refrigerator and bake, covered, for 35 minutes or until

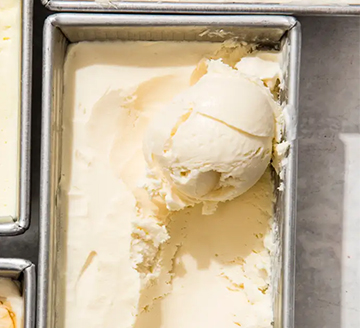
Vanilla No-Churn Ice Cream

Ingredients:
2 cups heavy cream, chilled
1 cup sweetened condensed milk
¼ cup whole milk
¼ cup light corn syrup
2 tablespoons sugar
1 tablespoon vanilla extract
¼ teaspoon table salt
The cream mixture freezes more quickly in a loaf pan than in a taller, narrower container. If you don’t have a loaf pan, use an 8-inch square baking pan.

Instructions
1.Process cream in blender until soft peaks form, 20 to 30 seconds. Scrape down sides of blender jar and continue to process until stiff peaks form, about 10 seconds longer. Using rubber spatula, stir in condensed milk, whole milk, corn syrup, sugar, vanilla, and salt. Process until thoroughly combined, about 20 seconds, scraping down sides of blender jar as needed.

2.Pour cream mixture into 8½ by 4½-inch loaf pan. Press plastic wrap flush against surface of cream mixture. Freeze until firm, at least 6 hours. Serve.

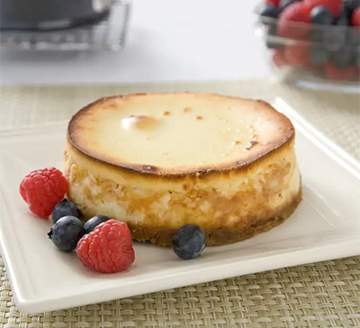
New York Cheesecakes for Two

Serves: 2

Why This Recipe Works
True New York–style cheesecake is a beautiful thing: the dense, velvety, tangy-sweet filling is supported by a crunchy graham-cracker crust. But with a dessert this rich, a full-size cake in a two-person household will mostly go to waste. We wanted to make foolproof individual cheesecakes for two. We started with a simple graham-cracker crust, prebaked to ensure it wouldn’t turn soggy once we added the filling. We thinned the cream cheese with just a little tangy sour cream. One whole egg plus an extra yolk gave the cakes a lush texture that was dense but not heavy. A pinch of salt, a small dose of vanilla, and a squeeze of lemon juice perfected the flavors. Finally, we baked the cheesecakes using the classic New York method—first at 500 degrees to get a nicely browned top, then at 200 degrees to cook through gently.
Ingredients:
CRUST
3 whole graham crackers, broken into 1-inch pieces
3 tablespoons unsalted butter, melted and cooled
1 tablespoon sugar
FILLING
10 ounces cream cheese, softened
⅓ cup (2⅓ ounces) sugar
Pinch salt
4 teaspoons sour cream
½ teaspoon lemon juice
½ teaspoon vanilla extract
1 large egg plus 1 large yolk
Instructions:
FOR THE CRUST: Adjust oven rack to middle position and heat oven to 325 degrees. Process graham cracker pieces in food processor to fine, even crumbs, about 30 seconds. Sprinkle 2 tablespoons melted butter and sugar over crumbs and pulse to incorporate, about 5 pulses. Divide mixture evenly between two 4½-inch springform pans. Using bottom of spoon, press crumbs firmly into even layer on bottom of pans, keeping sides as clean as possible. Bake crusts until fragrant and beginning to brown, about 10 minutes. Let crusts cool in pans on wire rack while making filling.
FOR THE FILLING: Increase oven temperature to 500 degrees. Using hand-held mixer set at medium-low speed, beat cream cheese in large bowl until smooth, 1 to 2 minutes. Scrape down sides of bowl. Add 1/4 cup sugar and salt and beat until combined, 30 to 60 seconds. Scrape down bowl, add remaining sugar, and beat until combined, 30 to 60 seconds. Scrape down bowl, add sour cream, lemon juice, and vanilla and beat until combined, 15 to 30 seconds. Scrape down bowl, add egg and egg yolk and beat until combined, 30 to 60 seconds.
Being careful not to disturb baked crusts, brush inside of pans with remaining 1 tablespoon melted butter and place pans on rimmed baking sheet. Pour filling evenly into cooled crusts, smooth tops, and bake cheesecakes for 2 minutes. Without opening oven door, reduce temperature to 200 degrees and continue to bake until cakes register 150 degrees, 12 to 17 minutes, rotating sheet halfway through baking.
Let cheesecakes cool in pans on wire rack for 5 minutes, then run thin knife around edge of each cake. Let cakes continue to cool to room temperature, about 1 hour. Wrap pans tightly in plastic wrap and refrigerate until cold, at least 2 hours or up to 4 days.
To unmold cheesecakes, wrap hot dish towel around pans and let sit for 1 minute. Remove sides of pans. Slide thin metal spatula between crusts and pan bottoms to loosen, then slide cakes onto individual serving plates. Let cakes sit at room temperature for 30 minutes before serving. (Cheesecakes can be made up to 3 days in advance; however, crust will begin to lose its crispness after only 1 day.)

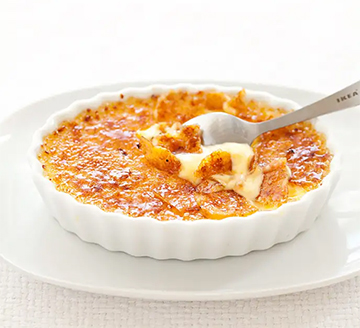
Crème Brûlée for Two

SERVES 2
With a lot of testing, we discovered the keys to the perfect crème brûlée recipe: lots of yolks for richness, turbinado sugar for a crunchy crust, an instant-read thermometer for judging the custard’s doneness, and a final chill for the best texture.
Ingredients:
1 cup heavy cream, chilled
2 tablespoons granulated sugar plus 1 additional teaspoon
pinch table salt
3 large egg yolks
½ teaspoon vanilla extract
2 – 4 teaspoons turbinado sugar or Demerara sugar
Before You Begin
Separate the eggs and whisk the yolks after the cream has finished steeping; if left to sit, the surface of the yolks will dry and form a film. The best way to judge doneness is with a digital instant-read thermometer. The custards, especially if baked in shallow fluted dishes, will not be deep enough to provide an accurate reading with a dial-face thermometer. For the caramelized sugar crust, we recommend turbinado or Demerara sugar. Regular granulated sugar will work, too. The amount of sugar needed for the topping will depend on the shape of the ramekin. Sprinkle enough sugar over the the top to cover, and then shake off the excess (about 1 – 1 1/2 teaspoons for turbinado sugar or 1 teaspoon for regular granulated sugar).
Instructions:
Adjust oven rack to lower-middle position and heat oven to 300 degrees.
Combine 1/2 cup cream, sugar, and salt in small saucepan; bring mixture to boil over medium heat, stirring occasionally to ensure that sugar dissolves.
Meanwhile, place kitchen towel in bottom of baking dish or roasting pan and arrange two 4- to 5-ounce ramekins (or shallow fluted dishes) on towel. Bring kettle or saucepan of water to boil over high heat.
After cream has cooled slightly, stir in remaining 1/2 cup cream to cool down mixture further. Whisk yolks in medium bowl until broken up and combined. Whisk in vanilla extract and about 1/4 cup cream mixture into yolks until loosened and combined; repeat with another 1/4 cup cream. Add remaining cream and whisk until evenly colored and thoroughly combined. Strain through fine-mesh strainer into 2-cup measuring cup or pitcher (or clean medium bowl); discard solids in strainer. Pour or ladle mixture into ramekins, dividing it evenly among them.
Carefully place baking dish with ramekins on oven rack; pour boiling water into dish, taking care not to splash water into ramekins, until water reaches two-thirds height of ramekins. Bake until centers of custards are just barely set and are no longer sloshy and digital instant-read thermometer inserted in centers registers 170 to 175 degrees, 35 to 40 minutes (30 to 35 minutes for shallow fluted dishes). Begin checking temperature about 5 minutes before recommended time.
Transfer ramekins to wire rack; cool to room temperature, about 2 hours. Set ramekins on rimmed baking sheet, cover tightly with plastic wrap, and refrigerate until cold, at least 4 hours or up to 4 days.
Uncover ramekins; if condensation has collected on custards, place paper towel on surface to soak up moisture. Sprinkle each with about 1 teaspoon turbinado sugar (1 1/2 teaspoons for shallow fluted dishes); tilt and tap ramekin for even coverage. Ignite torch and caramelize sugar. Refrigerate ramekins, uncovered, to re-chill, 30 to 45 minutes (but no longer); serve.

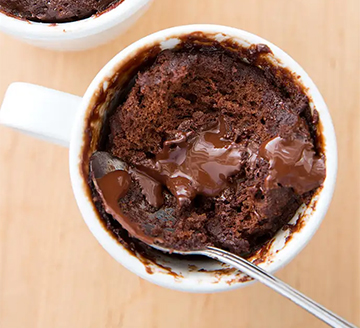
Coffee Mug Molten Chocolate Cake for Two

SERVES 2
TIME 20 minutes
Why This Recipe Works
These individual chocolate cakes are cooked in coffee mugs in the microwave for a nearly instant dessert. To keep our cakes from overflowing, we had to supplement bittersweet chocolate with cocoa powder; cocoa powder has less fat, which produces less steam, thus less chance of an overflow. Microwaving the cakes on 50 percent power was the key to cooking them gently, helping create a light, tender crumb, and stirring the batter halfway through ensured even cooking. Finally, a few chunks of bittersweet chocolate added to each cake created a gooey, molten center.
Ingredients:
4 tablespoons unsalted butter
1 ounce (28 grams) bittersweet chocolate, chopped, plus 1 ounce (28 grams) broken into 4 equal pieces
¼ cup (1 3/4 ounce/50 grams) sugar
2 large eggs
2 tablespoons unsweetened cocoa powder
1 teaspoon vanilla extract
¼ teaspoon salt
¼ cup (1 1/4 ounces/35 grams) all-purpose flour
½ teaspoon baking powder
Before You Begin
We developed this recipe in a full-size, 1200-watt microwave. If you’re using a compact microwave with 800 watts or fewer, increase the cooking time to 90 seconds for each interval. For either size microwave, reset to 50 percent power at each stage of cooking. Use a mug that holds at least 11 ounces, or the batter will overflow. The bittersweet chocolate is added at two points.
Instructions:
Microwave butter and chopped chocolate in large bowl, stirring often, until melted, about 1 minute. Whisk sugar, eggs, cocoa, vanilla, and salt into chocolate mixture until smooth. In separate bowl, combine flour and baking powder. Whisk flour mixture into chocolate mixture until combined. Divide batter evenly between 2 (11-ounce) coffee mugs.
Place mugs on opposite sides of microwave turntable. Microwave at 50 percent power for 45 seconds. Stir batter and microwave at 50 percent power for 45 seconds (batter will rise to just below rim of mug). Press 2 chocolate pieces into center of each cake until chocolate is flush with top of cake. Microwave at 50 percent power for 35 seconds (cake should be slightly wet around edges of mug and somewhat drier toward center). Let cakes rest for 2 minutes. Serve.

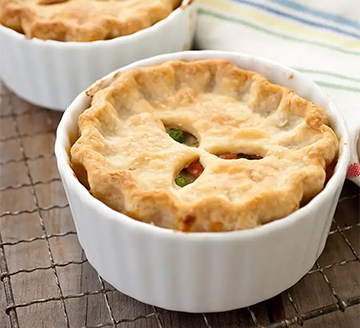
Chicken Pot Pie for Two

SERVES 2
TIME 1½ hours
Why This Recipe Works
To simplify our Chicken Pot Pie for Two, we opted to make two individual pies inside of ramekins. A single boneless, skinless chicken breast was super easy to work with and substantial enough for two pies when combined with the rest of the ingredients. Cooking the chicken right in the sauce imparted layers of flavor and also saved time on cleanup. A little soy sauce added complex flavor that would normally require hours of simmering to achieve. For the crust, we turned to a store-bought option, which we parcooked on a baking sheet to ensure it didn’t collapse into the filling.
Ingredients”
1 Pillsbury Just Unroll! Pie Crust
2 tablespoons unsalted butter
2 carrots, peeled and sliced 1/4 inch thick
1 small onion, chopped fine
1 small celery rib, sliced 1/4 inch thick
Salt and pepper
2 garlic cloves, minced
1 teaspoon minced fresh thyme
3 tablespoons all-purpose flour
1 ¾ cups low-sodium chicken broth
⅓ cup heavy cream
½ teaspoon soy sauce
1 (8-ounce) boneless, skinless chicken breast, trimmed
¼ cup frozen peas
2 teaspoons minced fresh parsley
¼ teaspoon lemon juice
Before You Begin
We use two ovensafe 12-ounce ramekins or bowls to make this dish. If you don’t own any, you can use 14-ounce disposable mini loaf pans, cutting the crust to fit.
Instructions:
Adjust oven rack to middle position and heat oven to 450 degrees. Line rimmed baking sheet with parchment paper. Unroll dough on baking sheet. Use 12-ounce ovensafe ramekin as guide to cut out 2 rounds of dough about ½ inch larger than mouth of ramekin. Fold under and crimp outer ½ inch of dough, then cut 3 vents in center of each crust. Bake until crusts just begin to brown and no longer look raw, about 7 minutes; set aside.
Meanwhile, melt butter in medium saucepan over medium heat. Add carrots, onion, celery, and ½ teaspoon salt and cook until vegetables are softened and browned, 8 to 10 minutes. Stir in garlic and thyme, and cook until fragrant, about 30 seconds. Stir in flour and cook for 1 minute.
Slowly whisk in broth, cream, and soy sauce, scraping up any browned bits. Nestle chicken into sauce and bring to simmer. Cover, reduce heat to medium-low, and cook until chicken registers 160 degrees, 10 to 15 minutes. Transfer chicken to plate; let cool slightly. Using 2 forks, shred chicken into bite-size pieces.

Meanwhile, return pan with sauce to medium heat and simmer until thickened and sauce measures 2 cups, about 5 minutes. Off heat, return shredded chicken and accumulated juice to pan. Stir in peas, parsley, and lemon juice and season with salt and pepper to taste.
Divide filling between ramekins and place parbaked crusts on top of filling. Place pot pies on baking sheet and bake until crusts are deep golden brown and filling is bubbling, 10 to 15 minutes. Let pot pies cool for 10 minutes before serving.

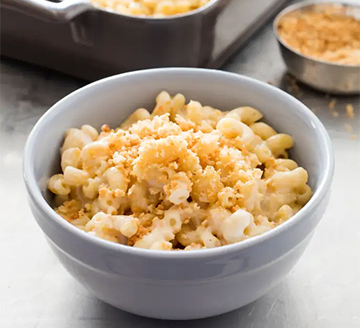
One-Pan Easy Baked Mac and Cheese

SERVES 4
TIME 1 hour
To make things totally simple, we wanted to be able to cook the pasta without having to heat up the water or toast the macaroni. Cooking the pasta at a relatively moderate temperature in a mixture of water and evaporated milk helped us do just that while also establishing a creamy base for the cheese sauce. Stirring in a meltable blend of shredded cheddar and American cheeses at the end of baking gave us perfectly and evenly cooked pasta in a lush, smooth sauce. And panko bread crumbs, browned in the microwave and sprinkled on before serving, provided irresistible crunch.
Ingredients:
12 ounces (3 cups) elbow macaroni
2½ cups water
1 (12-ounce) can evaporated milk
½ teaspoon dry mustard
Salt and pepper
6 ounces sharp cheddar cheese, shredded (1½ cups)
6 ounces American cheese, shredded (1½ cups)
½ cup panko bread crumbs, toasted
Instructions:
Adjust oven rack to middle position and heat oven to 375 degrees. Spray 13 by 9-inch baking dish with vegetable oil spray. Spread macaroni into prepared dish. Whisk 2 cups water, evaporated milk, dry mustard, 1 teaspoon salt, and ½ teaspoon pepper together in bowl. Pour into baking dish and stir gently to combine.
Cover tightly with aluminum foil and bake, stirring occasionally, until macaroni is nearly tender and most liquid has been absorbed, about 30 minutes.
Remove dish from oven and stir macaroni thoroughly, scraping sides and bottom of dish. Stir in remaining ½ cup water, cheddar cheese, and American cheese. Cover dish with foil and return to oven to bake until macaroni is tender and cheese is melted, 5 to 8 minutes.
Remove dish from oven. Stir to coat pasta evenly in sauce, and let cool for 10 minutes. Sprinkle with toasted panko before serving.

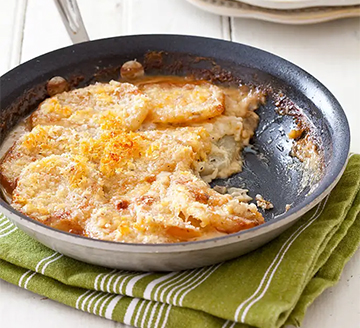
Cheesy Scalloped Potatoes for Two

SERVES 2
TIME 1 hour
Why This Recipe Works
Casserole-style scalloped potatoes can take as long as an hour to cook through. We not only wanted a version suitable for two, but we wanted it on the table as quickly as possible. We began by sautéing onion, garlic, and thyme in an 8-inch nonstick skillet before adding chicken broth, cream, and potatoes. To ensure quick cooking, we simmered the potatoes in the aromatic liquid until they were nearly tender (and well seasoned). Now it was time for the cheese. We knew we wanted assertive cheese flavor, but the more cheese we added, the greasier the dish became. Employing an old test kitchen trick, we tried tossing the cheese with cornstarch. Sure enough, the grease was held at bay even with a generous 1 cup of added cheese.
Ingredients:
2 ounces mild cheddar cheese, shredded (1/2 cup)
1 ½ teaspoons cornstarch
1 ounce Parmesan cheese, grated (1/2 cup)
1 teaspoon vegetable oil
½ cup finely chopped onion
1 garlic clove, minced
¼ teaspoon dried thyme
⅓ cup low-sodium chicken broth
⅓ cup heavy cream
12 ounces russet potatoes, peeled and sliced 1/4 inch thick
½ teaspoon salt
¼ teaspoon pepper
Before You Begin
Don’t use preshredded cheese, which contains added starch to prevent caking. By adding cornstarch yourself, you can control the dish’s texture. You’ll need 2 small or 1 extra-large potato.

Instructions:
Adjust oven rack to upper-middle position and heat oven to 425 degrees. Toss cheddar and 1 teaspoon cornstarch together in bowl until well combined. Toss Parmesan and remaining 1/2 teaspoon cornstarch together in second bowl until well combined.
Heat oil in 8-inch nonstick, ovensafe skillet over medium heat until shimmering. Add onion and cook until browned, about 5 minutes. Stir in garlic and thyme and cook until fragrant, about 30 seconds. Add broth, cream, potatoes, salt, and pepper and bring to boil. Reduce heat to medium-low, cover, and simmer until potatoes are nearly tender, 10 to 12 minutes.
Off heat, stir in cheddar mixture and press potatoes into even layer

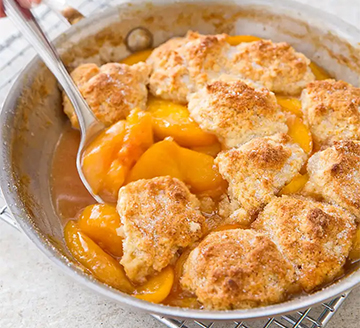
Peach Cobbler for Two

Biscuits are delicious. Peaches are delicious. So why, when you combine them, is the sum of the parts less than the whole?
SERVES 2
TIME 55 minutes, plus 20 minutes cooling
To prevent soggy biscuits and a runny filling in our peach cobbler, we cook the peaches to concentrate the juices into a syrup. Caramelizing them in butter and brown sugar adds flavor at the same time. We found that a little bit of thickener helped tighten up the peach juices exuded during baking, and flour is our go-to choice. Lemon juice and vanilla round out the filling, and for convenience, we bake our cobbler right in the skillet. For the topping, a traditional buttermilk biscuit is our favorite. Dropping the biscuits on top while the filling is hot jump-starts the cooking, and a final sprinkling of sugar before it goes in the oven creates a crispy, craggy, golden-brown top.
If you use frozen peaches, don’t thaw them, but do increase their cooking time in step 1 to about 7 minutes. A serrated peeler makes quick work of peeling fresh peaches. If you don’t have buttermilk, combine ¼ cup of milk with 1 teaspoon of lemon juice and let the mixture sit for 10 minutes before proceeding with step 2 of the recipe.

Ingredients
FILLING
3 tablespoons packed brown sugar
1 tablespoon unsalted butter
⅛ teaspoon salt
⅛ teaspoon ground cinnamon
1 ¼ pounds (567 grams) fresh peaches 1 1/4 pounds (567 grams) fresh peach , peeled, halved, pitted, and cut into 1/2-inch wedges, or 1 pound (454 grams) frozen sliced peaches
1 tablespoon water
1 ½ teaspoons lemon juice
1 teaspoon all-purpose flour
½ teaspoon vanilla extract
TOPPING
½ cup (2 1/2 ounces/71 grams) all-purpose flour
2 tablespoons plus 1 teaspoon granulated sugar
½ teaspoon baking powder
⅛ teaspoon baking soda
⅛ teaspoon salt
¼ cup buttermilk
2 tablespoons unsalted butter, melted
Instructions:
FOR THE FILLING: Adjust oven rack to middle position and heat oven to 400 degrees. Combine sugar, butter, salt, and cinnamon in 8-inch ovensafe skillet over medium-high heat. Cook until sugar is dissolved, about 2 minutes. Add peaches and cook, covered, until peaches release their juice, about 5 minutes. Whisk water, lemon juice, and flour together in bowl and stir into peaches. Off heat, stir in vanilla. Cover and set aside.

FOR THE TOPPING: Whisk flour, 2 tablespoons sugar, baking powder, baking soda, and salt together in bowl. Add buttermilk and butter and stir until dough forms.
Using spoon, drop 1-inch pieces of dough evenly over hot peach mixture in skillet. Sprinkle with remaining 1 teaspoon sugar and bake until topping is golden brown, 20 to 25 minutes. Let cool on wire rack for 20 minutes. Serve.

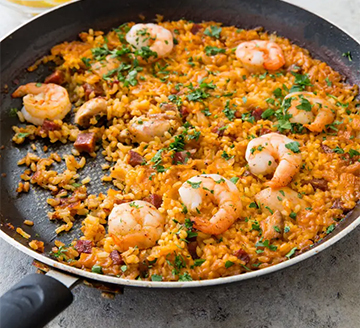
Paella for Two

Serves 2
TIME 50 minutes
Paella, with its long list of ingredients, can be a production. But does it have to be?
This classic saffron-scented rice dish from Valencia, Spain, with its signature crispy bottom crust and a melange of proteins, often contains a laundry list of ingredients, requires special equipment (a traditional, shallow Paella pan), and is meant to serve a crowd. To make paella for two people, we found some shortcuts. First, we used a 12-inch nonstick skillet, which is wide enough yet shallow enough to get the proper crust. To season the paella, we turn to smoked paprika, garlic, tomato paste, and white wine. To pare down the ingredient list, we opted for chorizo, chicken, and shrimp and made the recipe work with traditional Valencia rice or the more widely available Arborio rice. We discovered that browning the chicken and shrimp wasn’t necessary and nestled the chicken in with the rice, adding the shrimp to the skillet for the last few minutes of cooking.

Ingredients:
2 tablespoons extra-virgin olive oil, plus extra for drizzling
1 small onion, chopped
¼ cup dry white wine
1 tablespoon tomato paste
2 garlic cloves, minced
½ teaspoon smoked paprika
1 bay leaf
¾ cup Valencia or Arborio rice
8 ounces boneless, skinless chicken thighs, trimmed and cut into 1-inch pieces
Salt and pepper
2½౼2¾ cups chicken broth
3 ounces Spanish dry-cured chorizo sausage, cut into 1/2-inch chunks
Pinch saffron threads (optional)
6 ounces extra-large shrimp (21 to 25 per pound), peeled, deveined, and tails removed
2 teaspoons minced fresh parsley
Lemon wedges
Before You Begin
Spanish varieties of rice, while traditional in paella, are sometimes difficult to find, which is why we offer the more widely available Arborio rice as a substitute. Each type of rice requires a slightly different amount of liquid, so note the difference in the recipe. Make sure to use cured Spanish chorizo, not the fresh Mexican sausage, here.
Instructions:
Heat oil in 12-inch nonstick skillet over medium heat until shimmering. Add onion and cook until lightly browned, 3 to 5 minutes. Stir in wine, tomato paste, garlic, paprika, and bay leaf and cook until liquid evaporates and mixture looks oily, 2 to 4 minutes.
Stir in rice and cook until grains are well coated with tomato mixture, about 1 minute. Season chicken with salt and pepper. Stir in broth (2½ cups for Valencia rice, 2¾ cups for Arborio); chorizo; saffron, if using; chicken; and ⅛ teaspoon salt.
Bring to strong simmer and continue to cook, uncovered, over medium heat until liquid level falls just below surface of rice but paella still looks wet, 10 to 14 minutes. (After first 5 minutes of simmering, do not stir or paella will become starchy.)
Season shrimp with salt and pepper and nestle halfway into rice. Continue to cook until shrimp are mostly pink and all liquid has been absorbed, 4 to 7 minutes longer (paella will crackle and pop when liquid is absorbed).
To develop crust (socarrat) on bottom of paella, continue to cook until crackling and popping sounds become more pronounced, while occasionally rotating skillet over heat for even browning, 3 to 5 minutes. At this point, shrimp should be almost completely pink and paella should look dry on top.
Remove from heat, cover, and let sit for 3 minutes. Discard bay leaf. Sprinkle with parsley. Serve with lemon wedges and drizzle with extra oil.

Published
Categorized as Just For 2

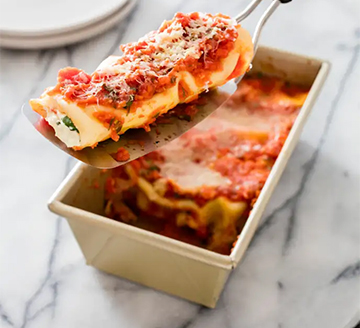
Baked Manicotti for Two

SERVES 2
TIME 1½ hours
Why This Recipe Works
When cooking for two, the hassle of putting a dish like this together hardly seems worth it. Could we find a simpler, better method for making manicotti? Stuffing and baking raw pasta tubes proved problematic, but soaking no-boil lasagna noodles until just pliable and rolling them up around the filling worked perfectly—and saved us the trouble of cooking the pasta separately. To ensure our filling was thick and creamy—not thin and runny—we mixed ricotta with a generous amount of mozzarella. Finally, just six ingredients whirred in the food processor gave us a fresh, bright tomato sauce in no time. As the manicotti baked, the tomato sauce reduced just enough that it didn’t taste raw and kept the manicotti moist and tender.
Ingredients:
Sauce
1 (14.5-ounce) can diced tomatoes
1 tablespoon extra-virgin olive oil
2 garlic cloves, minced
¼ teaspoon salt
⅛ teaspoon red pepper flakes (optional)
1 tablespoon chopped fresh basil
Filling and Pasta
8 ounces (1 cup) whole-milk or part-skim ricotta cheese
3 ounces whole-milk mozzarella cheese, shredded (¾ cup)
2 ounces Parmesan cheese, grated (1 cup)
1 large egg, lightly beaten
1 tablespoon chopped fresh basil
¼ teaspoon salt
⅛ teaspoon pepper
6 no-boil lasagna noodles
Before You Begin
Do not substitute fat-free ricotta cheese here.
Instructions:
FOR THE SAUCE: Adjust oven rack to middle position and heat oven to 400 degrees. Process tomatoes and their juice, olive oil, garlic, salt, and pepper flakes, if using, in food processor until smooth, about 10 seconds. Transfer mixture to bowl and stir in basil.
FOR THE FILLING AND PASTA: Combine ricotta, mozzarella, ½ cup Parmesan, egg, basil, salt, and pepper in bowl.
Fill large bowl halfway with boiling water. Slip noodles into water, one at a time. Let noodles soak until pliable, about 5 minutes, separating noodles with tip of knife to prevent sticking. Remove noodles from water and place in single layer on clean dish towels.
Spread ½ cup sauce over bottom of 8½ by 4½-inch loaf pan. Transfer noodles to counter with short sides facing you. Spread ¼ cup ricotta mixture evenly over bottom three-quarters of each noodle. Roll noodles up around filling and lay them, seam side down, in pan. Spoon remaining sauce over top to cover noodles completely. Sprinkle with remaining ½ cup Parmesan.
Cover pan tightly with aluminum foil and bake until bubbling, about 25 minutes. Remove foil and continue to bake until cheese is browned in spots, about 10 minutes. Let cool for 15 minutes before serving.

Published
Categorized as Just For 2

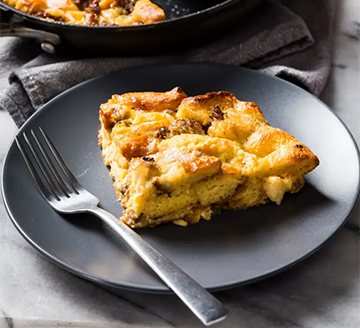
Sausage Strata for Two

SERVES 2
TIME 1 hour
Why This Recipe Works
We were after a hearty one-pan breakfast strata for two that combined elements of both sweet and savory breakfasts. We used an 8-inch nonstick skillet to brown hot breakfast sausage with some fresh sage and then tossed it with shredded cheddar and torn brioche soaked in a custard made of eggs, milk, and just a tablespoon of maple syrup. We favored brioche for its eggy richness and maple syrup for the welcome sweetness it brought to the savory mix. We piled everything back into the skillet and baked it until beautifully puffed and golden.
Ingredients:
¾ cup whole milk
3 large eggs
1 tablespoon maple syrup
¼ teaspoon table salt
¼ teaspoon pepper
4 ounces brioche, torn into 1-inch pieces (3 cups)
4 ounces sharp cheddar cheese, shredded (1 cup)
6 ounces hot bulk pork breakfast sausage
1 teaspoon minced fresh sage
Before You Begin
Two small brioche rolls should yield the 4 ounces needed for this recipe. For a less spicy dish, substitute regular pork sausage for the hot. We like the sweetness that maple syrup adds here, but you can omit it for a more savory strata. If you don’t have an 8-inch ovensafe nonstick skillet, cook the sausage in a 10-inch skillet and assemble and bake the strata in a greased 9-inch pie plate.
Instructions:
Adjust oven rack to middle position and heat oven to 375 degrees. Whisk milk, eggs, maple syrup, salt, and pepper together in large bowl. Add brioche and cheddar and stir to combine; set aside.
Cook sausage in 8-inch ovensafe nonstick skillet over medium heat until browned, about 8 minutes, breaking meat into small pieces with spoon. Add sage and cook until fragrant, about 30 seconds. Transfer to bowl with brioche mixture and stir to combine.
Transfer strata mixture to now-empty skillet and smooth into even layer. Bake until puffed and lightly browned, about 30 minutes (strata will puff above rim of skillet). Let rest for 10 minutes. Serve.
TO MAKE AHEAD: At end of step 2, strata mixture can be transferred to greased 9-inch pie plate, covered with plastic wrap, and refrigerated for up to 24 hours. Bake in pie plate.

Published
Categorized as Just For 2