Bug Spray with Catnip oil

How to Make Homemade Bug Spray
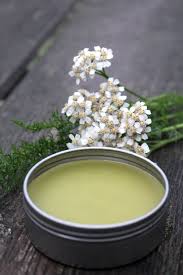
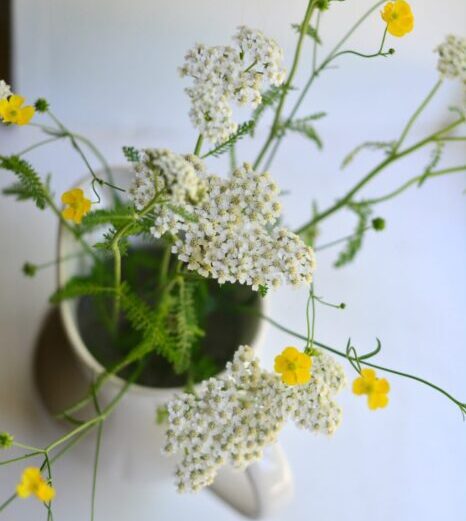
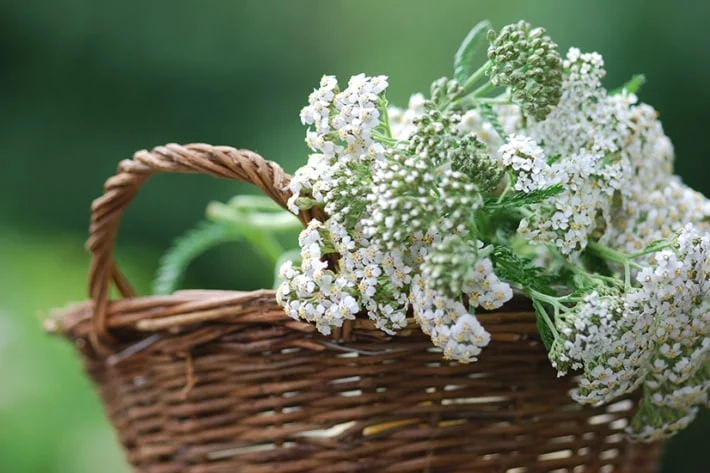
We are going to show you how to make an herbal bug repellant spray using yarrow (Achillea millefolium). Yarrow grows abundantly all over the world and has a multitude of uses, ranging from first aid to colds and flus. It is also a fabulous homemade bug repellent!
What you’ll need…
yarrow (either fresh or dried flowers and leaves)
alcohol (vodka works fine)
catnip essential oil
If using fresh yarrow, fill a jar with yarrow flowers and leaves,use pruners to cut them up.
If using dried yarrow, fill a jar about half full with yarrow.
Cover this with vodka and let sit for a week.
Strain off the yarrow. Preserve the liquid and compost the yarrow.
Fill a spray bottle with half the liquid and then fill the rest of the way with water. You could also just use the alcohol extraction without any additional water. Of course this costs more in the long run.
Place a few drops of catnip essential oil in the spray bottle. Catnip essential oil has been shown to be more effective than DEET at deterring mosquitoes. You could also try using lavender or sage essential oils.
Spray works best when I apply often – every hour or so. I personally dislike the smell of citronella bug sprays, but this one smells wonderful.

Tere are many variations to this homemade bug spray, so I encourage you to experiment with what works best for you.
You could simply make a tea out of yarrow and use that as a spray. This will not keep as long as an alcohol extraction.
There are a variety of essential oils that you can use besides the ones listed above.
Note: There is a rare possibility that yarrow may cause photodermatitis in sensitive individuals. If you have sensitive skin, it would be best to test this bug spray on a small area. (The area needs to receive sunlight to see if there is a reaction.)

Meadowsweet for Pain

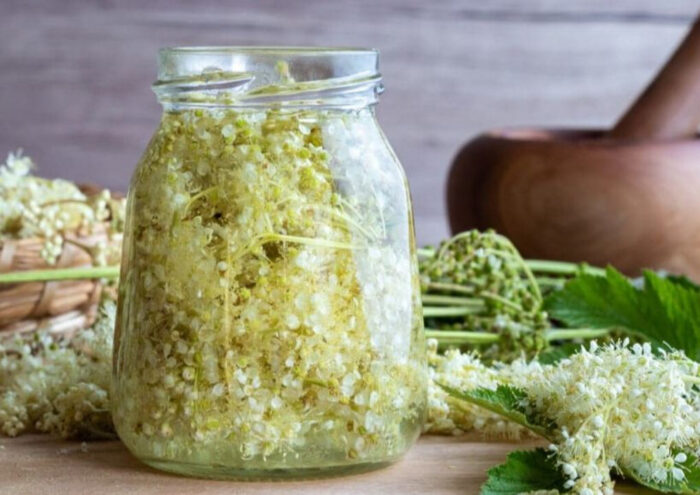
If you’ve ever seen Meadowsweet growing wild in a meadow, you’ll know why it is called the Queen of the Meadow. This ubiquitous plant with brilliantly white flowers dominates the meadows it calls home. Its contemporary common name, meadowsweet, may not just refer to the plant’s favorite living space, but also to its common use as a flavoring agent in meads and ales.

Meadowsweet (Filipendula ulmaria) is a sweet-smelling astringent herb that is commonly used for excessive diarrhea, ulcers, pain, stomach aches, fevers and gout.

Let’s make a delicious-tasting meadowsweet elixir. Before we get to our recipe, here’s a bit more about this beautiful plant.

“Meadowsweet was one of the three most sacred herbs used by ancient Celtic Druid priests. It is mentioned in the Knight’s Tale by Geoffrey Chaucer (fourteenth century C.E.), and described in old European herbals, including those of John Gerard (The Herball, 1597) and Nicholas Culpepper (The English Physitian, 1652).”
–Commission E Monograph

Meadowsweet for Pain

Meadowsweet is high in salicylic acid, which is well known for its ability to relieve pain. I find the plant to be a mild to moderate pain reliever that is especially suited to stagnant pain (in a fixed location, possibly with a pounding sensation) and for those with symptoms of heat.

“The Iroquois used the mashed and powdered dried root as part of a compound decoction with yarrow for side pain, and nausea.”
–Robert Dale Rogers

Headaches

Meadowsweet is especially suited to headaches in which the person has a hot head and feels a pounding sensation in the head. Meadowsweet is cooling and it promotes circulation, which can relieve stagnant energy in the head.

Rheumatism

Besides having the ability to relieve pain, meadowsweet is also anti-inflammatory in nature. Taken daily as a tea or tincture it can help relieve chronic arthritic pain and inflammation.

Stomachaches and Acid Reflux

My two favorite herbs for stomach aches and nausea are ginger and meadowsweet (okay, twist my arm, peppermint too).

Meadowsweet shines as an herb for stomach aches, nausea and poor digestion and is especially helpful for those who find herbs like ginger to be too warming. Meadowsweet removes stagnation (like when you eat a meal and it stays in your stomach too long) and relieves discomfort in the stomach.

“If someone asks you what to do for reflux but isn’t going to come in and do a consult or listen to a lengthy exposition on the nuance of gastric tissues and processes I say, ‘You could try meadowsweet and see if that helps.'”
–jim mcdonald

Madowsweet Elixir

This is a home remedy for pain. This meadowsweet elixir recipe extracts the medicinal properties of the herb with alcohol and glycerine. Glycerine is added to this recipe because it does a good job of extracting tannins found in the plant.

If you avoid alcohol, you can also enjoy the benefits of meadowsweet by simply making a tea from it.

What you’ll need…

  • 100 grams dried meadowsweet flowers (roughly 2 cups)
  • 400 milliliters vodka (50% ABV is best)
  • 100 milliliters vegetable glycerine

  1. Place the meadowsweet flowers in a jar.
  2. Add the vodka and glycerine to the jar.
  3. Shake well. Let this macerate for 4 to 6 weeks and check on it often.
  4. You may find that as the flowers soak up the alcohol and glycerin, the liquid will no long cover the herb.
  5. To remedy this, you can take a clean stone or weight and use it to weigh down the flowers below the liquid. If necessary, you can add a bit more alcohol to cover the herb. I opened my jar frequently and pushed down the flowers and that seemed to work just fine.
  1. Once you are done macerating the herb, it’s time to strain off the mixture. The easiest way to do this is strain it through a cheesecloth, which you then squeeze the dickens out of until you get all the moisture from the flowers. A tincture press works well, too.
  2. Once it is strained you can bottle and label it. Here’s an image of my label, which you can print for your own use.
  3. A standard dose is 30 to 60 drops as needed. Depending on age, weight and sensitivity, someone may find that more or less works best for them.

Meadowsweet is safe for most people. However, it should be used with caution for the following people:

  • children under 16 who have the flu or chickenpox symptoms (because of the rare but serious Reye’s syndrome)
  • people with asthma (may stimulate bronchial spasms)
  • people who are allergic to aspirin


#1 Remedy for a Poison Ivy or Oak Rash


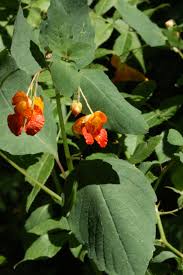
One Natural Poison Ivy Remedy is an Herb: Jewelweed
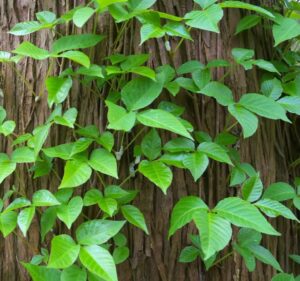
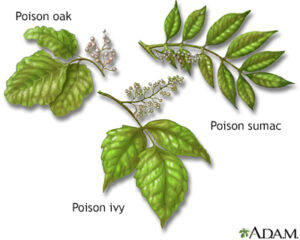
If you have come into contact with poison ivy or poison oak, the first thing to do is wash the area with cold soap and water. Once you’ve done this, now you can call on jewelweed.

Jewelweed (Impatiens capensis) is a plant that grows in wetter conditions, such as near a stream.
Pick a bunch, crush it, and rub it on exposed parts of your body that might come in contact or have already come in contact with poison ivy. It is a juicy plant. It is more effective before the urushiol oils (the poison ivy oils) set into your skin that cause the skin rash.
Knowledge of jewelweed coupled with awareness is the true poison ivy remedy.
Preparing for Poison Ivy Season: Jewelweed Ideas
Collect a bunch of jewelweed and make a tea. That is, bring a pot of water to a boil (4 cups or so), put the jewelweed in (chop a large handful), and let it sit for 20 minutes. Then strain it out.
You can bathe in this tea, just treat the affected area, or freeze it into ice cubes. You can apply the ice to exposed areas or areas that are already suffering from the rash.

How to make Basic herbal salve

Pro tip: The consistency of salves can easily be adjusted depending on your preferences. Use less beeswax for a softer salve and more beeswax if you’d like a firmer salve.

You can test the consistency by placing a spoon in the freezer before making your salve. When the beeswax melts, pour a little salve onto one of the cold spoons and place it back into the freezer for 1 to 2 minutes. This will simulate what the final consistency will be like.

Once cooled, you can make adjustments by adding more oil (for a softer salve) or more beeswax (for a firmer salve).

First make Make an infused oil
You can use a 1:2 ratio of dried herbs to olive oil, and simmer the mixture for an hour. You can also use a double boiler to gently heat the oil and beeswax together until the beeswax melts.

Basic Salve 1 Makes 5 ounces.

Ingredients
1 oz. beeswax (use carnauba wax for a vegan salve)
4 oz. herbal infused oil(s) of your choice (choose one or a combination)
10-20 drops essential oil of choice (optional)

Directions
Wrap beeswax bar in an old towel. On a sturdy surface, use a hammer to break bar up into small chunks.
Place beeswax in a double boiler and gently warm over low heat until the beeswax melts.
Add herbal oils and stir over low heat until well-mixed.
Remove from heat and add the essential oil(s).
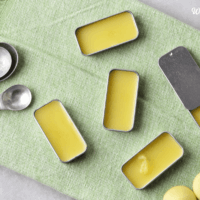
Quickly pour warm mixture into prepared tins, glass jars, or lip balm tubes and allow to cool completely.
Store in a cool location for 1 to 3 years.

Salve 2 Makes approximately 9 ounces.
8 oz. infused herbal oil
1 oz. beeswax, either grated or pellets
a double boiler

Directions:
Warm oil in double boiler. Add beeswax and stir until melted. Test the consistency of your salve by dipping a clean spoon into the mixture, and putting it in the freezer for a few minutes. If it’s softer than you’d like, add more beeswax.

Pour the still-warm salve into containers (old jam jars or small metal tins work well). If adding essential oils, do so now (only a few drops are need) and stir with a chopstick or other clean implement.
Put the cap on the containers, and store in a dark, cool place. Salves will last up to a year.

Storing Herbs and Herbal Preparations for Freshness and Longevity

Dried leaves and flowers will typically last one to two years, and roots can last two to three years. If you store dried herbs correctly, you’ll find the following to be a useful guideline:
Dried leaves and flowers have a shelf life of 1-2 years
Roots, seeds, and barks can last 2-3 years
Use your senses—smell, sight, and taste—to determine the vitality of stored herbs. If an herb looks vibrant and has retained most of its flavor and/or aroma, it’s still good medicine!

Storing Herbal Tinctures
Properly stored tinctures—prepared with high-percentage alcohol (50% or higher)—can last for years, even decades. We store our tinctures (and syrups, vinegars, oxymels, infused oils, and simple syrups) in amber glass dispensing bottles with polyseal caps. These bottles have several helpful attributes:
The brown glass excludes light, which can degrade medicine over time.
The inside of the polyseal cap is resistant to solvents, as it is manufactured for chemical storage. While I don’t like that the inside of the cap is plastic, I haven’t yet found a better system.
The bottles are a small investment, but they are washable and reusable—I have dozens that have been with me for over a decade.
As an alternative, people often store their medicine in glass canning jars. If you go this route, be aware that alcohol and vinegar will corrode canning lids over time, contaminating the medicine with plastic compounds. To prevent this, use natural waxed paper as a barrier on the inside of the lid.
Finally, make sure to store your alcohol-based tinctures some distance from the stove and potential kitchen fires as they are very flammable.
Storing Herbal-Infused Oils and Salves
Herbal-infused oils and salves will typically last two to three years when refrigerated and one year unrefrigerated, depending on the stability of the oil used. Using dried herbs will greatly increase the shelf life of your herbal-infused oils.

Storing Powdered Herbs and Capsules
Herbal powders have a shorter shelf life than cut and sifted herbs (loose teas and bulk herbs) because the plant material is ground to such a fine consistency. Use powdered herbs within 6-12 months, storing them in the refrigerator or freezer for maximum freshness.

Healing Herbal Lip Balm

This nourishing lip salve is infused with healing herbs for chapped, hurting lips. Great for all ages and guys too!
Yield: 4 ounces Author: Katie Wells
Equipment
Small tins (or lip balm tubes)
Double boiler OR glass bowl and pot
Materials
½ cup olive oil (or sweet almond oil)
½ tsp echinacea
½ tsp comfrey leaf
1 tsp plantain leaf (herb-not the fruit!)
1 tsp calendula flowers
½ tsp yarrow flowers
½ tsp rosemary leaf
¼ cup beeswax pastilles
10 drops vitamin E oil (optional)
5-10 drops essential oil (optional)
Instructions
Infuse the herbs into the liquid oil. See above for more details.
Heat 1/4 cup of the infused oil in a double boiler with the beeswax until melted and mixed. Save the extra oil for use on wounds/cuts or another batch of lip salve.
Remove from heat and stir in the essential oil and vitamin E oil (if using).
Pour into small tins, glass jars, or lip balm tubes and use on dry or chapped lips.
Notes
Store in a cool, dry place and use clean hands to apply.
This will last for about 6 months if stored properly (a little longer if you use the vitamin E oil).

Homemade Lip Balm

Easily make and customize your own homemade chapstick with all natural ingredients.
Yield:  lip balm tubes
Author: Katie Wells

Materials

Instructions

  • Add a few inches of water to the bottom of a small pan and heat over medium heat.
  • Place a small heat-safe jar (pint size or smaller) in the water, being careful not to get any water inside the jar. You can also use a double boiler or a glass bowl perched on top of a small pot of water.
  • Add the cocoa butter, coconut oil, and one tablespoon beeswax to the jar and slowly melt, stirring occasionally. Make sure not to get any water in the jar.
  • When all the ingredients are melted, stir well and turn off the heat. Leave jar in the water to keep warm.
  • Stir in the essential oils.
  • Use a glass dropper to quickly fill the lip balm containers, like tubes or lip balm tins.
  • The mixture will settle slightly as it cools, so I top off the containers after about 2 minutes as they start to harden.
  • Let sit without touching for several hours or until completely hardened.

Notes

  • Shelf life and Storage: Keep in a cool, dry place for up about 2 years. The optional vitamin E oil helps extend the shelf life even further.
  • This will make a medium firm lip balm. If you prefer a firmer version, you can add more beeswax, up to double the recommended amount. If you prefer a smoother and more oily lip balm, you can reduce the amount of beeswax.

Making Yarrow Herbal Remedies

Due to its styptic and antimicrobial properties, it is famously known for its ability to stop bleeding (when applied directly to a wound), prevent infection, and aid blood circulation when taken internally.

Women who are pregnant should not consume yarrow internally because it can cause bleeding. Consult a clinical herbalist or medical professional before ingesting.  Yarrow is a member of the Asteraceae (daisy) family so those with allergies to aster flowers should avoid ingesting and may also experience an allergic reaction to a topical application.

It is often used as a poultice, wash, soak, or salve to relieve pain, and help to heal wounds and injuries of various types.
It can be beneficial in alleviating digestive complaints and symptoms of colds and flu, and is also used to treat hemorrhoids, ease menstrual discomfort and postpartum bleeding, and reduce inflammation in the gums.
The next time you have a toothache, try chewing on a yarrow leaf. Its analgesic properties can help to numb the affected area.
Making Yarrow Herbal Remedies at Home
Harvest flower clusters when plants are in full bloom, cutting the top third of the plant just above a leaf node.
Leaves and flowers can be steeped in boiling water to make tea, and are best used fresh when applied as poultices for treating minor wounds.

You can dry foliage and flowers using a dehydrator, spread or hang them to air dry, or place them in the oven on the “warm” setting. Once they are thoroughly dried, it is easy to strip the leaves and flowers off the stems.
Both the dried leaves and the flowers can be consumed internally as a tea, preserved in tinctures, or infused into oils to make salves and creams.
Yarrow tea has a sweet and mildly bitter, aromatic flavor. It makes a wonderful addition to the herbal medicine cabinet to alleviate mild symptoms of colds and flu, as well as minor digestive complaints.
Infused Oil
Making an infused oil with yarrow is easy, and this serves as a useful treatment for wounds, inflamed muscles, and bruises. Its anti-inflammatory and astringent properties may help to reduce varicose vein swelling in some cases.
Just grind up some dried leaves and flowers, place them in a glass jar, and cover with a carrier oil in a 1:4 ratio, with one part dried plant matter and four parts oil.
I recommend using cold-pressed extra virgin olive oil as it is affordable and easy to find, but you can use any kind of high-quality neutral carrier oil that you prefer.
Seal the jar tightly with a lid and set it in a dark place for a few weeks, shaking daily to agitate the mixture.
You can also choose to leave the jar in the sun to heat infuse for the first few days. Be sure to move it to a cool, dark location for the remainder of the infusing time.
After 4-6 weeks, strain the oil and use it as is, or try melting in some beeswax and essential oils to make an herbal salve. This can be stored in tins or jars in a cool, dark place.
Tincture
You can also make a tincture from the dried leaves and flowers. As described above, grind them up, place them in a glass jar, and cover with 80 proof (or higher) alcohol.
Leave it to infuse for 6-8 weeks in a cool, dark place.
Strain, and place in a labeled dropper bottle. The tincture can be used as a mosquito repellent when applied to the skin, but always make sure you test it on a small area first, especially if you have sensitive skin.

First Aid Yarrow Salve:A natural remedy for stings, rashes, minor cuts, burns, and abrasions

Infusion Time: 48 hours or 4-6 weeks

Herbal Prep Time: 5 minutes

Cook Time: 5 minutes

Makes about 12 oz.

 *The quantity this recipe produces makes it a great product to keep in a jar for home first aid kits, and/or to give to friends and family.  Use within 6-8 months.

Ingredients:

1 1/2 to 2 cups fresh yarrow leaves and white flowers

1 1/4 to 1 1/2 cups jojoba oil (or any other neutral oil)

1 ounce beeswax (the more wax the more firm the salve)

Double boiler (or saucepan and heatproof bowl)

Salve tins (or small resealable jars)

FOLK INFUSION METHOD
  1. Gather yarrow from a clean area that hasn’t been sprayed with chemicals. Double-check that you have identified the yarrow properly before beginning this project.

  2. Roughly chop the yarrow, filling a pint mason jar almost to the top with leaves.

  3. Pour oil (jojoba, grape seed, or olive oil) over the yarrow leaves, then cover with the lid.

  4. Place the jar in a sunny window for 4-6 weeks. Every few days shake up the jar. If you are using the rapid infusion method, then skip this step and instead follow the set of instructions listed below before resuming with step 5 here.

  5. When the oil is completely infused, strain out the yarrow leaves. It should be a bright or deep green color.

  6. Pour the infused yarrow oil into a heatproof bowl, place the bowl over a pot of gently simmering water, creating a double boiler.

  7. Stir in the beeswax and let it slowly melt into the oil. Test the firmness of the salve by spooning out a small amount then placing the metal spoon in the freezer for 30 seconds. Then, take out the spoon and touch the salve. If you want it more firm, add more beeswax. Keep doing this until you reach your desired consistency.

  8. Remove from heat once the beeswax is completely incorporated.

  9. Carefully pour the oil and beeswax combination into the salve tins or a wide mouth jar. If you’d like to add 1-2 drops of essential oil into each tin, now is the time. It’s an optional step that can add fragrance.

  10. Cover the tins with their lids and let the salve set completely before using; around 30-45 minutes.

Rapid Infusion Method

This method allows an infusion to occur within 1-2 days as opposed to 6 weeks. This is a great option if you have the equipment and you’re short on time. Between step 3 and step 5 listed above, follow these instructions:

  • Fill a saucepan or slow cooker with 1 inch of water. Carefully place the yarrow-and oil-filled jar on a trivet in a double boiler or in the slow cooker.

  • Slowly heat the water until it reaches 110 to 120 degrees. Turn off the heat.

  • Keep the contents of the jar incubating in the warm water. Bring the water back up to temperature periodically over the next 24 to 48 hours, never leaving the heat on for any prolonged amount of time and never allowing the water line to evaporate to less than 1/2-1 inch.

A Note of Caution:
This plant is generally recognized as safe for use, though in rare cases yarrow may cause an allergic reaction. It should not be used if you are sensitive to plants in the aster (Asteraceae) family. It should also be used with caution during pregnancy or if you are taking any prescription medication. Always remember to consult your doctor or healthcare practitioner before using any herbal remedy.
According to the ASPCA, yarrow is toxic to dogs, cats, and horses.

Some gardeners also use yarrow instead of comfrey to make a tea fertilizer to apply as a soil conditioner. Because it is drought tolerant and can grow in poor, dry soils, it is also useful for combating erosion.

Yarrow Tea

Ingredients
  • 2 TB yarrow
  • 2 TB elderflower
  • 4 TB mint
  • 2 TB red clover
  • 1 TB maple syrup

Instructions

  • Steep herbs in a quart jar of hot water.
  • Cover and let sit for about 6 hours, to steep the full benefits. I will often do this overnight, but, fair warning, if it steeps too long it can taste bitter. Usually overnight is perfect.
  • To make the removal of the herbs super easy, I love my quart-size tea steeper, linked below.
  • Add sweetener and stir. (Read more above about choosing the right sweetener.)
  • Serve over ice, or you can warm it as well and enjoy a mug-full of this delicious hot tea.

Notes

I choose maple for both the taste and the added polyphenols and antioxidants. In fact, I substitute maple syrup for sugar in almost everything.

If you use maple syrup, always be sure you’re using 100% maple syrup. (It’s the second most faked food in the world, topped only by olive oil.)

Making Aloe Vera Jell

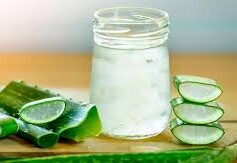
Drain the yellow liquid: Before extracting the gel, cut the larger end and drain the yellow liquid (aloin) from the leaf by placing the leaf with the cut side down in a glass, or tilt leaf in a bowl, for 15 minutes. Rinse the leaf again, starting from the bottom, I do this for a few minutes just to give me peace of mind that all debris and impurities are completely removed.
This helps to get rid of the bitter taste.

Things You Should Know. Pure aloe vera gel can be stored in the fridge for up to 1 week. To prolong the shelf life of your aloe vera gel to 1 month in the fridge, blend it with a vitamin C tablet. You can also freeze Aloe Vera gel for up to 1 year.

Freezing the gel in an ice cube tray rather than one large block means that you can just take out individual pieces whenever you need them. freeze overnight and then place cubes in a sealable bag.

Constipation

Chia or Flax Seed: 2 1/2 Tb. 1 time a day in food or drink. In extreme case try 3 Tb.  Drink plenty of water throughout the day.

Yields 2 ¼ cups loose leaf tea
Ingredients
• ½ C dried senna leaf
• ½ C dried spearmint leaf
• ½ C dried chamomile
• ½ C dried nettle leaf
• ¼ C dried anise seeds
Directions
1. In a large bowl, mix together ½ cup of dried senna leaf, ½ cup of dried spearmint leaf, ½ cup of dried chamomile, ½ cup of dried nettle leaf, and ¼ cup of dried anise seed.
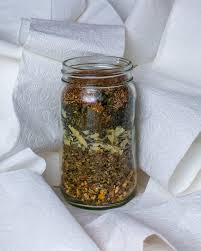
2. Transfer to a glass jar for storage.
3. For best results: This tea should only be used OCCASIONALLY. This tea should be consumed an hour or so before bedtime. When the morning comes, batten down the hatches! Teas for helping to ease constipation are not safe for regular daily use. If you are suffering from regular constipation, please increase fiber in your diet with vegetables and whole grains. Consider increasing consumption of high-magnesium foods (pepitas, almonds, spinach, dark chocolate) and fluids as well as dried fruits like prunes and raisins to help balance your digestive system. Don’t ever forget the power of fresh fruits to facilitate regular bowel movements.
4. Steep 1-2 tablespoons of the dried herbal blend in 8-10 ounces of boiling water. Let steep for 10 minutes, then strain.

From: Upasana Shukla

Remedey 1 Ingredients:-
4 Dried Plums or ¼ cup Raisins
½ tsp. Castor Oil
¼ cup Hot Water

Method:-
In a bowl, mix dried plums, castor oil and soak in hot water for 10-15 minutes and then mash it.

Remedy 2  Ingredients:-
1 Ginger
Mint Leaves

Method:-
Grate the ginger in a vessel and mint leaves to it. Then pour 1 cup water. Heat all this for 10 minutes.


Turmeric Healing Paste

To make a healing paste with turmeric:

Mix 1-2 teaspoons of ground turmeric (depending on how large the wound is) with enough water to make a thick paste (generally about half the amount of turmeric you use). You can also mix turmeric with coconut oil instead of water for your paste for more healing and anti-bacterial benefits, or apply it as a face cream/mask to reduce acne, redness, or scars.

Be sure to wash your hands and then apply the paste gently on the wound. (It should be pasty, so don’t expect it to look like a cream.)

Once you’ve covered the infected area, place your bandage of choice over the wound.

Let it sit for at least 12 hours, or up to 24.

Do this for three days.

Why this works:

Turmeric not only relieves inflammation to help with pain but also aids in healing in many ways. First, it’s a natural anti-bacterial food, so it will help fight bacteria that are found on the skin when you have a wound and prevent bacteria from entering the body via the wound opening. Turmeric also helps clot the blood, so it will prevent the wound from bleeding further. Last, it helps the wound heal and treats the skin, so there will be little to no scarring and the skin will stay protected.

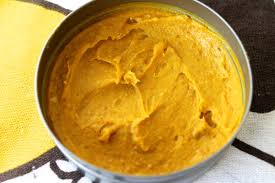
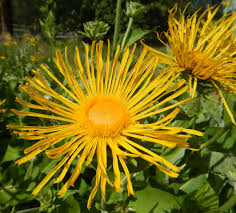
Elecampane root & Marshmallow root Cough Tonic

This lung tonic is a strong decoction of marshmallow & elecampane roots. The shelf life is relatively short, so drink this honeyed decoction often as needed.

I’ve had syrups like this last in my fridge for months, though I give the syrup I sell a 4 week expiration date to be on the safe side.

Dosage:
Shake Well! Separation is natural.
Add 1 to 3 tablespoons to still or sparkling water, tea, or whatever you are sipping.
3 tablespoons or so in a quart of warm lemon water, first thing in the morning.

Ingredients:
1/2 ounce fresh or dried marshmallow root
1 ounce fresh or dried elecampane root
2.5 ounces fresh baby ginger
1 oz herbs = 1 quart of water so, 4 quarts of water = 1 gallon of water
2 cups honey
optional: licorice and fennel seeds

Instructions:

Toss coarsely chopped roots into water and bring to a boil. Let simmer at least 20 minutes, lid off, allowing water to evaporate, ideally until water volume is reduced by half. Strain the decoction and pour into a jar to cool and measure volume; add equal volume of raw honey and stir to combine. Store in fridge up to one month.

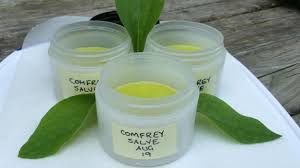
Comfrey Salve

Comfrey salve can help with painful muscle and joint conditions as well as bruises and fractures. It also smell great!

Ingredients

2 tbsp. comfrey leaf, dried
2 tbsp. olive oil 2 tbsp. coconut oil
1/8 tsp vitamin E oil
5 to 10 drops peppermint essential oil
1 tbsp. beeswax

Instructions

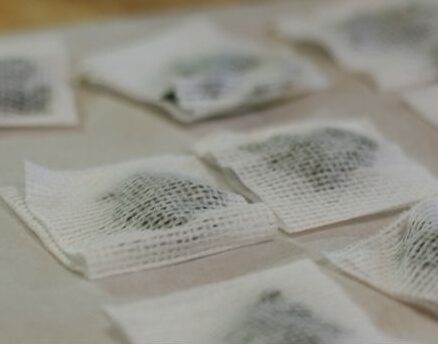
Create a double boiler by placing a glass measuring cup in a saucepan, on top of a canning jar ring. Place the herbs in a cloth tea bag. Pour the oils over the tea bag. Simmer on medium heat for 30 to 45 minutes. Press out the herbs to release their herbal goodness into the oil.
Add 1/8 tsp vitamin E oil and the peppermint essential oil to the comfrey mixture.
Place back into the pot and place the beeswax into the oils. Once the wax has melted, stir with a clean popsicle stick or toothpick. Pour the liquid into a jar or tin to harden.

Comfrey Poultice

A Comfrey Poultice for Pain Relief

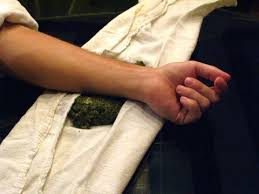
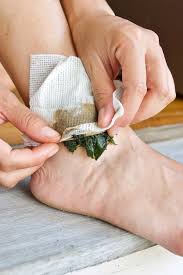
One of the easiest herbal remedies you can make with fresh or dried herbs is a poultice. This topical remedy is an effective remedy for bug bites, pain, muscle cramps, and more.  You could crush the leaves and blend with flour and place in a jar to use as needed. I would freeze this.
Yield: 3–4 poultice packs

Ingredients:

About a dozen fresh comfrey leaves (stem included)

  • 1 cup water
  • 2 handfuls flour or French green clay
  • A few old dish cloths (or another small piece of cloth you’re no longer using)

Directions:

Use a knife to coarsely chop your comfrey leaves.
Place leaves in a blender. Add water.
Blend for about 30 seconds, until the water and leaves have combined. The consistency should be a somewhat chunky paste.
Put this freshly-blended paste in a bowl. Add a handful of flour or clay to the paste and stir it in with your hands.

Place a cup of comfrey poultice in the middle of your cloth and flatten it down with a spatula.
Now fold in the sides of your cloth and wrap it around the comfrey. Repeat this process until you’ve wrapped up all of your comfrey paste in cloth. You can now either use these poultices fresh or store them in your freezer.

When storing them in the freezer, place a piece of wax paper between each poultice (so it’s easier to separate them later). Now place your poultices in a plastic gallon freezer bag for storage.
Note: once you’ve used a poultice once, you can compost the herbs. The cloth can be washed and then re-used.

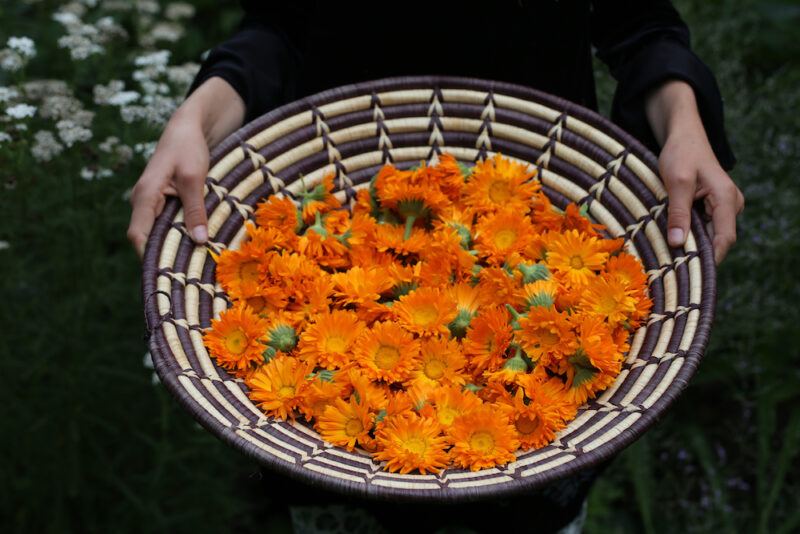
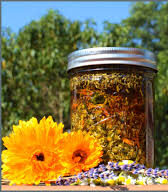
Calendula oil infusion for sunburn and bug bites

Herb-to-Oil Ratio
You can prepare the Calendula oil infusion using two different approaches: folk and weight-to-volume.
With the folk method, loosely pack your herbs into a jar, leaving an inch of space at the top.

Pour oil ( like sesame, grapeseed, or jojoba ) over the plants until they are completely submerged under oil. Fill oil nearly to the jar brim to reduce oxidation of the oil and molding of the plant matter.

In the weight-to-volume method, herbs and oil are typically combined in a 1:5 ratio, but I find that 1:10 allows for easier handling. To get these proportions, use ten times the amount of oil (measured by volume) for every one part of herb (measured by weight). For example: 25 grams of herbal material to 250 milliliters of oil.

Choosing an Extraction Method
Oil infusions can be prepared with or without heat. The heatless process, or maceration, is slower but doesn’t damage the delicate constituents in the plants or carrier oils. You can use heat to speed up the infusion process, reducing the extraction time from weeks to only a few hours. However, heated methods require more mindfulness to ensure the oil doesn’t get ruined. Resinous herbs like Calendula are best extracted using heat and longer processing time.
Maceration Method
Place the sealed jar in a sunny window. Cover with a paper bag in order to protect from damaging UV light. Shake daily for four to six weeks.

Making Herbal Tinctures

How to make herbal tinctures (“folk method”): 1 to 5 maceration (vodka) ratio. This makes a 1:5 ratio.

  1. Gather your herb.
  2. Fill it loosely into a jar with a screw top (i.e. mason jar).
  3. Pour alcohol over your herb until it covers the herb about 1/2” or so. You will notice air bubbles forming.  These need to be removed.

For dry herbs use 40-50% alcohol (80-100 proof),
for fresh herbs use 60-95% alcohol (120-190 proof).

Plants with a high water content (i.e. fresh roots) should use the higher alcohol percent (i.e. 95%). Vodka or grain alcohol are good choices because of their neutral flavor.

3.5. Optional step – blend the alcohol and herb together to increase surface area exposure for the herb.

  1. Place the jar away from light (i.e. in a cupboard), in a cool, dry location for 6 weeks.
  2. Shake or stir the tincture every day if possible.
  3. If after a day or two the plant material expanded and is no longer submerged in the alcohol you may need to add more alcohol. Especially look for this with dry roots and fruits (may need to cover them with 1-2” or more alcohol from the beginning).
  4. After 4-6 weeks strain out the herbal material and store your tincture for use!

It’s possible to get much more detailed with your tincture-making, but the above method will work pretty well for most herbs. If you want to be more precise, you can measure the weight of the herbs and the volume of the “menstrum” (alcohol). You can also look up a recipe to find an “herb:menstrum” ratio for the plant you’re working with. For example, an recipe might say to tincture a fresh plant at “1:2, 80%,” which means for every 1 part of plant material by weight (grams or ounces), use 2 parts of menstrum by volume (milliliters or fluid ounces), using 80% alcohol.

With more potent herbs it’s best to be precise and follow a specific recipe in order to take a more precise dose of the final product. For most mild herbs, there is a great deal of room for experimentation and error – herbs like peppermint or chamomile have a wide therapeutic dose range, so it doesn’t matter so much what the relative concentration of the tincture is.

The most important thing in terms of safety is to prevent fermentation, mold or harmful bacteria growth by using a high enough alcohol percent. To be on the safe side, the final alcohol percent should be above 30%. When you use fresh herbs that contain water, the final alcohol percent will be lower than the alcohol you add in, as the water in the herb will dilute the alcohol. That’s why you need to start with a higher percent of alcohol with fresh herbs. If you want to be very precise, set aside some of the fresh herb, weigh it, let it dry, and then weigh it again to find out how much water was in the herb.

How to an Make Herbal Oil Infusion

How to an Make Herbal Oil Infusion

Supplies needed
Herbs. Dried herbs are best for a slow cold infusion. Fresh herbs, wilted herbs, or dry herbs can be used with the quick heat method.

A carrier oil of choice, such as jojoba oil, olive oil, sweet almond oil, or other.

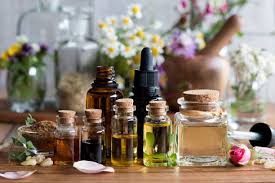
A glass container with a tight-fitting lid. Use something as small as a half-pint mason jar, or as large as a half-gallon jar! The size simply depends on how much herb infused oil you intend to make.

Fine-mesh colander, reusable nut milk bag and/or cheesecloth for straining.

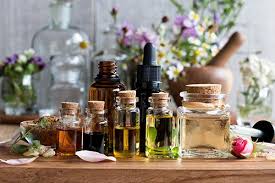
Storage containers for finished oil, such as glass jars or amber dropper bottles.

Optional: a slow-cooker or double boiler and probe thermometer (only if you intend to use the quick heat method)

Should I wash herbs before drying them?

It depends. Some gardeners and herbalists avoid washing herbs before drying because the added moisture may prevent them from drying properly and potentially lead to mold. This is especially a concern when air-drying herbs, but shouldn’t be an issue when using a food dehydrator. If herbs are particularly dirty, the extra step of washing them may be preferred. Shake them out well (or even toss them in a salad spinner) to remove excess water after washing. I personally only wash herbs that I plan to use in cooking.

Option 1: Slow Cold Infusion

The first option is the easiest, but does require a little patience: simply allow dry herbs to soak in oil at room temperature for several weeks. Known as slow or cold infusion, this method relies on a passive process to gently extract beneficial compounds from the herbs. Since it’s not exposed to heat, the maximum therapeutic properties of both the oil and herbs are retained. The herbs should soak in oil for a minimum of 2 or 3 weeks, up to 4 to 6 weeks for the most medicinal oil possible.

Directions

Start by filling a clean glass container at least two-thirds full with dry herbs. Feel free to fill the container even more to create a stronger infusion. Yes, you can mix several different types of herbs together if you’d like!

Pour oil over the dry herbs until they’re completely covered by at least an inch or two of oil (though they may float, that’s okay). If you wish to get more technical and measure, aim for an herb to oil ratio of about 1 part dry plant material by weight to 5 parts oil by volume. For example, 1 ounce of herbs to 5 fluid ounces of oil.

Add a lid and set the jar in a dark place to infuse for several weeks. Some herbalists like to use the “solar infusion” method, steeping the herbs and oil in a sunny window to garner luminary warmth and energy. Yet others say that sunlight can reduce the potency of herbs or make oil go rancid more quickly. So, it’s a bit of a controversial topic! We’ve done both methods and never had oil spoil on us.

Though not necessary, you can give the jar of oil a gentle shake or tilt from time to time. This is especially helpful during the first few days to rotate/submerge any “floaters” on top.

Occasionally, condensation may develop near the top portion of the jar. If you notice this, simply open the jar and wipe it away with a clean paper towel.

When the time is up, strain the herbs from the oil. I place a nut milk bag or layer of cheesecloth inside of a fine colander perched on top of a bowl, and then pour the oil through both. After it sits to drain a bit, I wring out any leftover oil from the herbs by squeezing the nut milk bag or cloth. Compost the leftover herbs.

Transfer the finished herb infused oil into a clean storage container with a lid, and store it in a cool dark place. I like to use amber dropper bottles for face and body oil, storing the excess in a larger jar in the fridge for refills. The dark glass protects the medicinal herb oil from light degradation, so I can safely keep it out on my bathroom counter too. (See shelf life information below.)

Option 2: Quick Heat Method

The quick heat method is a simple, fast way to create herb infused oils without waiting for them to passively steep. Though we’ll be lightly heating the herbs and oil, it’s important to keep everything at 110°F or below to avoid degrading the quality of the oil and herbs. It’s okay to use fresh, wilted, or dry herbs with this method.

Directions

Start by chopping up the herbs you wish to infuse. Smaller pieces = more surface area = stronger infusion.

Add the herbs to a slow cooker (crock pot) or the top portion of a double boiler on the stove. If you don’t have a double boiler, create your own by nesting a glass bowl or smaller pot inside of a larger pot of water below. The top/inner pot should touch the water, but not rest all the way on the bottom of the lower pot.

Pour over enough oil to submerge and cover the herbs by at least an inch or two. It isn’t necessary to measure, but you can if you wish. For fresh herbs, aim for an herb-to-oil ratio of 1 part fresh herbs by weight to 3 parts oil by volume (e.g. 1 ounce fresh herbs to 3 fluid ounces oil). For dry herbs, use 1 part dry plant material to to 5 parts oil by volume (e.g. 1 ounce dried herbs to 5 fluid ounces oil). For wilted herbs, use a ratio of 1:4.

Gently heat the oil, but do not boil it. Between 95 and 110°F is ideal. Check the temperature with a probe thermometer and adjust the heat if needed. In a crockpot, use the lowest temperature or “keep warm” setting.

Allow the oil and herbs to simmer together for at least 30 minutes, up to several hours for a more potent infusion. (Some medicinal herb oil recipes call for 12 to 24 hours in a slow cooker). Important: To prevent spoilage, leave the lid off so moisture from the fresh herbs can evaporate and escape. The more fresh the herbs, the longer I suggest lightly heating to ensure water content is reduced.

Finally, strain and store the oil as explained in the “slow infusion method” section above.

One time we do use the quick heat method is to make hemp-infused oil, shown in our makeshift double boiler (a smaller pot nested inside a larger pot with water in the bottom).

A fine sieve metal strainer with a layer of cheesecloth over the mesh is positioned over a glass bowl.

We sometimes use organic cheesecloth to strain herb oils, but mostly use reusable/washable nut milk bags nowadays!

How long does herb infused oil last?

The shelf life of herbal oils varies depending on the type of carrier oil used, if the herbs were adequately dried before steeping, and how the oil is stored. Most herb infused oils should stay good for about a year when made with dry herbs and stored sealed in a cool, dark place.

Some oils have a naturally shorter shelf life than others (such as grape seed and sweet almond oil), while jojoba oil can stay good for 5 years or more! Furthermore, refrigeration may be recommended for some oils. Refer to the oil manufacturer’s instructions, and see the expected shelf life of various carrier oils here.

If the herbal oil is used to make salve, lip balm, lotion, soap, or other goodies, the shelf life is extended since other preservatives are often used in those items. Beeswax is an excellent natural preservative for example!

Visible mold and/or sour, putrid, or otherwise “off” odors are signs that oil has gone bad or rancid and should be discarded. However, cloudiness is not usually a sign of spoilage (unless accompanied by a bad smell) and can be common in herb infused oils.

Ways to use herb infused oil

Here are some general ideas and ways to use medicinal herbal oils, but use your noggin’! Be sure the use is appropriate and safe for the type of carrier oil and herbs you used.
As body oil or massage oil
Facial moisturizer – just a few drops will do!
Work a few drops through damp hair to soften hair and smooth split ends.

As an ingredient in other homemade body care products like salve, soap, cream, lotion, lip balm, ointment, or other natural skincare products. Check out our lip balm and salve recipes here! For more ideas, I highly recommend this organic body care recipe book. It’s loaded with awesome recipes!

If you used an edible carrier oil, you can use your herbal oil as a tasty marinade, salad dressing or in other culinary creations.

As part of your oil cleansing method

As spot treatment directly on scars, stretch marks, varicose veins, or other areas of concern.

To soothe rashes, bug bites eczema, psoriasis, scrapes, burns, or other skin irritations

On cracked heels, cuticles, feet, dry elbows, or other rough patches of skin.

On chapped or cracked lips, or around your nose when it’s chaffed.

To treat cradle cap on babies (check your carrier oil safety first).

To remove makeup (but avoid contact with sensitive areas around your eyes)

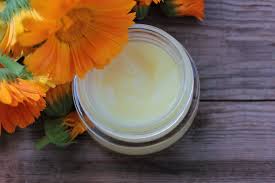
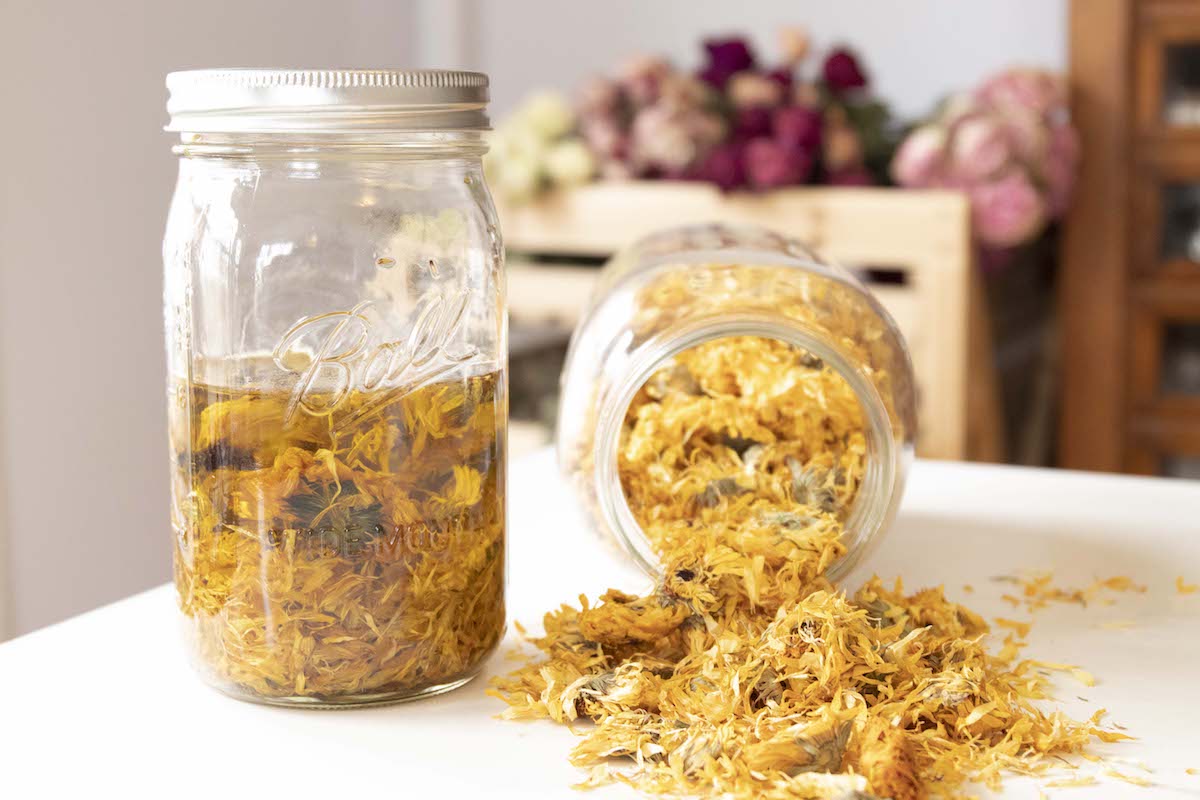
Calendula-infused oil turned into homemade calendula salve. This stuff does WONDERS for the skin!

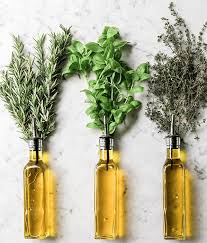
Easy Herb-Infused Olive Oil

Yield: 2 cups 

Want to take your favorite fresh herbs and create something with truly spectacular flavor? Make easy herb-infused olive oil at home with these easy to follow instructions.

Ingredients

For Soft Herbs like Basil, Cilantro, and Parsley:

2 cups pure olive oil

1 cup fresh herb leaves, stems removed

For Woody Herbs like Rosemary, Winter Savory, and Thyme:

2 cups pure olive oil

4 cups fresh herb leaves, stems removed

Instructions

  1. Add herb leaves and oil to a blender and blend until completely smooth.
  2. Add mixture to a medium saucepan and bring to a simmer over medium heat. Simmer for 45 seconds.
  3. Strain into a bowl through a fine mesh strainer or chinois without pushing down on the mixture.
  4. Strain again through a paper coffee filter into a medium-sized bowl. Let the filtered oil settle for a few hours, then pour it off the dark liquid in the bottom of the bowl, if there is any.
  5. Store in an airtight container in the refrigerator, and use within 1 week.

How To Make Herb-Infused Oils Class

These easy herbal preparations are a wonderful way to capture the benefits of herbs for many uses, from skincare to cooking. There are so many herbs you can choose from depending on your intended use, and there are so many ways these oils can be used.
As an example of the many uses of an herb-infused oil, let’s take a look at the herb rosemary (Rosmarinus officinalis). Rosemary can be used to create a vibrantly flavored culinary oil for use when roasting potatoes or making your favorite pasta sauce. For topical use, rosemary-infused oil can be used in a number of bath products, such as sugar scrubs or herbal shampoo. With its antimicrobial and moisturizing properties, rosemary-infused oil is a popular support for an itchy scalp and dandruff (McIntyre, 1996). It is also used to support hair growth since rosemary is an invigorating herb that stimulates blood flow on the surface of the skin.

Herb-Infused Oils for Wellness and Beauty
Herb-infused oils can be used for bath and skincare products and other topical uses.
Herbs that make great herb-infused oils include calendula (Calendula officinalis) flower, plantain (Plantago spp.) leaf, chickweed (Stellaria media) leaf, chamomile (Matricaria chamomilla) flower, lavender (Lavandula angustifolia) flower, and comfrey (Symphytum officinale) leaf. These herb-infused oils can be used in lotion, cream, salve, insect repellent, and bath oil. Calendula is commonly used for sunburn, itchiness, rashes, inflammation, and wounds that are slow to heal (Hoffmann, 2003). Plantain is a vulnerary and encourages tissue renewal (Bruton-Seal, 2009). Chickweed can be used to soothe minor burns and skin conditions such as psoriasis and eczema (Wood, 2008). Chamomile and lavender are both calming and antifungal (McIntyre, 1996), and comfrey can be considered for minor burns, rashes, and insect bites (Grieves, 1971) but should be used with caution on open wounds due to its pyrrolizidine alkaloids. To learn more about the safe use of comfrey, see our article, The Comfrey Controversy: Can And Should One Use Comfrey Internally?
Carrier oils used that are ideal for topical use include olive (Olea europaea) oil, as it offers some resistance to oxidation and rancidity, but there are many other oils that can be used, such as almond (Prunus amygdalus), apricot (Prunus americana), coconut (Cocos nucifera), and grapeseed (Vitis vinifera). Beneficial properties and shelf life will vary for each oil. We recommend researching each carrier oil option before choosing an oil for your herb-infused oil. You can find a list of carrier oils and their properties in our post, Choosing Essential Oil Carriers.
There are several infusion methods you can use to make these infused oils, such as warm infusion, solar infusion, stovetop infusion, and oven infusion methods, which we will describe below. Each of these methods yields fairly similar results, so feel free to experiment and see which method(s) you prefer.

Culinary Herb-Infused Oils
You can use tasty herb-infused oils for a delicious addition to salad dressings or any number of healthy, delicious meal preparations. Some herbs that make lovely culinary oils are garlic (Allium sativum) bulb, ginger (Zingiber officinale) rhizome, cayenne pepper (Capsicum spp.) fruit, and oregano (Origanum vulgare) leaf. We suggest using dried herbs to prevent mold and bacterial growth in your infused oils and minimize the risk of botulism poisoning.
Carrier oils that are ideal for culinary infused oils are avocado (Persea americana), coconut (Cocos nucifera), grapeseed (Vitis vinifera), and olive (Olea europaea) oil, among others.
While you can certainly use any of the herb infusion methods mentioned below, the stovetop method is the most common infusion method used when making culinary herb-infused oils. If using the warm-infusion method, you can strain and use it after 1-2 weeks.
Tips For Making Herb-Infused Oils
For best results, we recommend using high-quality dried herbs, as they will not contribute to spoilage, and you will have a longer-lasting product.
While fresh herbs can be used in herb-infused oils for topical use and are preferred for some herbs, such as St. John’s wort (Hypericum perforatum) aerial parts and mullein (Verbascum thapsus) flowers, care must be taken to minimize moisture in the finished product to decrease the chance of growth of mold or bacteria. This article will focus on herb-infused oils made with dried herbs.
Culinary oils meant for internal use should be made with dried herbs to minimize the risk of botulism.
You can use one herb to make your herb-infused oil or you can blend herbs to create a formula for your herb-infused oil. The choices are endless and completely up to you!
Herb-infused oils can be made with either the traditional folk method in which ingredient amounts are eyeballed or the more precise ratio method where ingredient amounts are measured. Each method is included in the herb-infused oil tutorials below.
Always use dry, sterilized jars with tight-fitting lids when making herb-infused oils using dried herbs to reduce the chance of bacteria or mold growth or your oils going rancid due to oxidation. Colored glass bottles will reduce exposure to light, which speeds up the degradation of your oils and herbal properties. Also, adding a few drops of vitamin E oil can discourage oxidation as well.
Be sure to label jars and bottles with dates and ingredients during the infusion process and after bottling for storage.
Now that we’ve covered some of the most important points of making herb-infused oils, let’s look at the supplies you’ll need and the various ways to make these preparations in more detail below.

Supplies for Herb-Infused Oils
When making herb-infused oils, you will likely need the following supplies depending upon the oil infusion method you choose to follow.
Carrier oil(s) of choice, such as avocado (Persea americana), coconut (Cocos nucifera), grapeseed (Vitis vinifera), or olive (Olea europaea) oil
Dried herb(s) of your choice such as calendula (Calendula officinalis), plantain (Plantago spp.), chickweed (Stellaria media), chamomile (Matricaria chamomilla), lavender (Lavandula angustifolia), or comfrey (Symphytum officinale)
Natural waxed paper
Sterilized, dry glass jar with a tight-fitting lid
Sterilized, dry spoon
Sterilized, dry, stainless steel saucepan(s) or a double boiler
Crockpot (optional)
Cheesecloth or finer cloth, such as a nut milk bag, muslin, an old (but clean!) T-shirt, or unbleached coffee filter (optional)
Bowl with a spout
Labels and permanent marker
Dark-colored glass bottles with dropper tops or cap tops for storing finished product
Mortar and pestle (optional)
Wire strainer (optional)
Funnel (optional)
Vitamin E oil (optional)

Warm-Infusion Method for Herb-Infused Oils
The warm-infusion method of making herb-infused oils is one of the simplest methods you can use to infuse oils although it does require a time commitment, so be sure to plan ahead if you choose to use this type of infusion method.
Now don’t let the term warm confuse you here. It does not involve using any external heat sources, as the room temperature of your home is sufficient.
Warm Infusion
There’s something that feels so grounding about combining herbs and oil together, expressing gratitude and good intentions over the mixture, and setting it away to infuse and to be used later in various ways. That’s what this warm infusion method of making herb-infused oils feels like to us. It’s so simple and basic that anyone can do it with ease!
Warm Herb-Infused Oil
Ingredients
Carrier oil(s) of choice
Dried herb(s) of choice
Natural waxed paper
Sterilized, dry glass jar with a tight-fitting lid
Directions
To begin making an herb-infused oil, you’ll want to decide whether to use the folk method or the ratio method. As mentioned above, the traditional folk method relies on “eyeballing” the ingredient amounts and is the simplest method to follow. However, you may prefer to measure ingredient amounts, and if so you can use the more precise ratio method.
To create an herb-infused oil using the folk method, simply fill a dry, sterilized container ½ full with dried herb(s) and pour room-temperature oil over the herb(s), making sure to completely cover the herb(s) by 1 inch.
To create an herb-infused oil using the ratio method, fill a dry, sterilized container with 1 ounce of dried herb(s) and pour 10 fluid ounces of room-temperature oil over the herb(s).
The steps to making a basic herb-infused oil are as follows. Slight variations in these steps will be noted in the infusion methods detailed below.
Place dried herbs in a dry, sterilized container and cover with the appropriate amount of room-temperature oil, based on whether you are using the folk or ratio method.
Use a dry, sterilized spoon to mix thoroughly so all surfaces of the herb(s) are coated with oil and no air bubbles remain.
Place a square piece of natural waxed paper on top of the jar, then seal jar with a lid (this protects the herbal oil from any chemical coating that may be on the lid).
Roll jar back and forth in your hands to continue to thoroughly mix the herb and oil.
Place the container in a dark, warm spot, such as a cupboard, out of direct sunlight, and let the mixture sit for 4-6 weeks. Stir or shake the herb and oil mixture to mix the contents and release the herbal constituents into the oil every few days.
When the infusion time is up, line a wire strainer with a few layers of cheesecloth or finer cloth, or simply place the cloth within a funnel placed in the mouth of a dry, sterilized glass jar, and decant the mixture. With clean, dry hands, gather the cloth up and squeeze strongly, squeezing as much oil from the herb(s) as possible. Compost the herb(s).
Cover the jar, and let the oil settle overnight in a cool, dark location. This will allow any herb sediment to settle to the bottom of the jar. You can also strain the oil through a finer filter such as an unbleached coffee filter to remove sediment.
Pour the oil into dry, sterilized, dark-colored glass bottles with dropper tops or caps and add a couple of drops of vitamin E oil to each container, if desired, to slow down the oxidation of the oil.
Label, and store in a cool, dark location.

Heat-Infusion Methods for Herb-Infused Oils
Utilizing external sources of heat is an excellent way to get a high-quality herb-infused oil as heat encourages the breakdown of plant material and the movement of the carrier oil molecules, allowing them to more easily extract the plant’s constituents into the solution, resulting in a better extraction. Heat is definitely helpful in breaking down the cell walls of tough plant parts and mushrooms. When using external heat sources, it’s best to keep the preparation no warmer than 120-140 degrees Fahrenheit at any given time to best preserve the properties of the plant material and the oil.
Solar Infusion
The solar infusion method of making herb-infused oils is a beautiful one, especially if you want to incorporate the energy of the sun into your infused oils. This method is the simplest of all the heat-infusion methods as it utilizes the sun for warmth. It is very similar to the warm-infusion method above, only requiring one additional step.
Solar Herb-Infused Oil
Ingredients
Carrier oil(s) of choice
Dried herb(s) of choice
Natural waxed paper
Sterilized, dry glass jar with a tight-fitting lid
Directions
Follow the directions for making herb-infused oil using the warm-infusion method above.
Once your herbs and oils have been combined in the jar and sealed, place the jar in a brown paper bag or wrap it in an opaque cloth, and place it in a sunny window sill or directly in the sunlight for 1-2 weeks. Every 1-3 days, roll the jar in your hands to help mix the contents and release the herbal constituents into the oil.
When the infusion process is finished, follow the directions in the warm-infusion method above for straining and bottling your herb-infused oil.
Double-Boiler Infusion
The upside to this method is that it’s the quickest of all the heat-infusion methods and will allow you to make herb infused oils in under an hour! How nice is that? This method is commonly used for herbal oils needed quickly during an acute condition such as an earache or insect bite. The downside is that it doesn’t produce the strongest infused oils possible.
Double Boiler Herb-Infused Oil
Ingredients
Carrier oil(s) of choice
Dried herb(s) of choice
Sterilized, dry glass jar with a tight-fitting lid
Directions
Begin by placing a stainless steel saucepan on the stove, filling it ¼ full of water, and bringing the water to a boil.
Place your herbs and oils into a second dry, sterilized stainless steel saucepan that is slightly smaller than the first. Use a dry, sterilized spoon to mix thoroughly so all surfaces of the herb(s) are coated and no air bubbles remain.
Place the smaller, herb-filled saucepan inside the larger, water-filled saucepan and simmer for 30-60 minutes, keeping a careful eye on the amount of water in the larger pan and being very careful not to let water splash into the oil/herb mixture. Monitor the temperature of your oil and keep it between 120-140 degrees Fahrenheit. If the water level runs low in the lower saucepan, carefully add more hot water to bring the water level in the saucepan back up to ¼ full.
When the infusion process is finished, follow the directions in the warm-infusion method above for straining and bottling your herb-infused oil.
Stovetop or Crockpot Infusion
If you’re looking for another quick way to effectively infuse herbs into oil, the stovetop or crockpot infusion method is for you. While this method takes a bit more time than the double boiler method above, it will allow you to make a stronger herb-infused oil that more effectively extracts the beneficial properties of the plant material. This method can take anywhere from 4-8 hours (or more, if you’d like) from start to finish, and it produces a lovely herb-infused oil for you to use in a fairly short amount of time.
Stovetop or Crockpot Herb-Infused Oil
Ingredients
Carrier oil(s) of choice
Dried herb(s) of choice
Natural waxed paper
Sterilized, dry glass jar with a tight-fitting lid
Directions
Follow the directions for making herb-infused oils in the warm-infusion method above.
Once your herbs and oils have been combined in your jar and sealed, place the jar in saucepan or crockpot that has been filled ¼ full of water (place some jar lids on the bottom of the pan to protect the jar from breaking).
Simmer for 4-8 hours (or more, if desired), keeping a careful eye on the amount of water in the pan and being very careful not to allow the water to splash into the oil/herb mixture. Monitor the temperature and keep it between 120-140 degrees Fahrenheit. If the water level runs low, carefully add more hot water to bring the water level in the saucepan back up to ¼ full. When time is up, remove the jar from the saucepan and allow it to cool before straining.
When the infusion process is finished, follow the directions in the warm-infusion method above for straining and bottling your herb-infused oil.
Oven Infusion
If you don’t want to worry about leaving open heat sources on or keeping a constant eye on water levels, infusing an oil using the oven method is an option. This method produces a nicely infused oil and doesn’t require your constant attention.
Oven Herb-Infused Oil
Ingredients
Carrier oil(s) of choice
Dried herb(s) of choice
Sterilized, dry, ovenproof dish
Directions
Begin by preheating the oven to 120-140 degrees Fahrenheit.
Follow the directions for making herb infused oils above.
Place your herbs and oils into a sterilized, dry, ovenproof dish, and use a dry, sterilized spoon to mix thoroughly so all surfaces of the herb(s) are coated and no air bubbles remain.
When the oven has preheated, place the herb-filled ovenproof dish in the oven, uncovered, for 4-8 hours.
When the infusion process is finished, follow the directions in the warm-infusion method above for straining and bottling your herb-infused oil.
Learning how to make herb-infused oils is just one of the first things beginners learn in herbalism. If you are interested in studying herbalism, start your journey in the Online Introductory Herbal Course or in the Online Intermediate Herbal Course. Learn more about herbs and how to use them for wellness and as food.

Chai Tea Recipe

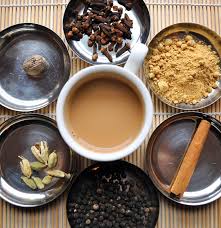
Bowl of whole spices for chai tea, cinnamon sticks, nutmeg, cloves, allspice, ginger root and peppercorn
Cinnamon sticks, cloves, allspice, ginger root, peppercorns and a nutmeg pod.
Ingredients
3-4” of fresh ginger, chopped or grated
3 Sticks of Cinnamon
(ground cinnamon will make the tea gritty)
2 tsp Whole Cloves (or 1/2 tsp ground)
1/2 of a Whole Nutmeg (or 1 tsp ground)
1 tsp Peppercorns ( do not substitute ground)
2 tsp Allspice
Optional: 6-8 cardamom pods
or 2-4 Star Anise
1 Vanilla Bean (or add 2 tsp vanilla extract after you take off heat)

Directions
Pot of simmering spices for chai tea
Simmer all the above in a medium pot with 3-4 cups of water for 15-20 minutes.

Add 6-8 black tea bags, turn off heat and let steep for 5 minutes.

Strain into a heat proof container. Store in refrigerator for up to a week.

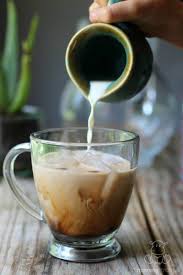
To serve, heat tea concentrate and then add milk, or milk with a splash of cream , or half and half- yum! Up to a 50/50 ratio. Sweeten with honey or maple syrup.

I will often keep the strained ingredients in a pot on the stove, and keep simmering in water like a stovetop potpourri!

Also, many of the same ingredients do well in my DIY Cocktail Infusion Kits.

Cheers to simple, slow cups of chai tea, herbal tea or whatever warms your soul!

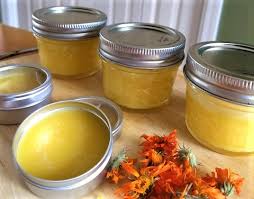
Calendula and Chamomile Beeswax Salve

Choose favorite oils and butters to make just a few tins or a large batch
1 part beeswax
1 part cocoa butter/shea butter
2 parts high-quality edible oil
Optional: vitamin E oil as a preservative

Note: amounts do not have to be precise, but very close. Use more oil for creamier, or less for firmer consistency.
Ingredients
56 g beeswax
28 g cocoa butter
28 g shea butter
14 g coconut oil
56 g calendula infused olive oil
56 g chamomile infused avocado oil
14 g vanilla infused sunflower-coconut oil
10 g castor oil
5 g vitamin E oil (antioxidant/preservative)
Optional: essential oils

Instructions
Measure all ingredients and gently melt beeswax and shea butter/cocoa butters and fats in a double boiler over medium heat. Add oils. Stir well and turn off the heat. Carefully pour into empty containers. This must be done quickly before the mixture hardens. If the mixture should harden place measuring cup back into the double boiler water and heat up slowly while stirring the mixture. Cool for an hour until mixture has completely hardened, then cap.

Chamomile Syrup-Tincture & Oil

Chamomile Syrup

1/4 cup dried chamomile flowers
12 ounces water
Approximately 1/2 cup honey
Steep the chamomile in just-boiled hot water for 10 minutes, covered. Strain. Add the honey, stir well to combine. Keep in the fridge and use within 2 weeks.
Yield: 2 cups

 Chamomile Tincture
1 cup finely crumbled dried chamomile flowers
16 ounces vodka (80-100 proof)
Place the chamomile in a glass pint jar. Add the vodka. You will most likely not use the entire 16 ounces. Stir well. Cover with a tight fitting lid and let it macerate for 4 weeks. I keep mine in a dark place on the counter and shake it daily for the first couple of weeks. Strain. This stores indefinitely. The recommended dosage is 3-6 ml, 3 times a day, or small doses more frequently.
Yield: 14 ounces

 Chamomile Oil

1/2 cup finely crumbled dried chamomile flowers
16 ounces carrier oil of your choice
Place the chamomile in a glass pint jar. Fill the jar withthe oil. You will most likely not use the entire 16 ounces.
Stir well. Cover with a tight-fitting lid and let it macerate for 4 weeks. I keep mine in a dark place on the counter and shake it daily for the first couple of weeks. When the oil smells like lovely chamomile, you can strain it, and then use as desired. Use within a year.
Yield: 14 ounces

Immune-Building Astragalus Chai (Tea)

Yield: 1 serving
Ingredients:
15 to 20 small astragalus root slices (30 grams)
1 tablespoon dried orange peel
2 teaspoons dried ginger root
1/2 tablespoon cinnamon chips
1/2 teaspoon whole peppercorns
1 or 2 cardamom pods
2 whole cloves
milk to taste (optional)
honey to taste (optional)
STOVE METHOD
1. Optional step: Let the herbs sit
in lukewarm water for 30 minutes
to 2 hours prior to simmering. Use
this same water when you simmer
the herbs.
2. Place the herbs in a medium
saucepan. Add 2 1/2 cups of water.
3. Bring to a boil. Reduce heat and
simmer for 20 minutes, covered.
SLOW COOKER METHOD
1. Place the herbs in a slow cooker
with 2 1/2 cups of water.
4. Strain. Add milk and honey as
desired. Drink within 36 hours.
2. Set it to low heat and let it
cook overnight, covered. Inspect
the amount; if it looks low, add
more water.
3. Strain. Add milk and honey as
desired. Drink within 36 hours.

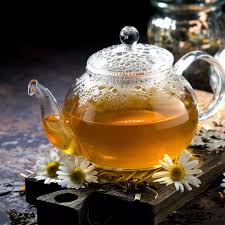
Chamomile Tea

Yield: 1 serving
1 tablespoon dried chamomile flowers
12 ounces water
Steep the chamomile in just boiled hot water for 7-10
minutes, covered. Strain. Add honey if desired. Enjoy!
Or
Yield: 1 1/2 cup
Ingredients:
1 tablespoon dried chamomile flowers
1 inch of vanilla bean, minced (optional)
Optional:
1 1/2 teaspoons dried oatstraw
1 1/2 teaspoons dried rose petals
honey to taste
Instructions:

Place the herbs in a large tea strainer inside a teacup.

Fill the cup with 1 1/2 cups of  just-boiled water.

Cover and steep for 15 minutes.

Strain. Tip: Use a spoon to squeeze  out more liquid from the herbs.

Add honey if desired.